Process 1099s
Use the 1099 Processing screen to prepare your 1099s, then export the records to a file and submit it through a 1099 filing service.
The process is:
- Prepare your 1099s on the 1099 Processing screen.
- Export the 1099 records to a spreadsheet.
- Upload the file to a filing service, which submits and prints the forms.
Before you begin
Section titled “Before you begin”- Each vendor’s 1099 setup and W-9 must be on the vendor record. Attach the W-9 to the vendor so it isn’t reported as missing. See Set up an AP vendor and Store vendor documents.
- To export the files, you need report permission for Form 1099 MISC (Box 1 Rent) and Form 1099-NEC (Box 1 Non Employee Comp).
Open 1099 Processing
Section titled “Open 1099 Processing”- Go to Accounting › Vendors › 1099 Processing.
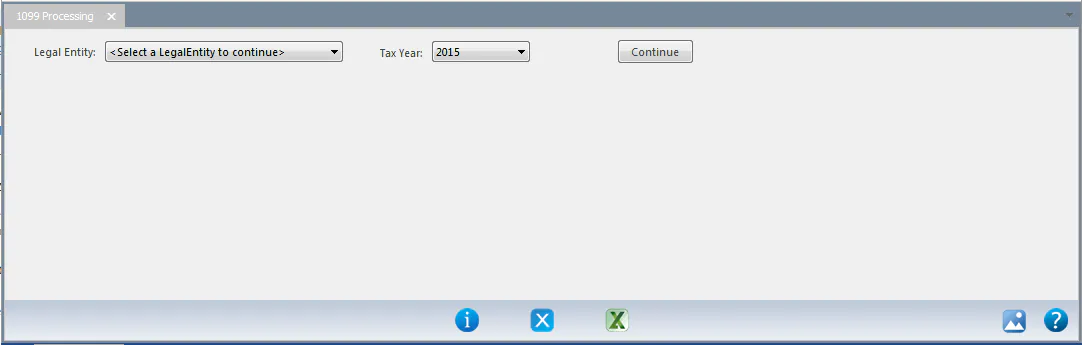
- Select the Legal Entity and Tax Year, then select Continue.
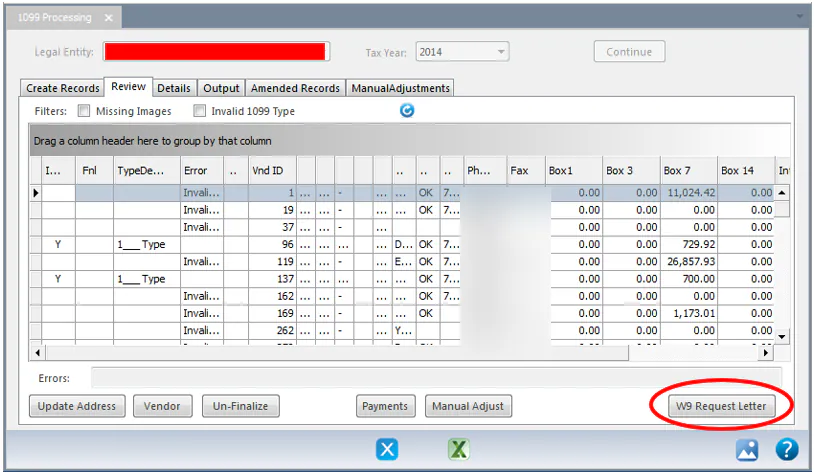
From this screen you can see which vendors are missing W-9s or are set up incorrectly, make manual adjustments, and send W-9 request letters.
Step 1: Check every vendor for errors
Section titled “Step 1: Check every vendor for errors”-
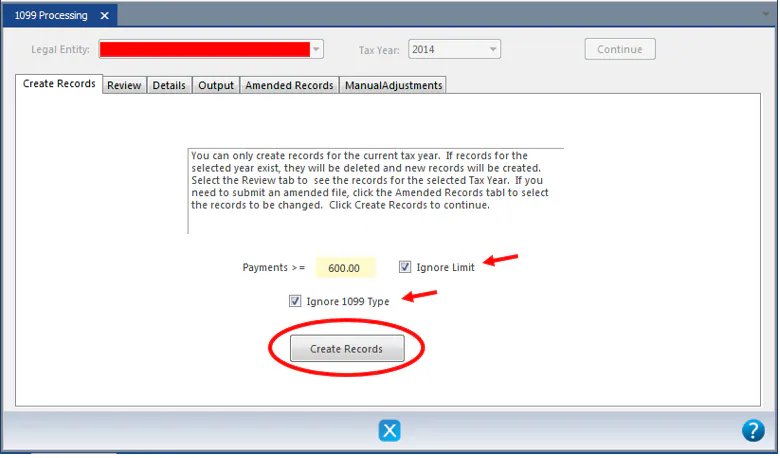
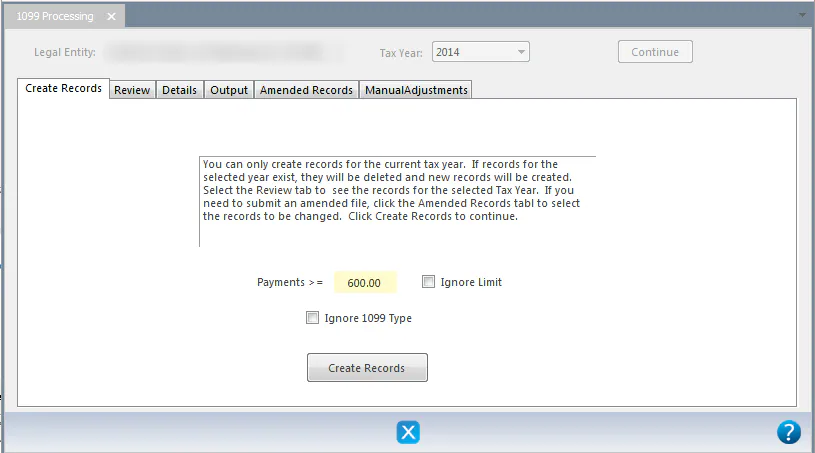
On the Create Records tab, check Ignore Limit and Ignore 1099 Type, then select Create Records. This lists all vendors so you can fix any vendor record errors.
-
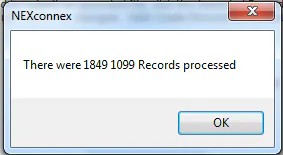
A message shows how many 1099 records were processed. Select OK.
-
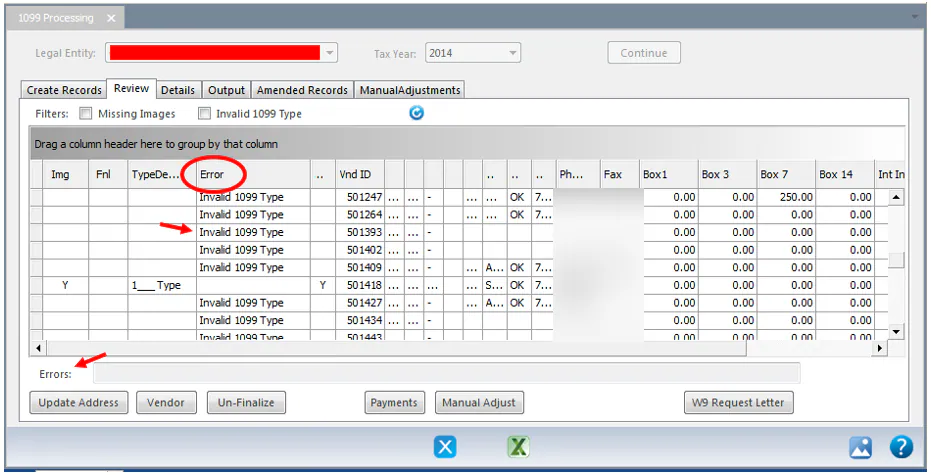
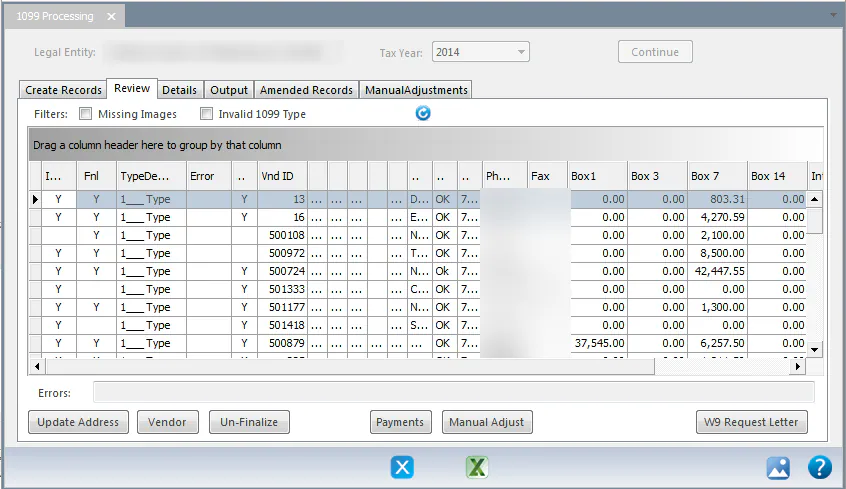
On the Review tab, vendors with a setup problem show Invalid 1099 Type in the Error column. Select a record to see a description of the errors in Errors at the bottom. Use this to check that each vendor has the right 1099 type.
-
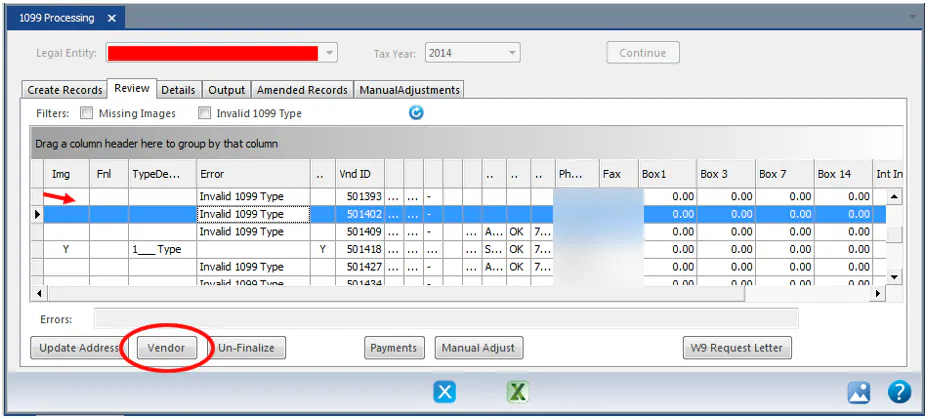
To fix a vendor, select the line and select Vendor to open the vendor record.
-
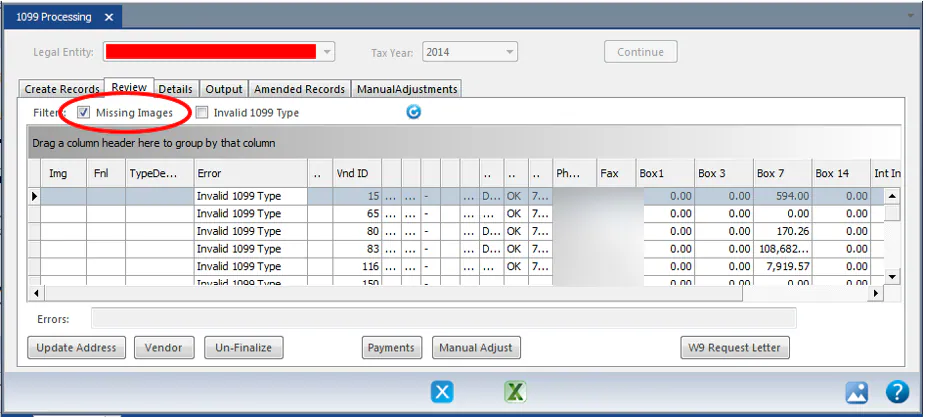
To see vendors without a W-9 attached, check Missing Images.
Step 2: Create the 1099 records
Section titled “Step 2: Create the 1099 records”-
When the vendors are cleaned up, uncheck Ignore Limit and Ignore 1099 Type, and select Create Records again.
The Review tab now lists only the vendors you’ll send 1099s to.
Make a manual adjustment
Section titled “Make a manual adjustment”-
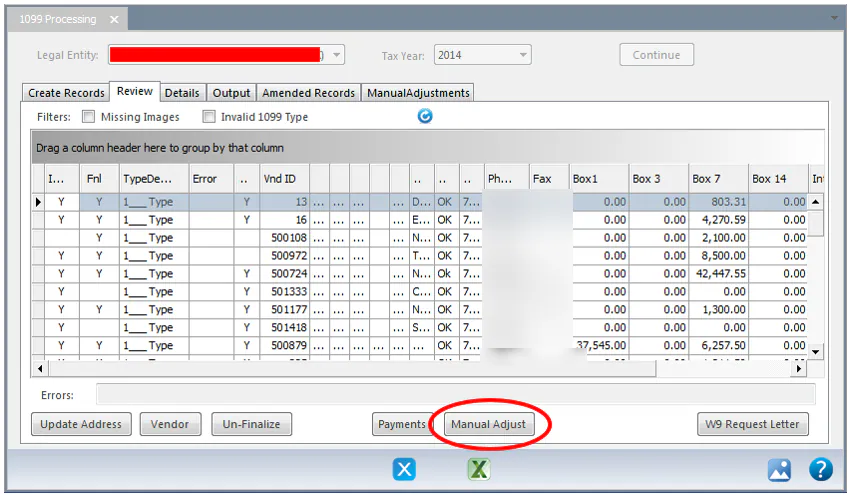
Select the record and select Manual Adjust.
-
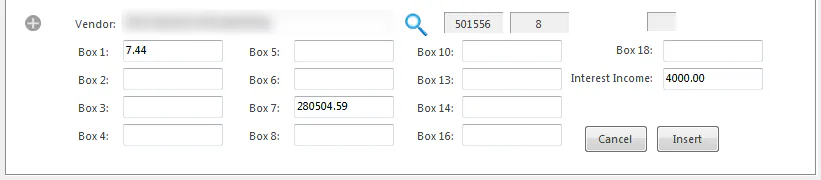
To change an amount, enter the difference, not the new total. The amounts already shown are for reference only; whatever you enter is added to the original amount. For example, if Box 7 shows 280,504.59 and you want it to be 250,000.00, enter -30504.59.
-
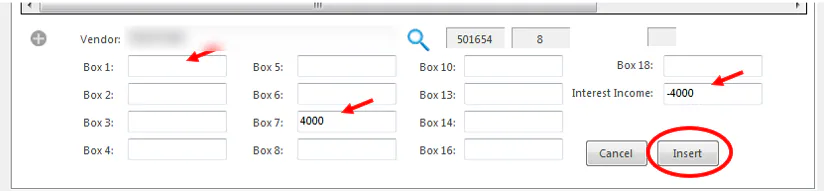
To move an amount from one box to another, enter a negative amount in the box it’s moving from and a positive amount in the box it’s moving to. For example, to move 4,000.00 of Interest Income to Box 7, enter -4000 in Interest Income, clear Box 1, and enter 4000 in Box 7.
-
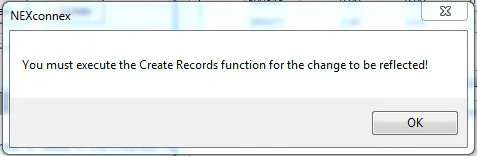
Select Insert. The adjustment shows in the list above.
-
Select Create Records again to include the adjustment.
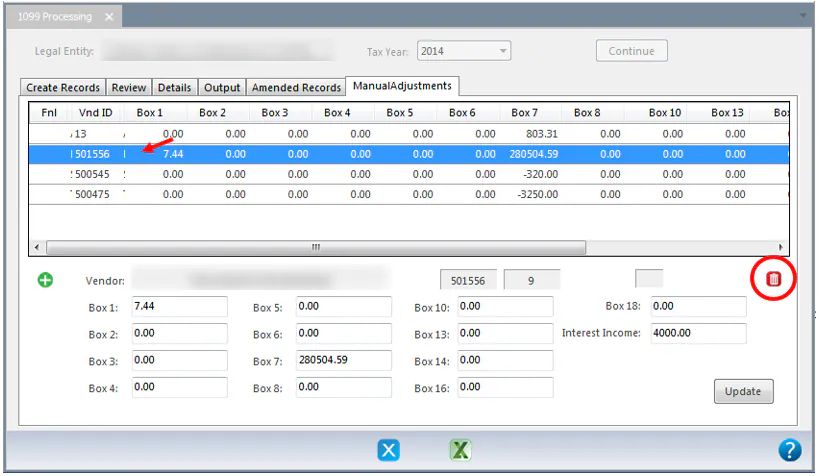
To remove an adjustment, select it on the ManualAdjustments tab, select the delete button, and select Create Records again. Each vendor can have only one manual adjustment, so delete the old one before you add a new one.
Step 3: Export the list
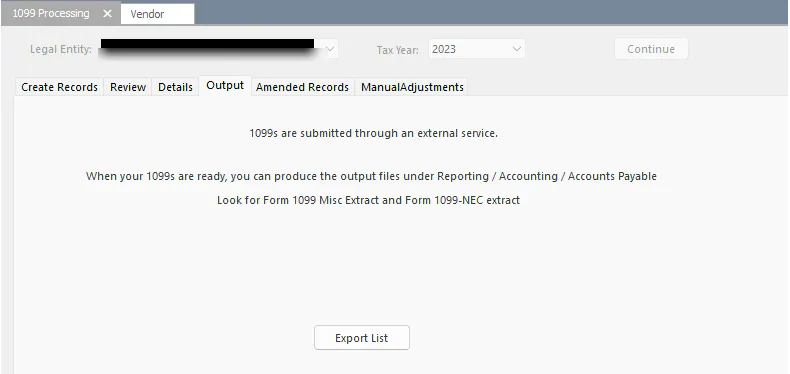
Section titled “Step 3: Export the list”On the Output tab, select Export List to see the data in a spreadsheet.
Export the 1099 files for the filing service
Section titled “Export the 1099 files for the filing service”When the 1099s are final, produce the files to send to your 1099 service. The files have the fields a service needs to submit 1099-NEC and 1099-MISC forms. They’re formatted for eSmart Payroll (esmartpayroll.com) but should work with the service of your choice.

-
On the Reporting tab, select Reports.
-
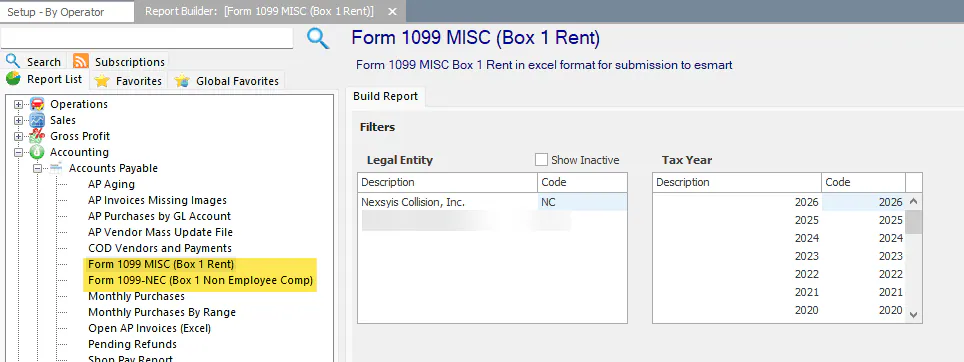
Run Form 1099 MISC (Box 1 Rent) and Form 1099-NEC (Box 1 Non Employee Comp). Select the Tax Year and, if you have more than one legal entity, the Legal Entity.
-
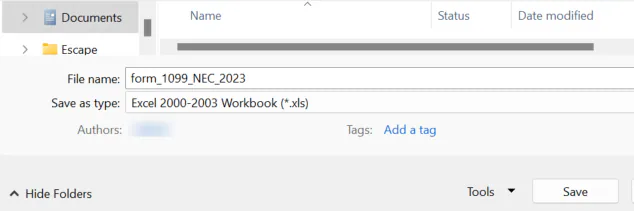
A Save As dialog opens. It might be behind another window. Save the file; this is the file you submit. It’s saved in XLS format.
-
A temporary report also opens, showing what was saved in the file. You can close it without saving.
Submit your 1099s through eSmart Payroll
Section titled “Submit your 1099s through eSmart Payroll”-
Go to esmartpayroll.com and create an account or sign in.
-
Select the Company & Employees tab and follow the steps to add your company.
-
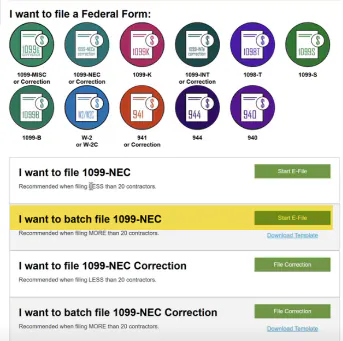
Under I want to file a Federal Form, select 1099-NEC or 1099-MISC.
-
Under I want to batch file 1099-NEC, select Start E-File.
-
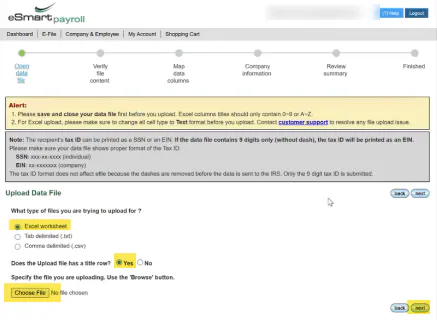
Choose the file options and browse to the file you saved from Nexsyis.
-
Review the file contents and select Next.
-
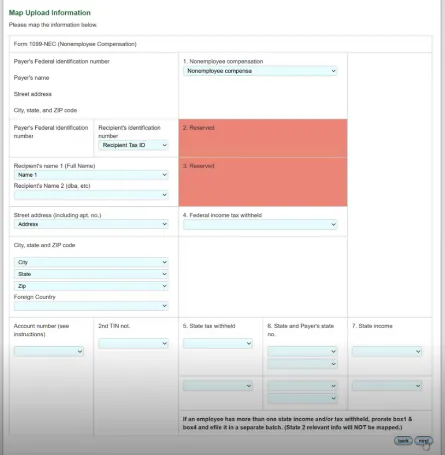
Check the column mapping. The fields should map automatically. Select Next.
-
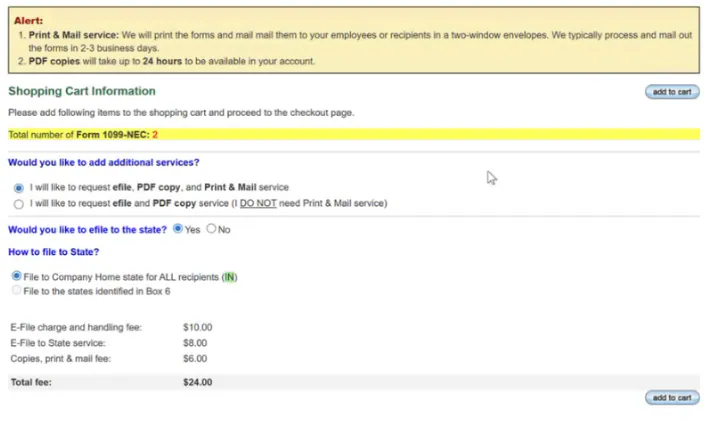
Complete the checkout.
Prepare for next year: W-9 request letters
Section titled “Prepare for next year: W-9 request letters”To request W-9s from vendors that are missing one, select W9 Request Letter on the Review tab. Nexsyis fills in each vendor’s name and address on the letter.