Add or remove appointment slots
Change the open slots on the Scheduling screen for a single day: remove a slot so it can’t be booked, or add one at a busy time.
To change the slots for every day, see Set up scheduling.
Remove a slot
Section titled “Remove a slot”- On the Scheduling screen, right-click the slot you want to remove.
- Select Remove an Appointment Slot.
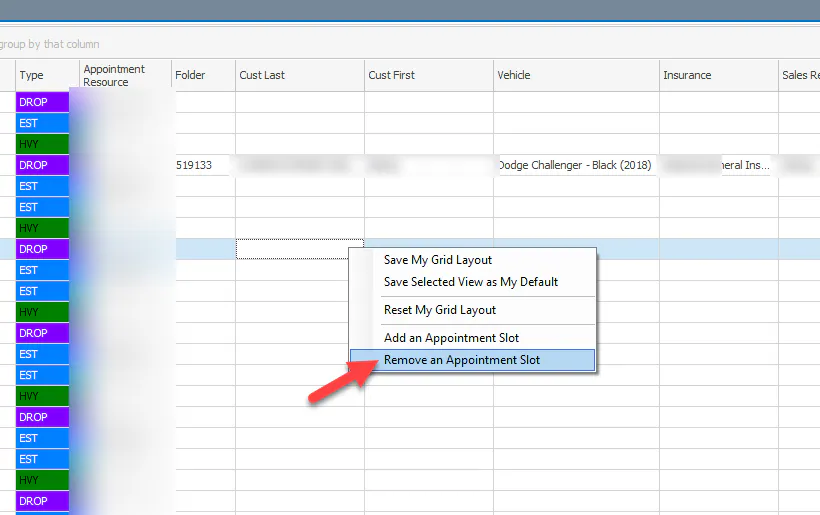
The slot is grayed out and marked < SLOT REMOVED >.
Restore a removed slot
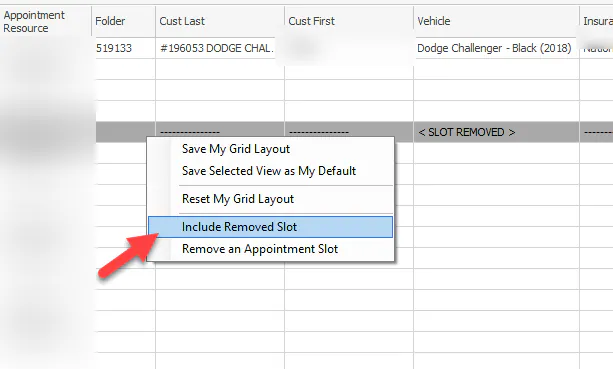
Section titled “Restore a removed slot”- Right-click the removed slot.
- Select Include Removed Slot.
Add a slot
Section titled “Add a slot”-
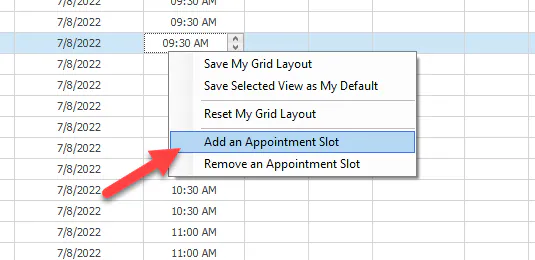
Right-click a slot at the time you want to add one.
-
Select Add an Appointment Slot.
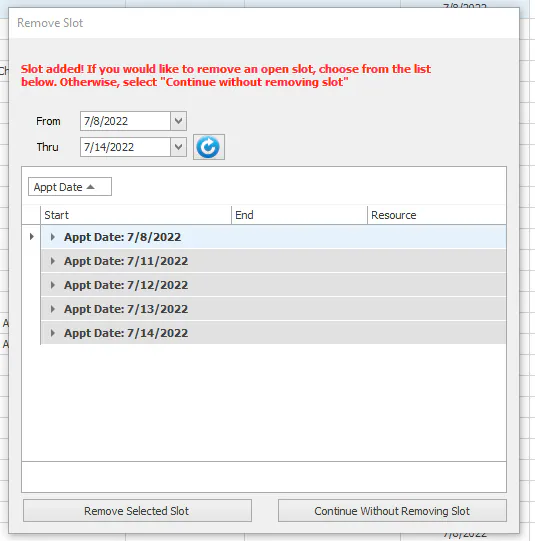
The Remove Slot window opens so you can balance the new slot by removing a future one.
-
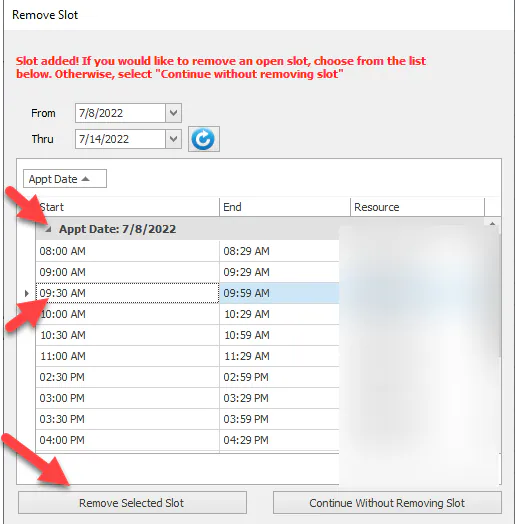
Do one of the following:
- To keep the added slot without removing another one, select Continue Without Removing Slot.
- To remove a future slot, expand the Appt Date you want, select the slot, then select Remove Selected Slot.
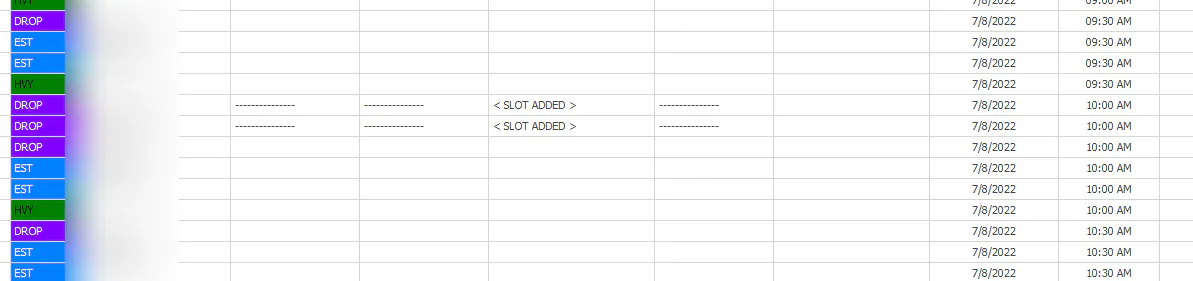
The added slot appears on the Scheduling screen marked < SLOT ADDED >.