Print AR statements
Send statements to remind customers, insurance companies and fleets what they owe. In Nexsyis you print statements one folder or one fleet at a time. In NexsyisNow you can create statements for all outstanding AR in one batch and print, email or text them.
Print a customer statement
Section titled “Print a customer statement”-
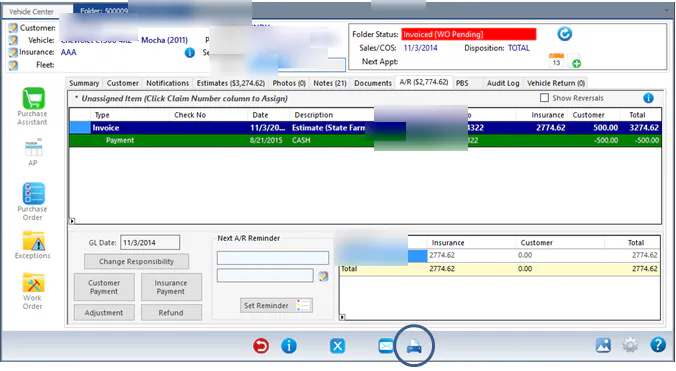
Open the folder and select the print button at the bottom of the screen.
-
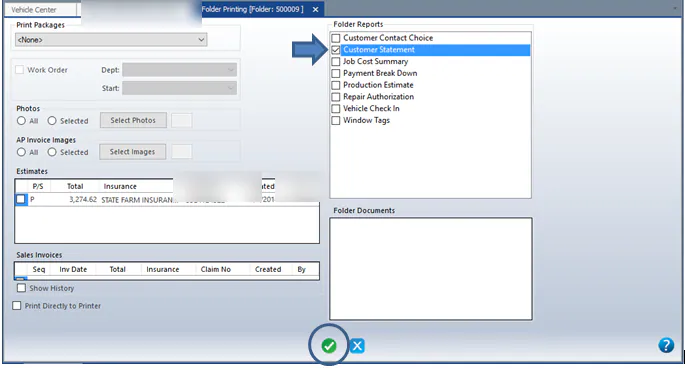
Under Folder Reports, select Customer Statement, then select the green check button.
Print a fleet statement
Section titled “Print a fleet statement”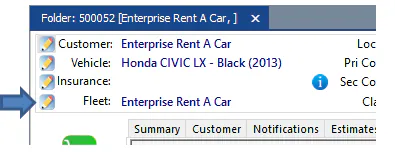
From the reports screen
Section titled “From the reports screen”Go to Reporting › Reports › Accounting › Accounts Receivable. There are four fleet statements:
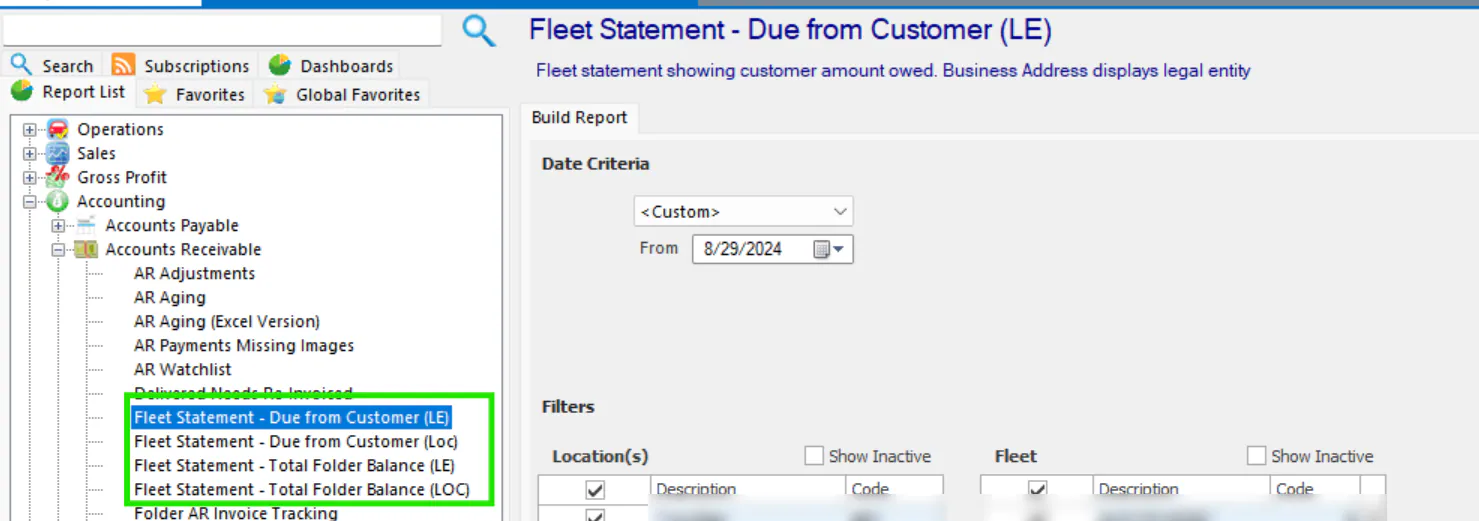
- Fleet Statement - Total Folder Balance: shows the total folder invoice balance.
- Fleet Statement - Due from Customer: the Total column shows the amount the customer owes, not the invoice total. Payments made by the customer are subtracted to show the balance.
Each comes in two versions. (LE) prints your legal entity’s name and address in the header; (Loc) prints the location’s name and address.
From the Outstanding AR tab
Section titled “From the Outstanding AR tab”-
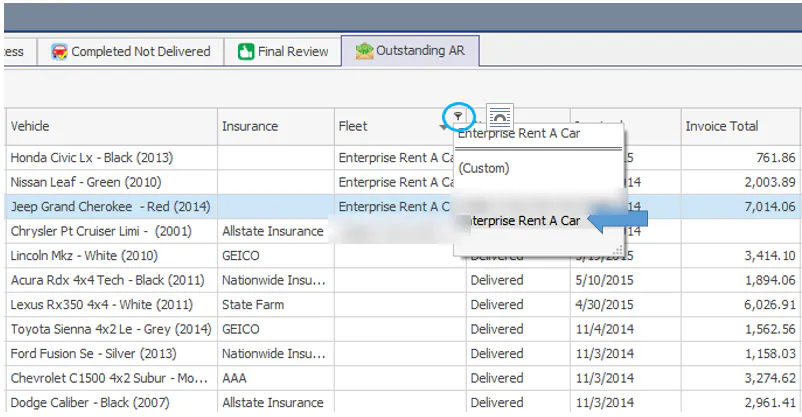
On the Vehicle Center Outstanding AR tab, select the filter icon in the Fleet column and select the fleet. Only that fleet’s vehicles are shown.
-
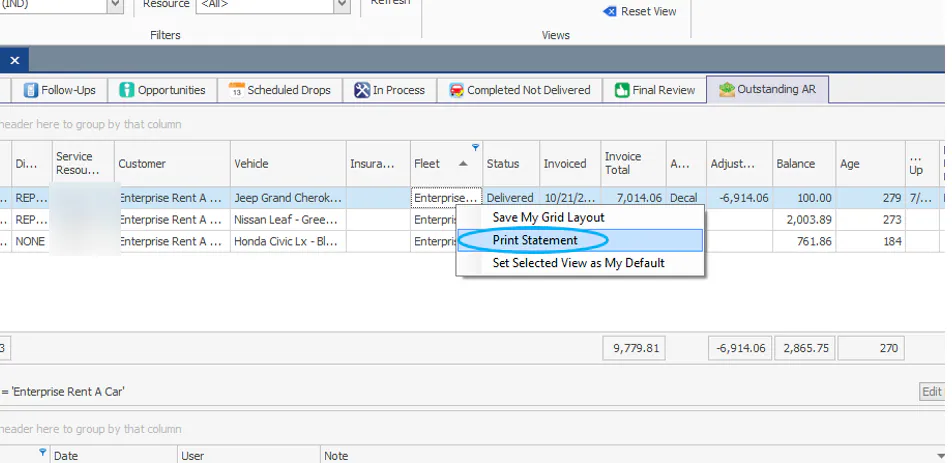
Right-click a folder row and select Print Statement.
-
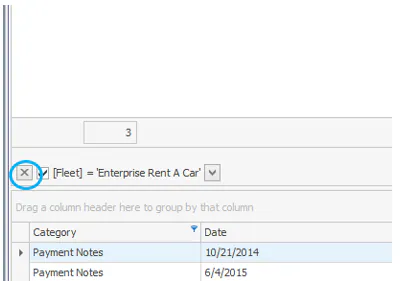
To remove the fleet filter, select the X at the bottom left of the grid.
By default, Print Statement uses Fleet Statement - Total Folder Balance (LE). To use another version, email nexsupport@nexsyis.com and ask for the fleet statement preference to be changed.
Before you begin
Section titled “Before you begin”You need the AR Statements Processing transaction permission.
Create a batch of statements
Section titled “Create a batch of statements”-
Select the $ icon in the side toolbar.
-
Choose the As of Date. It prints on each statement as the Statement Date, and invoices dated after it are left out.
-
Select + Generate Statement.
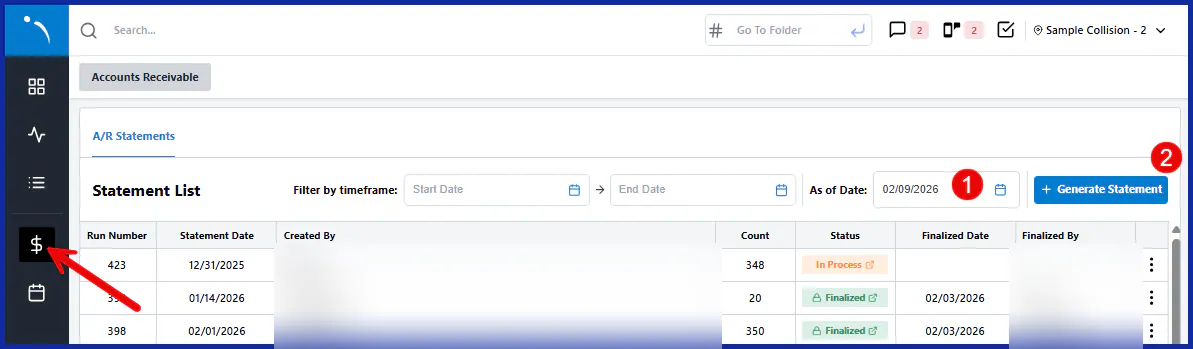
All outstanding AR for customers and insurance companies is pulled into a new batch with the status In Process.
Review the batch
Section titled “Review the batch”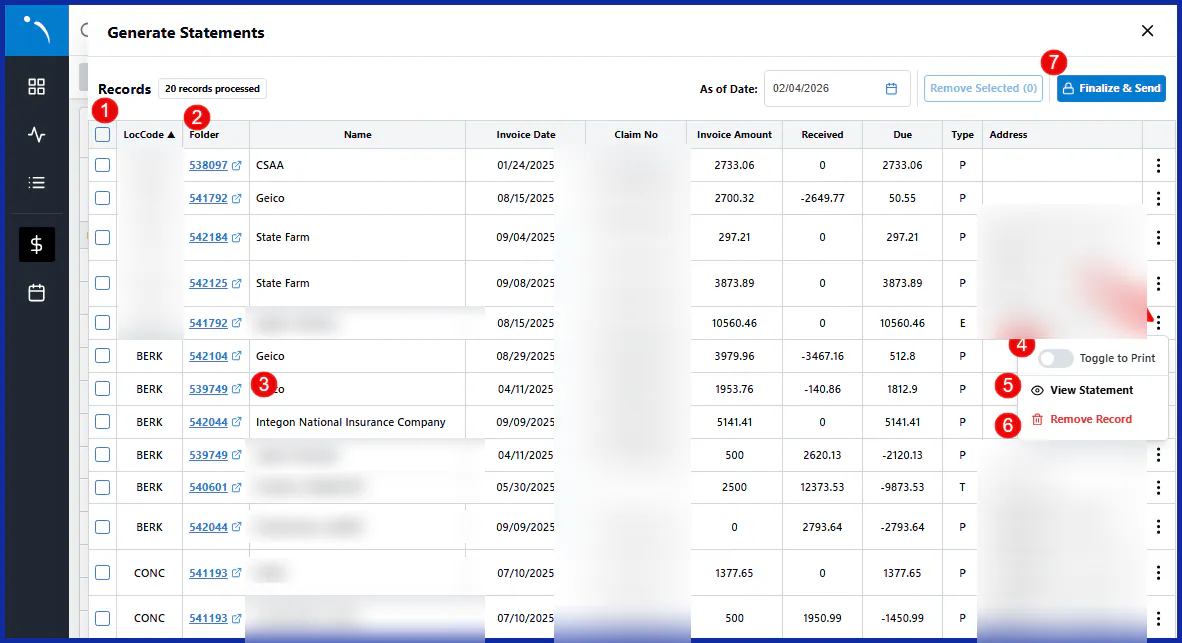
- Remove lines: select the checkboxes for the lines you want to leave out, then select Remove Selected. To keep only a few records, select the top checkbox to select all rows, then clear the ones you want to keep.
- Sort: select a column heading, such as LocCode, to sort by it.
- Open a folder: select the folder number. The folder opens in a new browser tab.
- Delivery: the Type column shows how each statement is sent: P for print, E for email, T for text. To print a statement instead of emailing or texting it, select the three-dots menu and select Toggle to Print.
- View a statement: select the three-dots menu and select View Statement.
- Remove a record: select the three-dots menu and select Remove Record.
Send the statements
Section titled “Send the statements”-
When the batch looks right, select Finalize & Send.
-
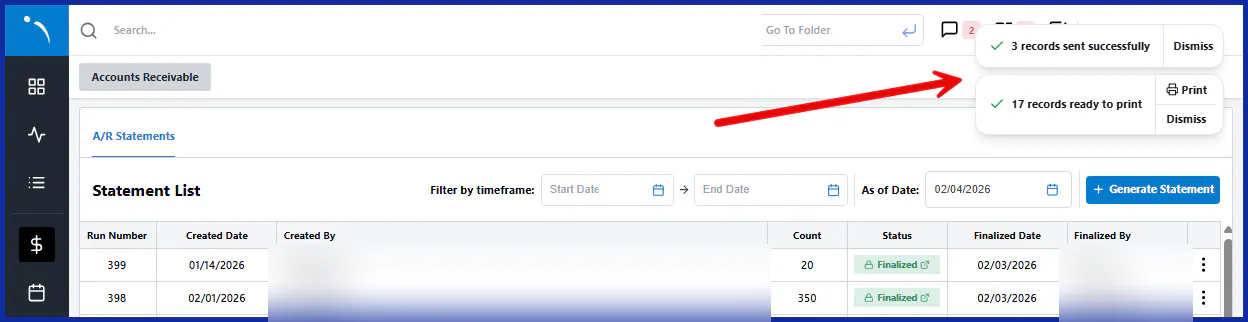
A notification shows how many statements were sent by email and text, and how many are ready to print. Select Print to open the printed statements as a PDF, grouped by location.