
View the repair timeline
The Repair Timeline in NexsyisNow shows a folder’s key dates in order, from date of loss to folder reviewed. You can also fill in dates from it.
Before you begin
Section titled “Before you begin”Which dates you can change depends on your transaction permissions:
- Allow Target Date Change
- Change Arrival Date
- Allow the changing of folder dates/fields related to sales & COS
- Mark Folders as Reviewed (if needed)
Open the repair timeline
Section titled “Open the repair timeline”-
Open the folder in NexsyisNow.
-
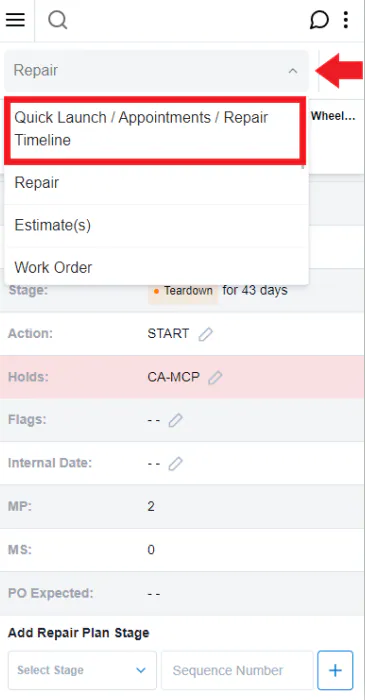
Select the Repair drop-down, then select Quick Launch / Appointments / Repair Timeline.
-
Scroll down to Repair Timeline.
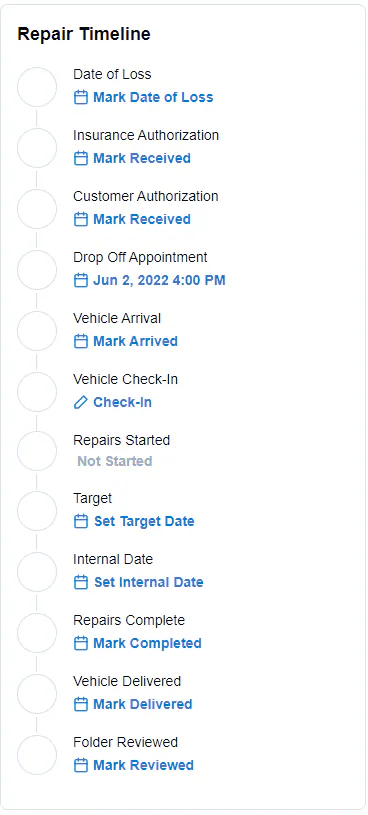
The timeline lists Date of Loss, Insurance Authorization, Customer Authorization, Drop Off Appointment, Vehicle Arrival, Vehicle Check-In, Repairs Started, Target, Internal Date, Repairs Complete, Vehicle Delivered and Folder Reviewed.
Fill in a date
Section titled “Fill in a date”-
Select the blue link under the date you want to fill in, for example Mark Date of Loss.
-
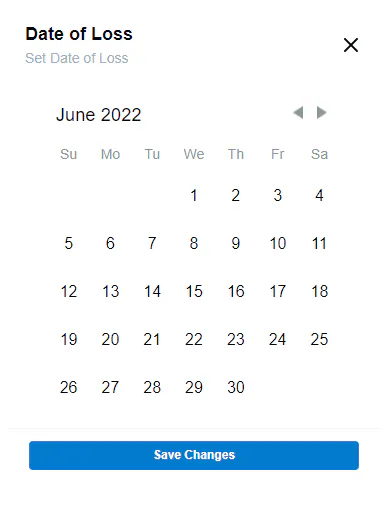
In the calendar, select the date.
-
Select Save Changes.
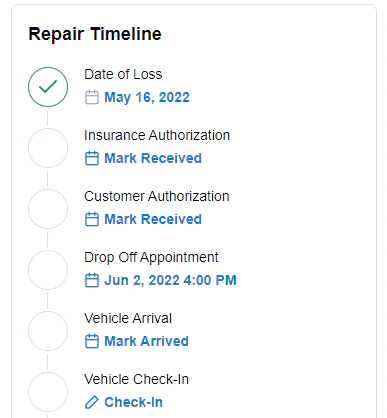
A green check mark shows next to each date that’s been saved.
For the Vehicle Check-In date, see Check in a vehicle with e-Vehicle Check-In.