
Reject a part with no PO number
To reject a part, it has to be on a purchase order. If the part was invoiced without one, create the PO and attach it to the invoice first, then reject the part.
Step 1: Add a manual work order line
Section titled “Step 1: Add a manual work order line”Add a manual line for the part to the folder’s work order.
Step 2: Order and receive the part in Nexsyis
Section titled “Step 2: Order and receive the part in Nexsyis”-
In the Purchase Assistant, select the white line and select Order.
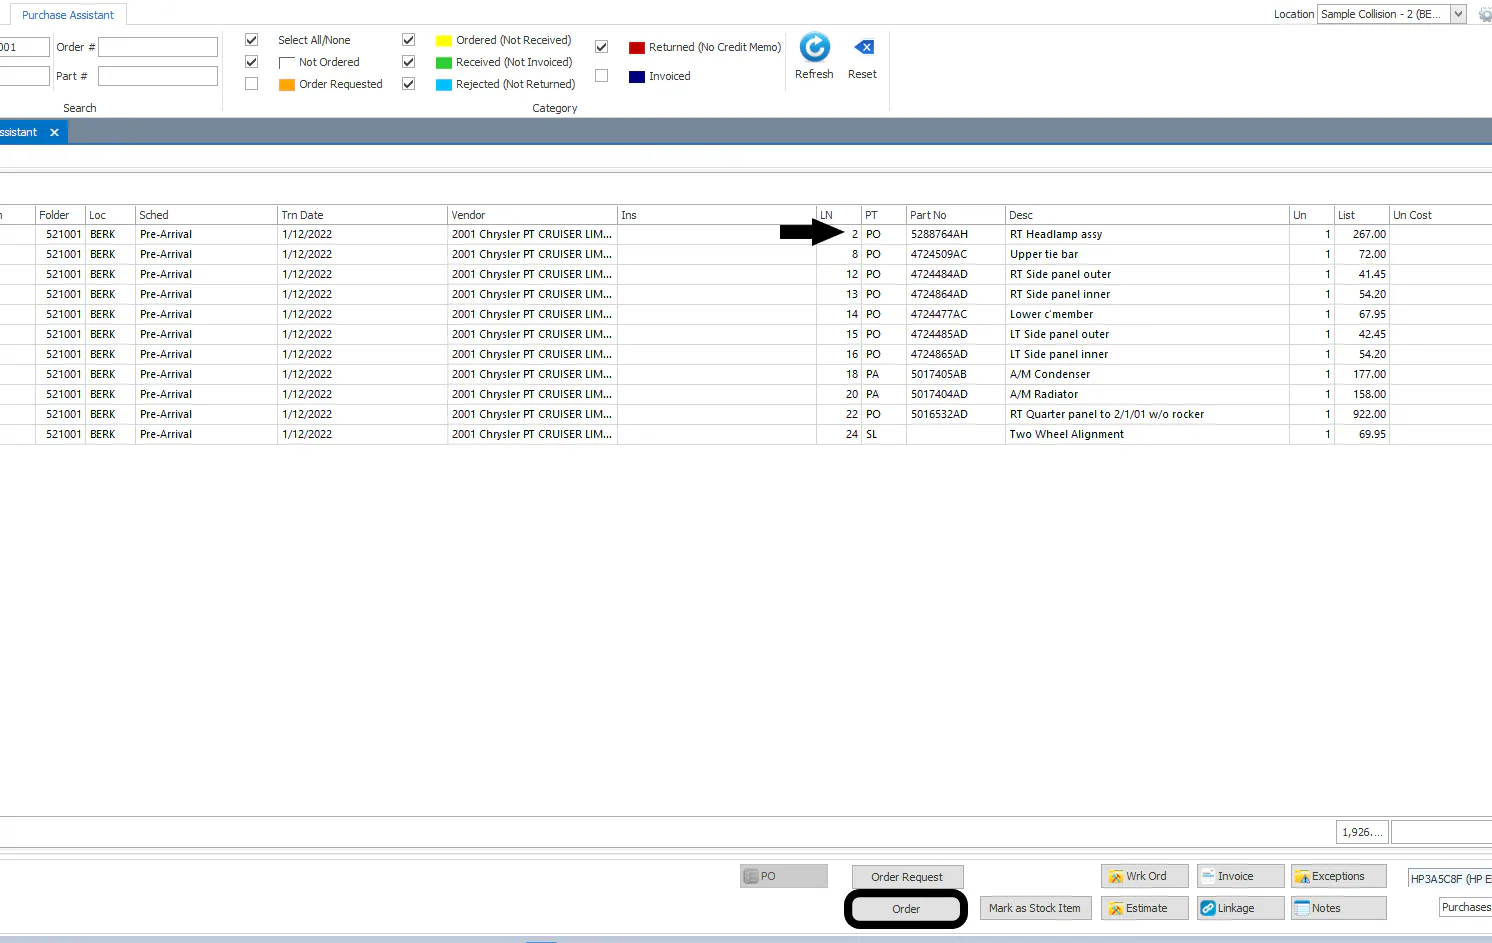
-
Choose the vendor you used on the invoice and select Save. Close the screen for sending the purchase order that opens next.
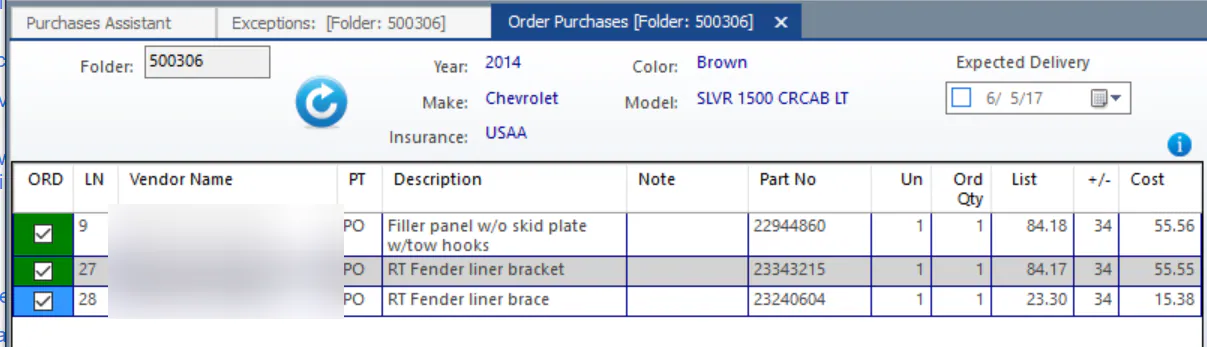
The line is now yellow: Ordered (Not Received).
-
Select the yellow line and select Receive.
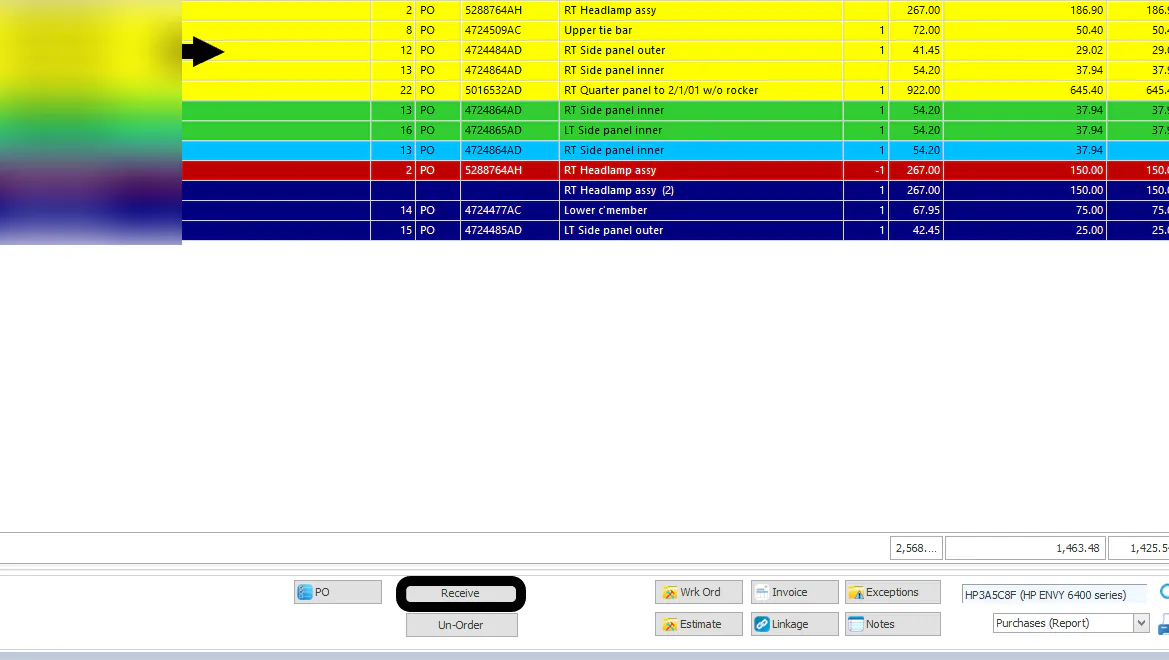
The line is now Received (Not Invoiced).
-
Note the PO number on the green lines. You’ll need it in the next step.

Step 3: Attach the purchase order line to the invoice
Section titled “Step 3: Attach the purchase order line to the invoice”-
Select the navy Invoiced line and select Invoice to open the AP invoice.
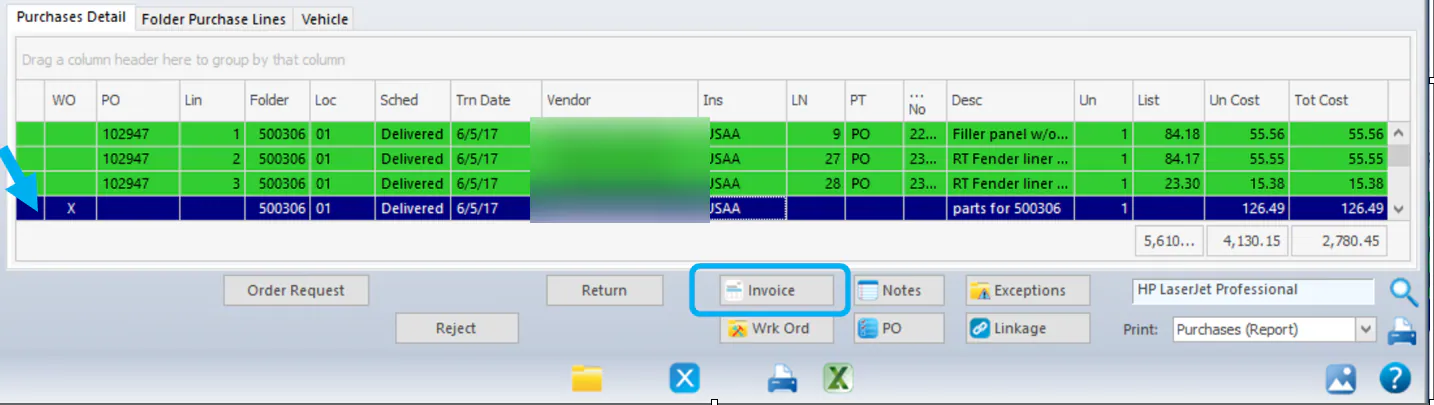
You’ll change the invoice’s distribution lines to use the PO lines.
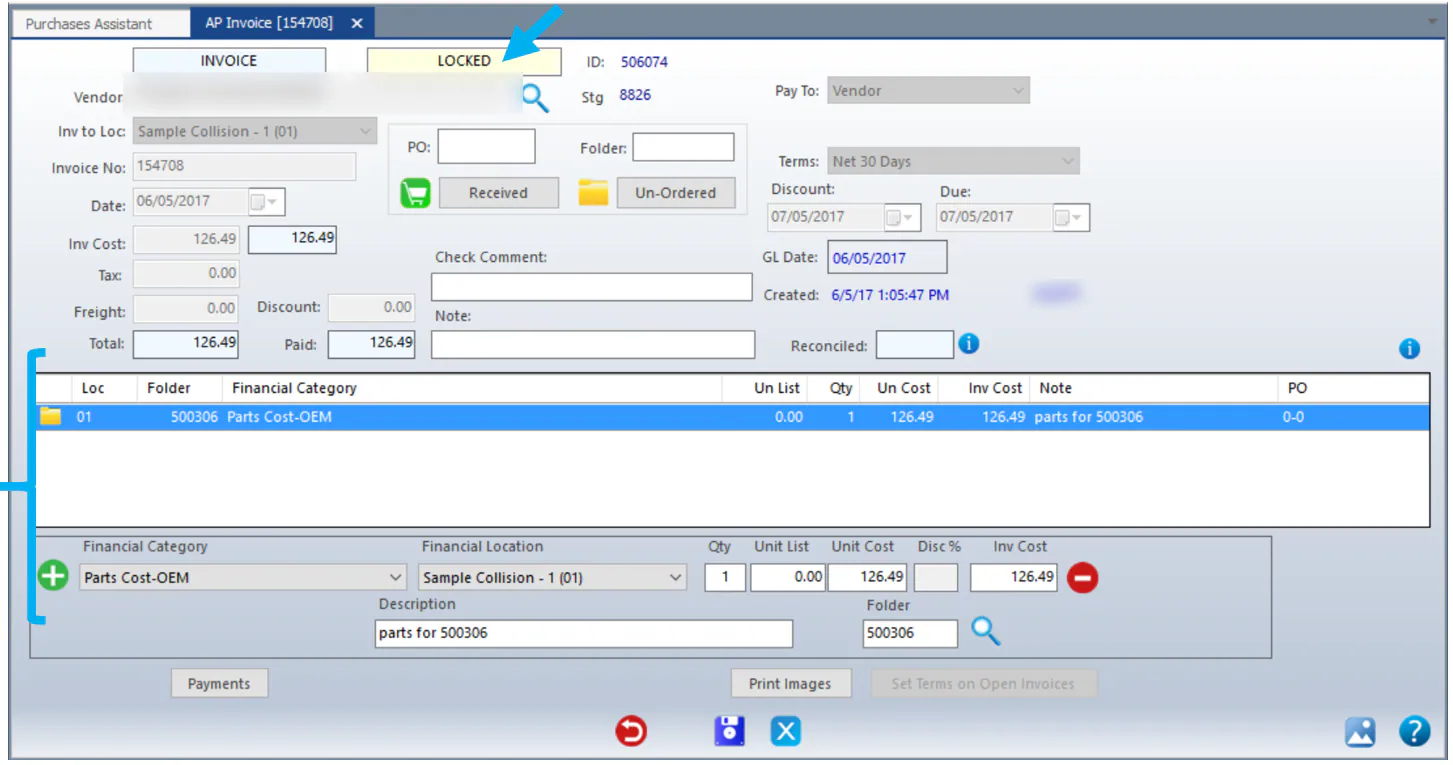
-
Enter the PO number at the top middle of the invoice screen and select Received to load the received lines.
-
Change Act List and Act Cost as needed. The costs must add up to the invoice total before you can save.
-
Select the green check mark to set the lines.
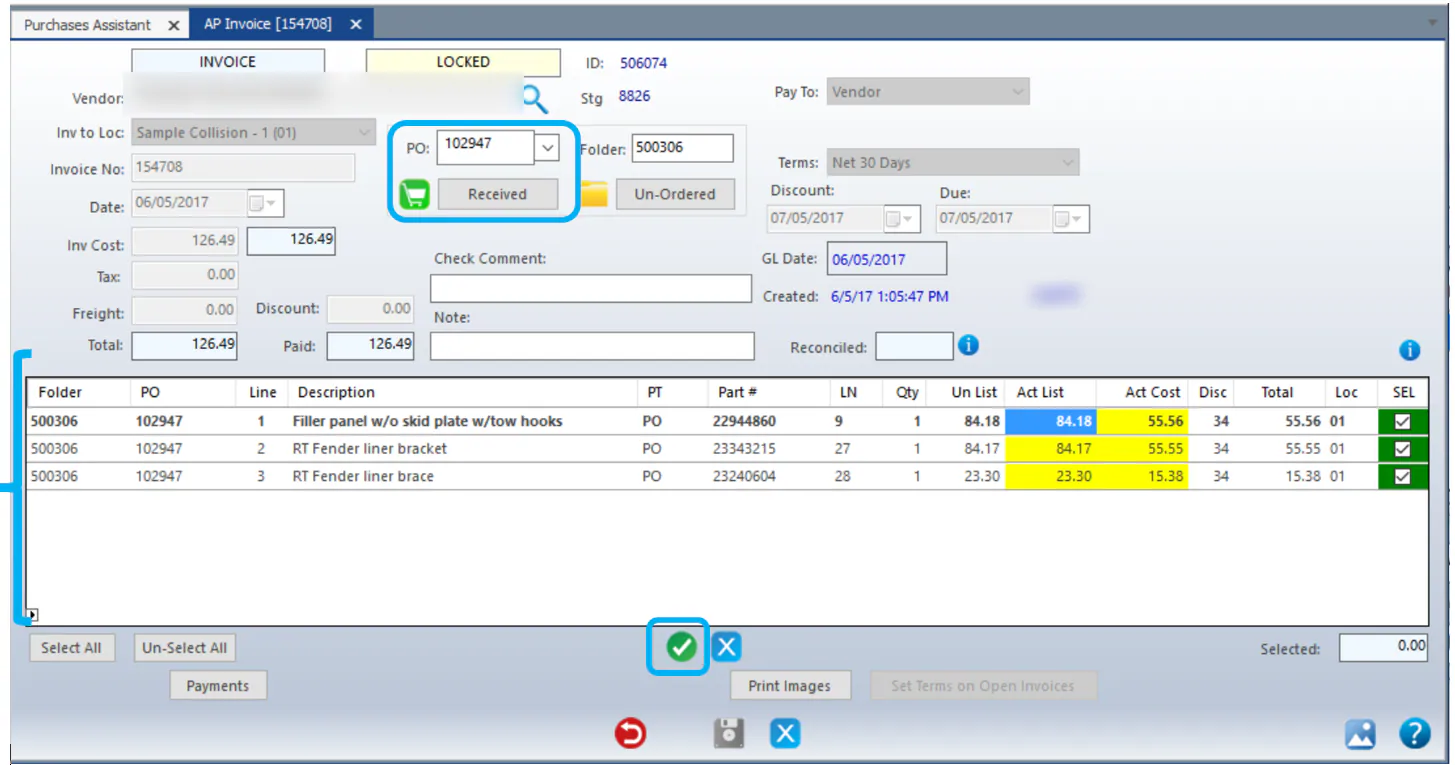
-
Select the placeholder line you added when you first entered the invoice, and select the red minus button to remove it.
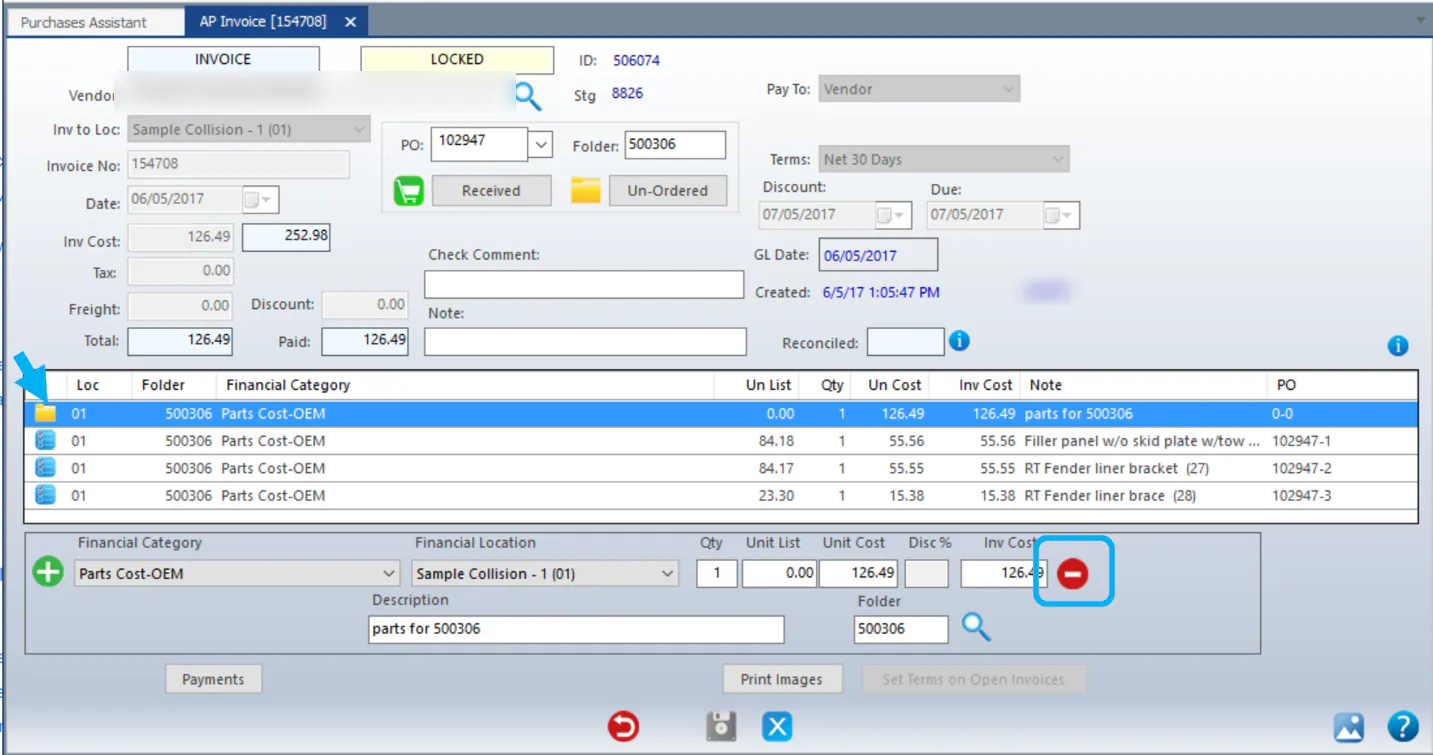
-
When the PO lines add up to the invoice cost, select Save.
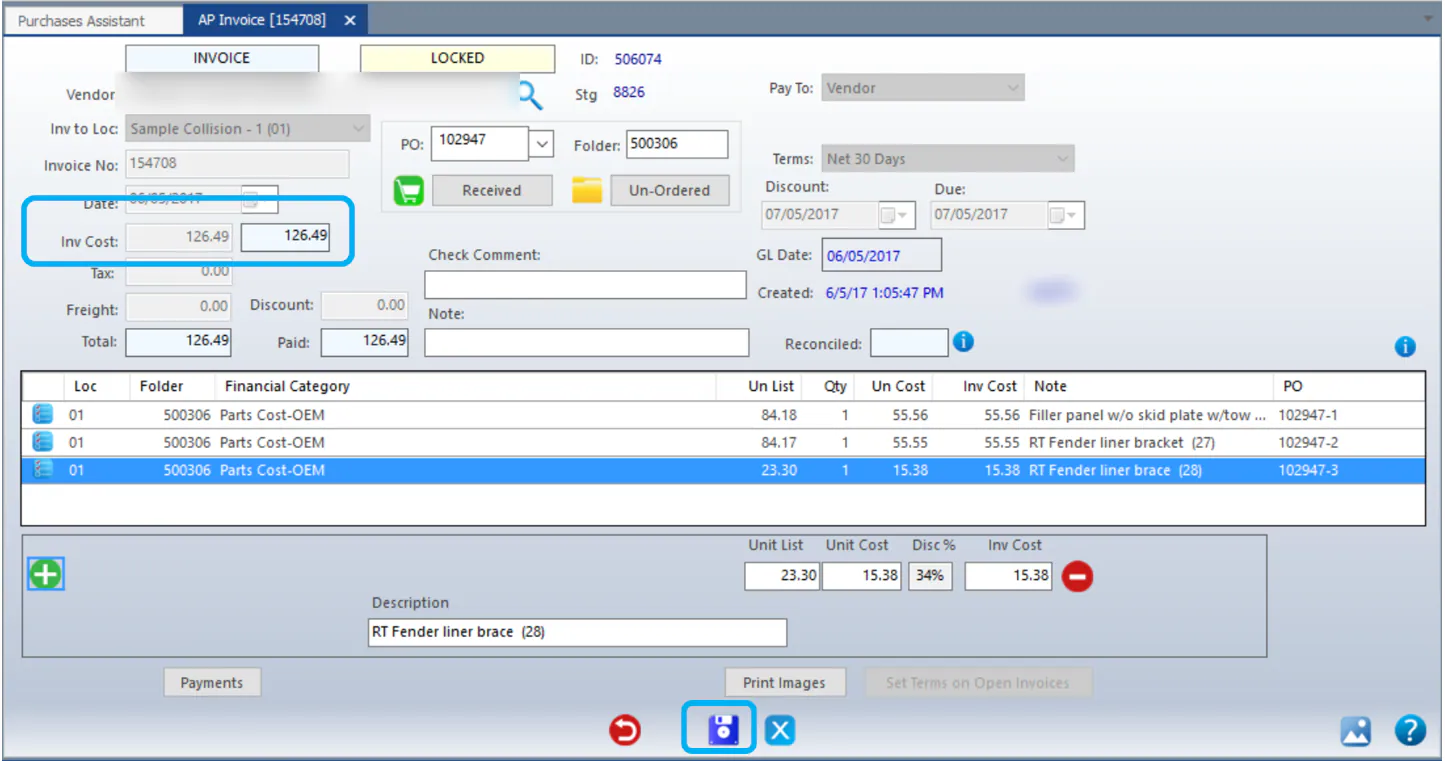
Refresh the Purchase Assistant. The line is now attached to a purchase order, and you can reject and return it as usual.
