Create a folder from an estimate file
If you already have an estimate, create the folder from the estimate file. The customer, claim and vehicle information fill in from the estimate.
Create the folder
Section titled “Create the folder”-
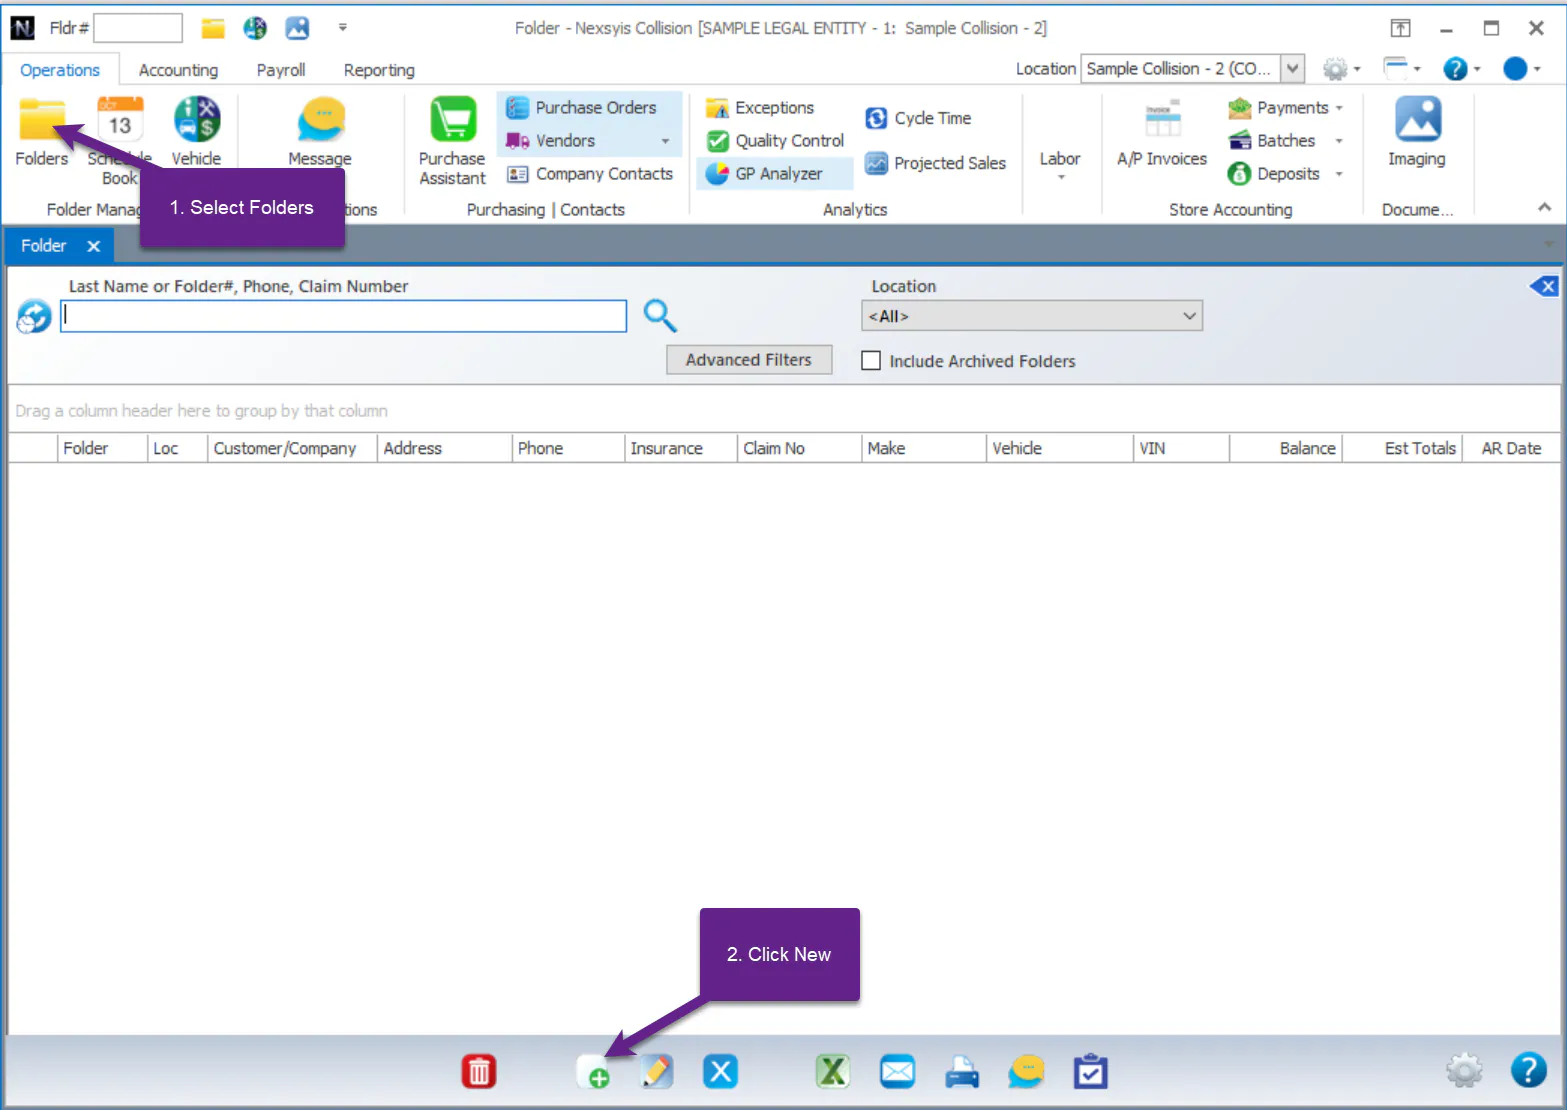
On the Operations tab, select Folders.
-
On the folder search screen, select the new folder button (a sheet of paper with a green plus sign).
-
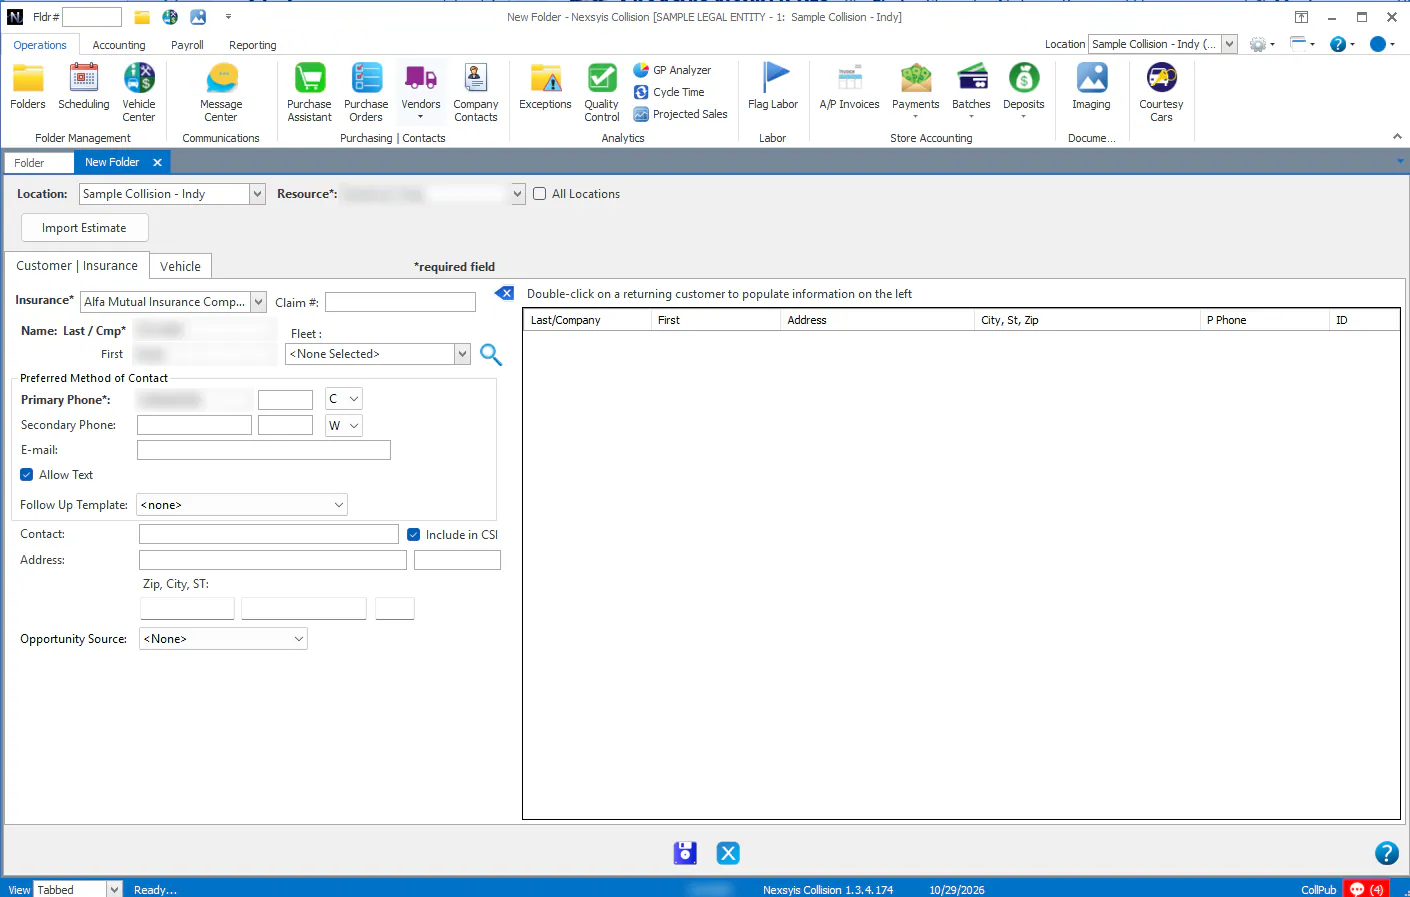
Select Import Estimate. A window opens where you choose the estimate file.
- For Mitchell and Audatex, if you import from disk, set your default path first so it’s saved for future imports. See Set up estimate imports.
- For CCC, see Import an estimate.
-
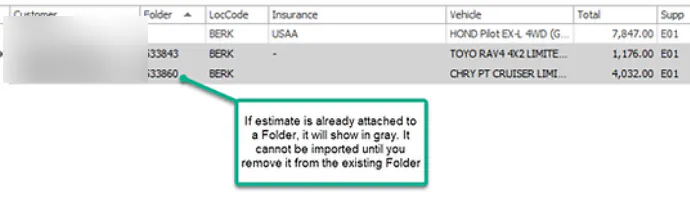
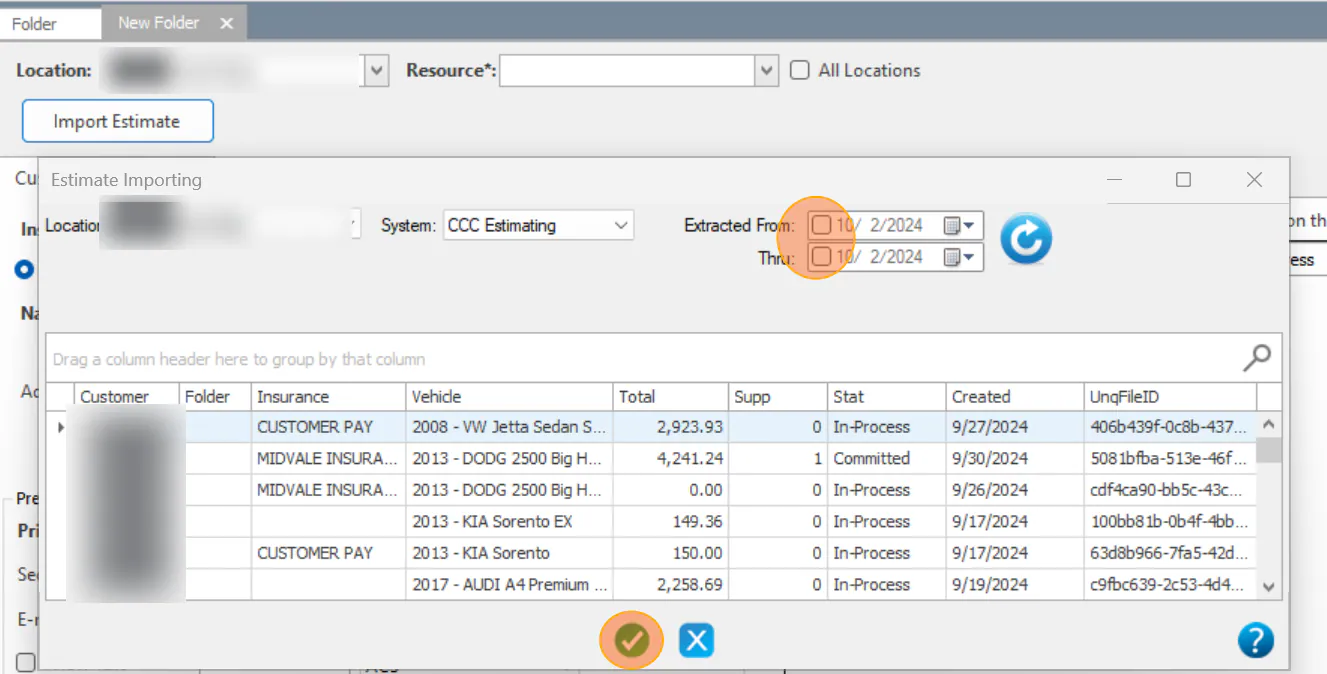
Find the estimate in the list. The list shows estimates extracted today by default. If you don’t see your estimate, clear the date range filters and refresh the list, or select the magnifying glass at the top right to search.
-
Select the estimate, then select the green check mark on the button bar to import it.
-
Check the customer and claim information from the estimate, and fill in any other folder details. Make sure you select the Resource (or <Unassigned> if no one is assigned yet) and the insurance company.
-
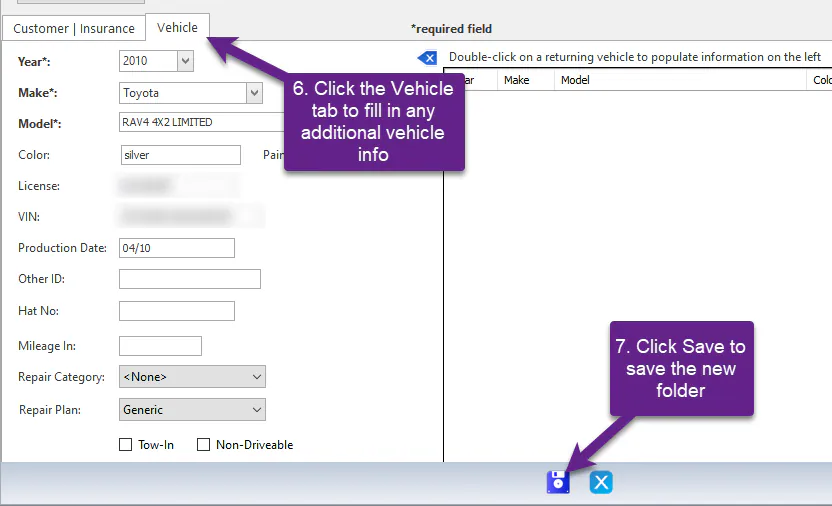
Select the Vehicle tab and complete any other vehicle information.
-
Select Save.