
Pay a vendor before the PO exists
Sometimes you need to pay a vendor for parts before you’ve imported the estimate or marked the parts as ordered. Post the invoice to the folder and print the check now, then attach the purchase order (PO) lines to the paid invoice once the estimate is in.
The steps are:
- Post the invoice to the folder with Pay it Now checked.
- Print the check.
- Import the estimate.
- In the Purchase Assistant, order the parts from the vendor you paid, which creates a PO, and receive them.
- Edit the paid invoice to attach the PO lines.
Step 1: Create the invoice
Section titled “Step 1: Create the invoice”-
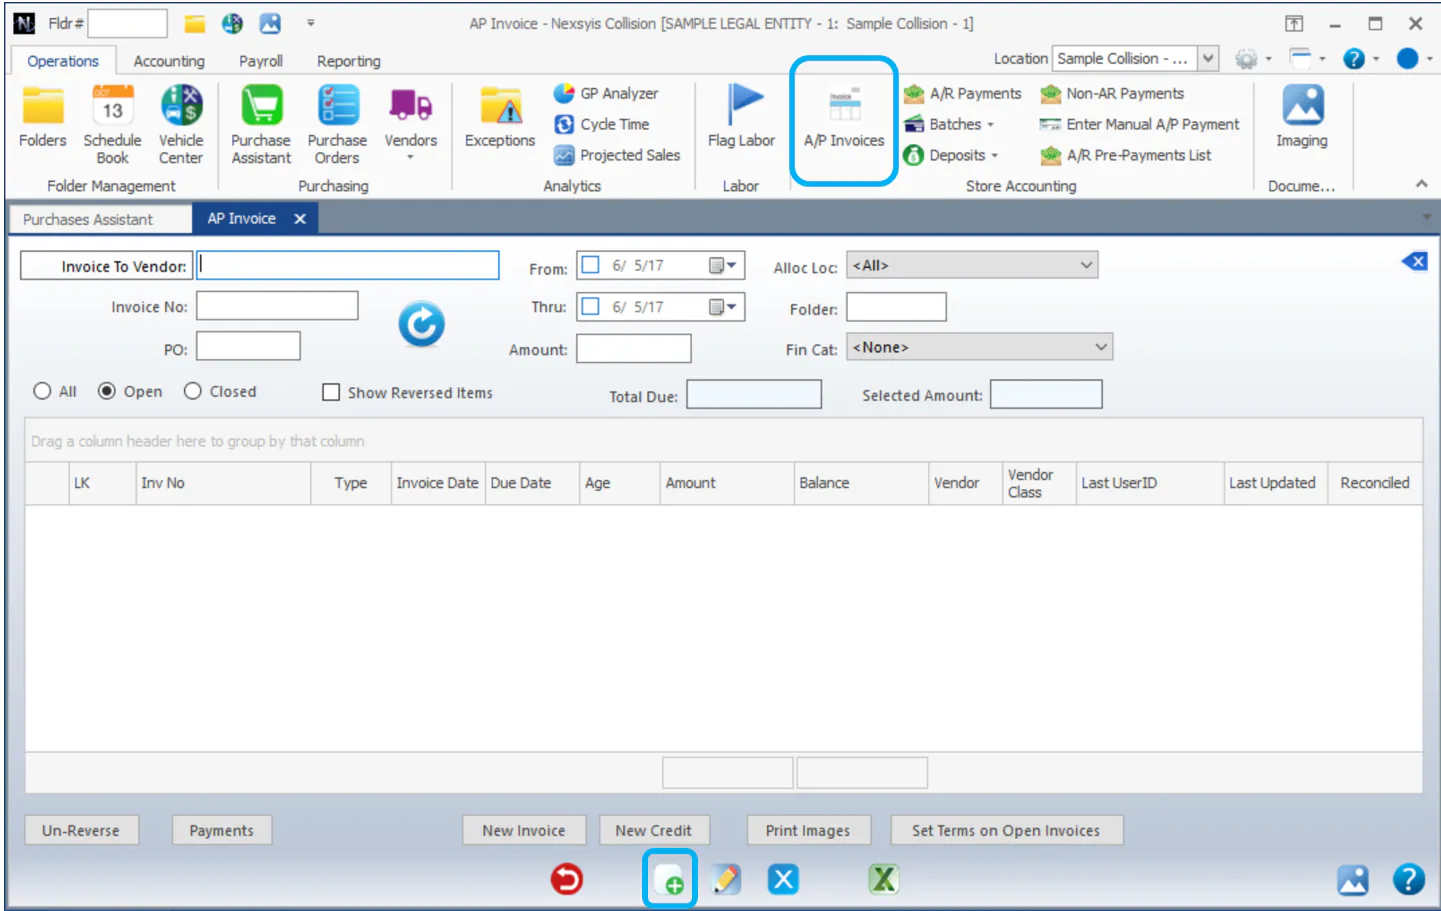
On the Operations or Accounting tab, select A/P Invoices, then select New at the bottom of the screen.
-
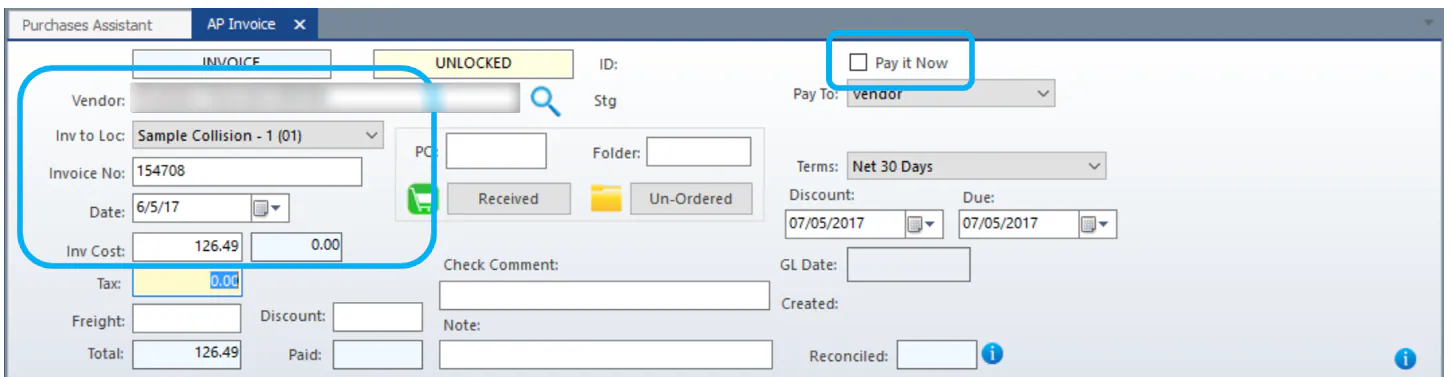
At the top, find the Vendor and enter the Invoice No, Date and Inv Cost.
-
On the right, check Pay it Now.
-
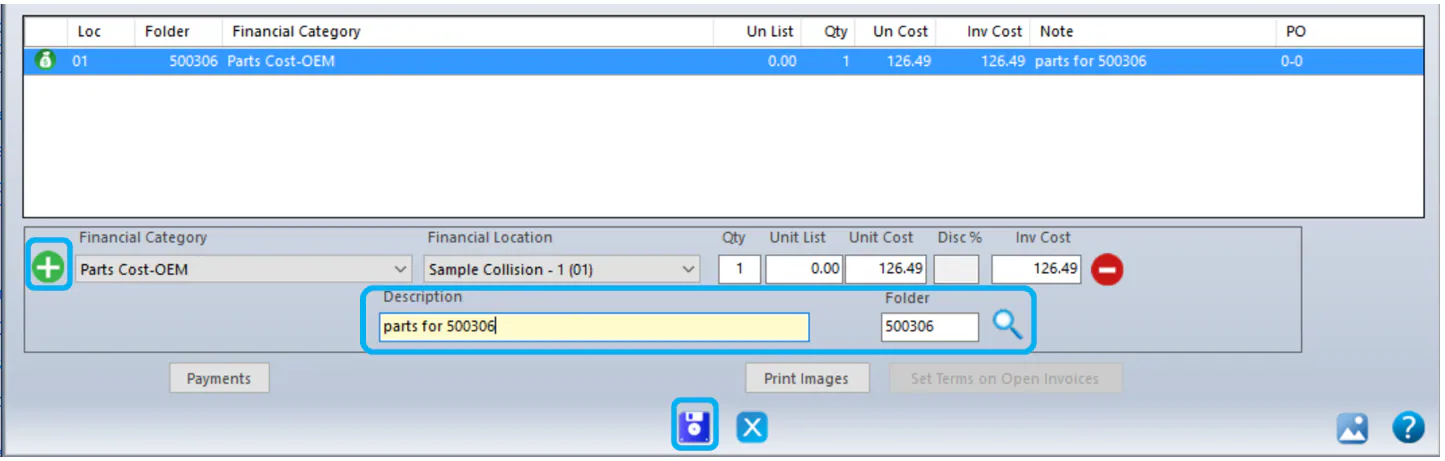
In the bottom half, select the green + to add a line. Enter a Description and the folder number in Folder.
-
Select Save.
Step 2: Print the check
Section titled “Step 2: Print the check”-
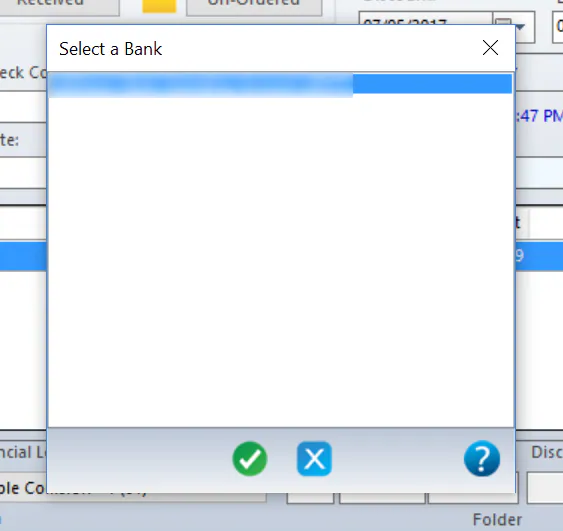
When asked, select the bank to pay from and select the green check mark.
-
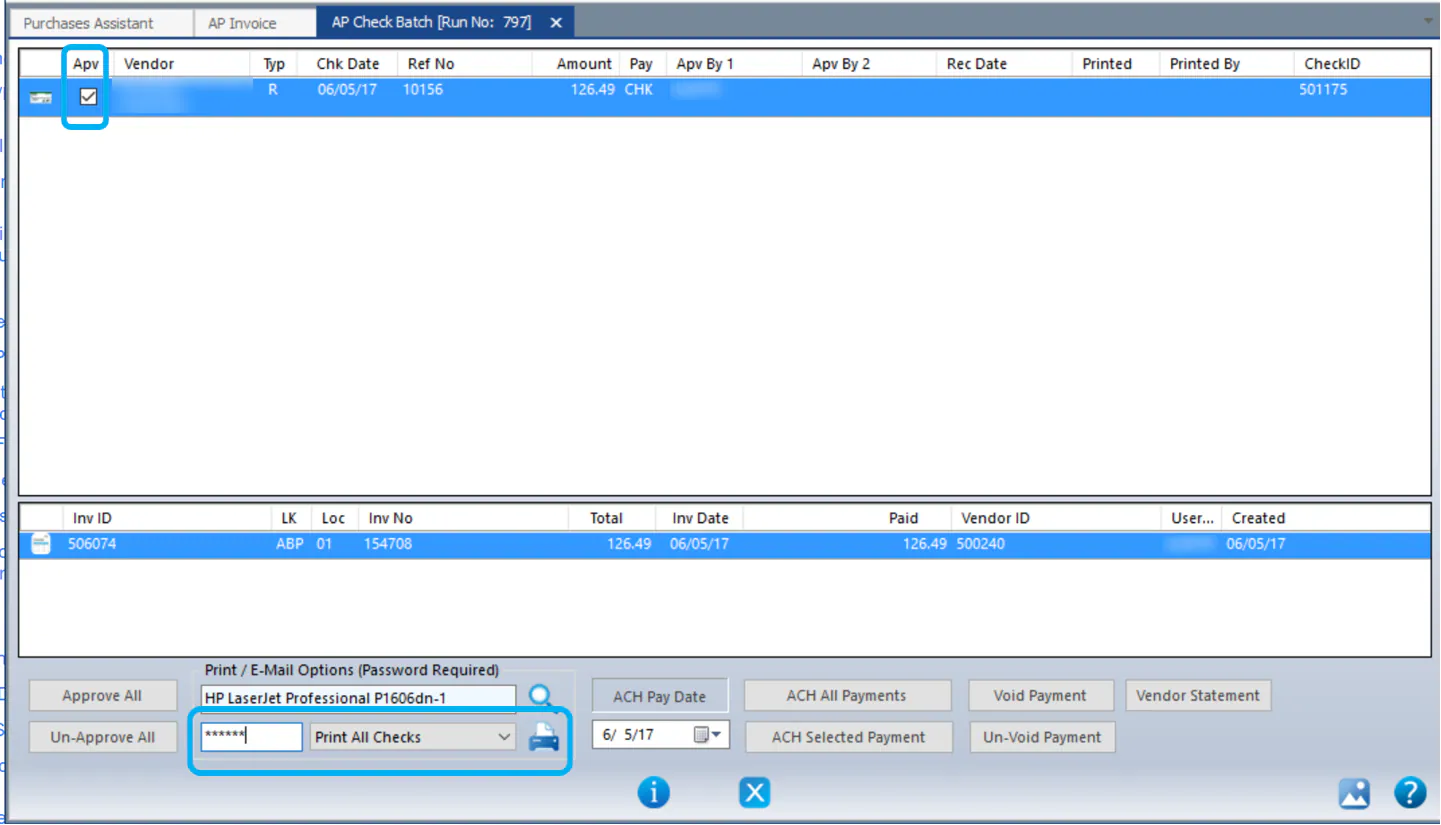
Select the AP Check Batch tab, to the right of the AP Invoice tab.

-
At the top, check Apv to approve the check.
-
At the bottom, enter your password and select the Print icon.
Step 3: Import the estimate
Section titled “Step 3: Import the estimate”When the estimate is ready, import it into the folder and create the work order if you haven’t already.
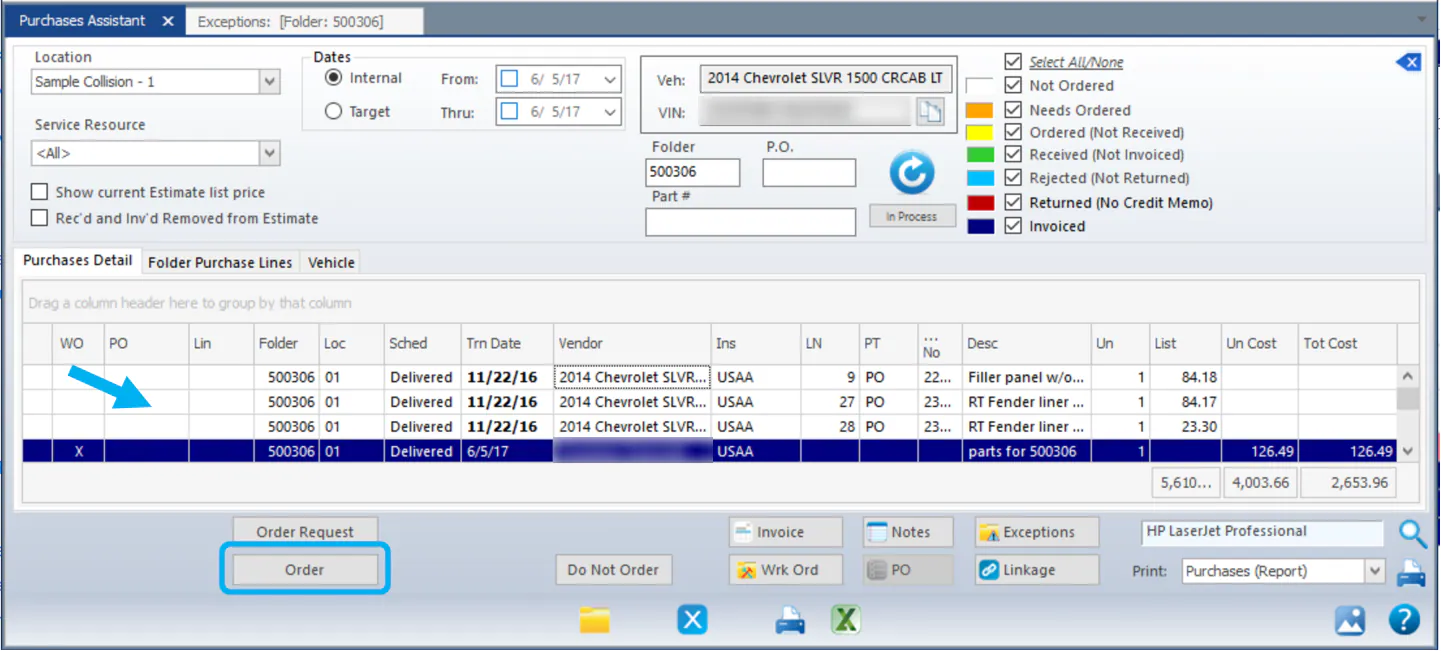
In the Purchase Assistant, the estimate lines show white and the invoice line shows navy (Invoiced).
On the Exceptions screen, the invoice posted to the folder shows as a Cost, No Sale exception, and each estimate line that isn’t ordered yet shows as a Sale With No Cost exception. The next steps clear these exceptions.

Step 4: Order and receive the parts
Section titled “Step 4: Order and receive the parts”-
In the Purchase Assistant, select any of the white lines and select Order.
-
Assign the vendor you paid and select Save. Close the Send PO screen that opens next.
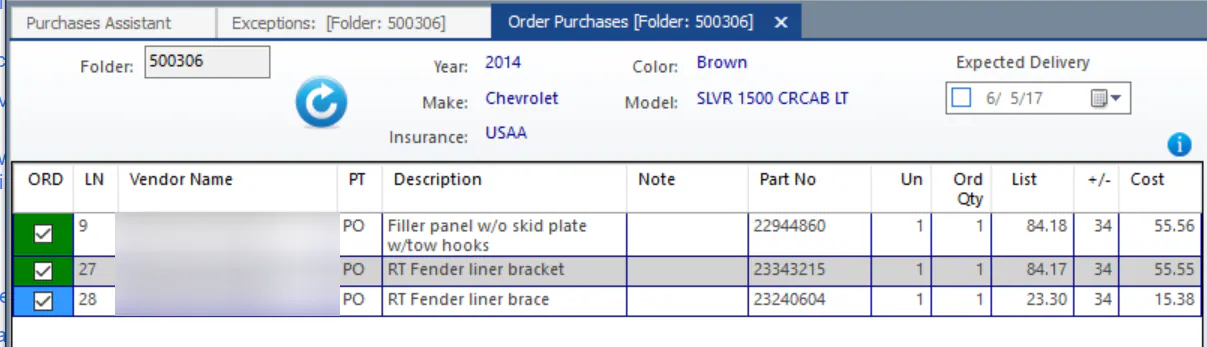
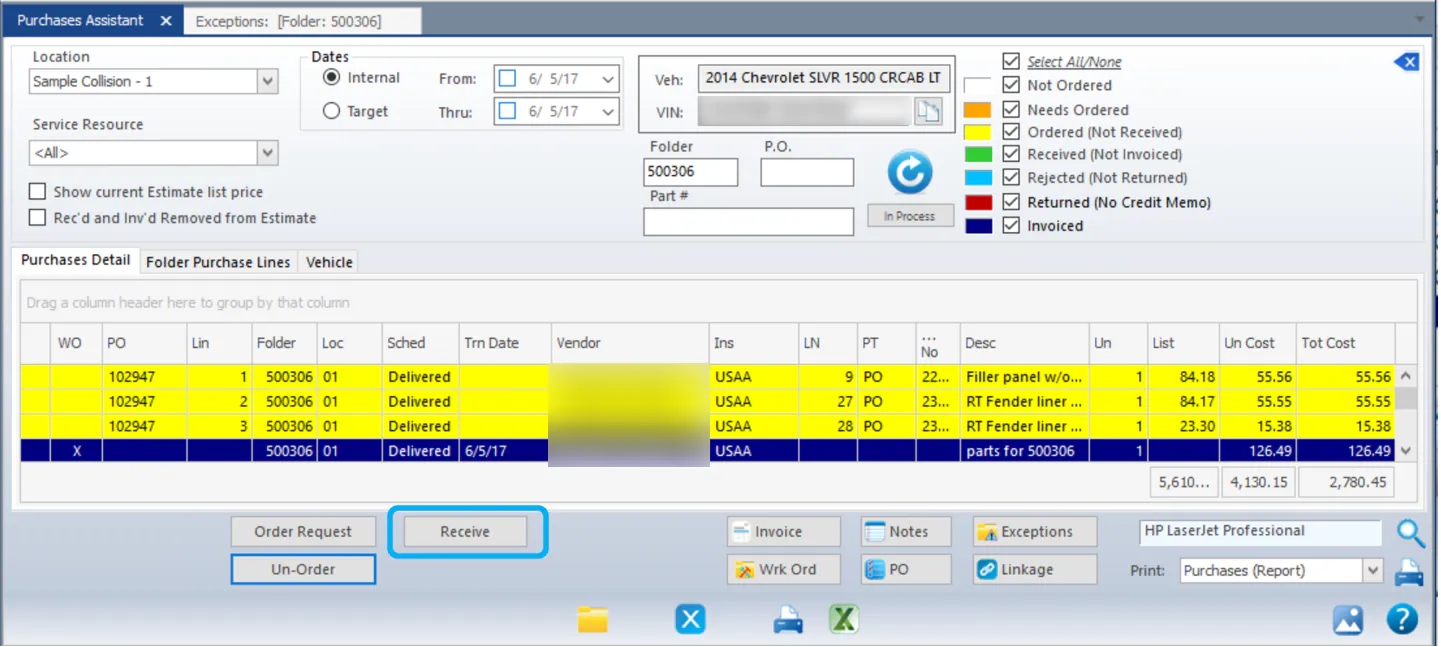
The lines turn yellow (Ordered (Not Received)).
-
Select any of the yellow lines and select Receive at the bottom.
-
Select Receive All, then Save.
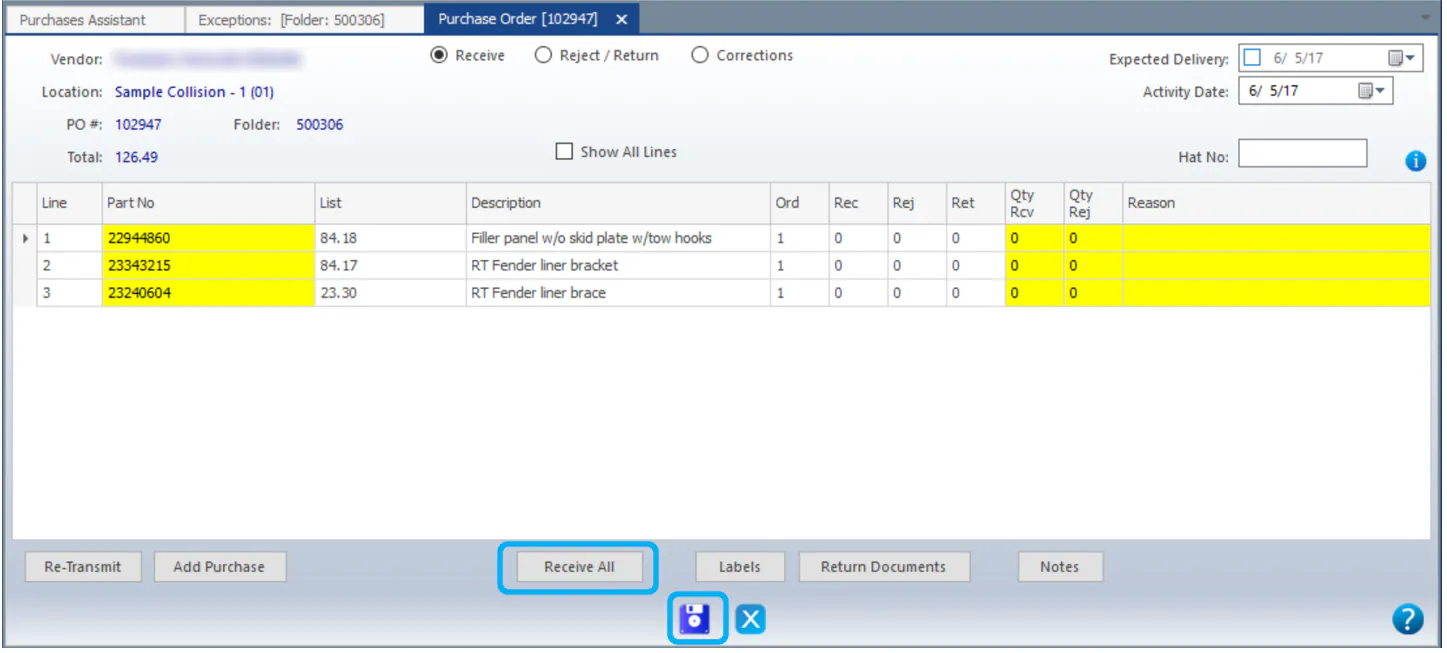
The lines turn green (Received (Not Invoiced)). Note the PO # on the green lines; you need it in the next step.

See also Order parts and Receive parts.
Step 5: Attach the PO lines to the paid invoice
Section titled “Step 5: Attach the PO lines to the paid invoice”Open the paid invoice from the Purchase Assistant and replace its placeholder line with the PO lines. Follow Edit a paid AP invoice.
When you’re done, the lines show navy (Invoiced) in the Purchase Assistant, and the Cost, No Sale and Sale With No Cost exceptions are gone.