
Enter work-in-progress AR
At go-live, re-create each open repair from your prior system in Nexsyis, along with any payments already received. Do the same for finished repairs that still have an AR balance, so you can collect them in Nexsyis.
Re-create the repair
Section titled “Re-create the repair”- Create a folder for the repair by importing its estimate from your estimating system. See Create a folder from an estimate file. If the estimate isn’t available, write a Nexsyis estimate instead. See Write a Nexsyis estimate.
- Add the original repair order (RO) number to the folder, as described below.
- Set the folder dates to match your prior system. See Set folder dates for WIP folders.
- Enter any payments received before cutover, as described below.
For a repair in progress, also re-enter its parts orders, AP invoices and technician labor so they match the work done so far. See Enter work-in-progress AP and Convert prior flag hours.
For a finished repair that only has an AR balance, don’t create a work order. If one was created by mistake, see Remove a work order from an AR-only folder. Check that the AR invoice total matches your prior system’s AR aging report.
Add the original RO number
Section titled “Add the original RO number”Store the RO number from your prior system in the vehicle’s Other ID field, so you can find the folder by that number.
-
Open the folder.
-
Select the Edit button next to the vehicle in the folder header.
-
In Other ID, type the original RO number, then select Save.
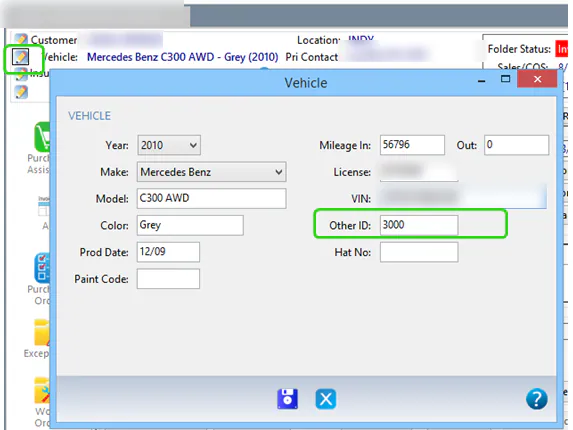
To find the folder by this number, on the folder search screen select Advanced Filters, then select Other ID, and type the number in the search box.
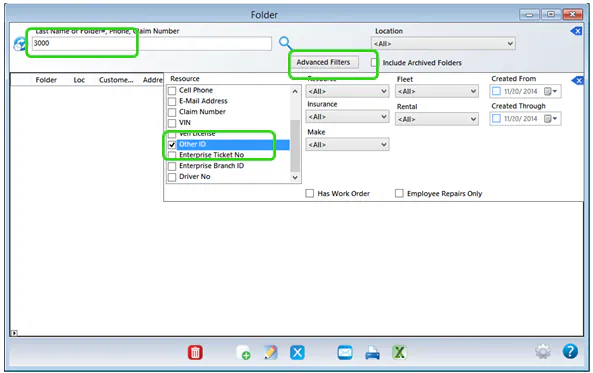
See Find a folder.
Enter payments received in your prior system
Section titled “Enter payments received in your prior system”-
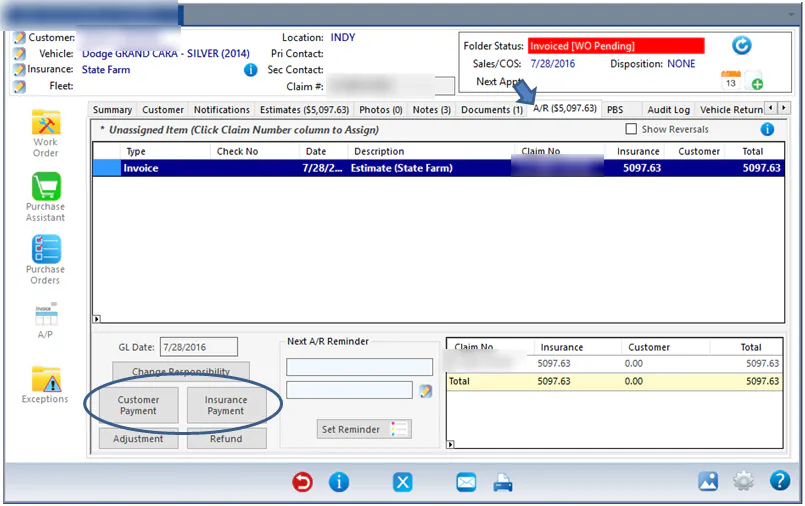
On the folder’s A/R tab, select Customer Payment or Insurance Payment.
-
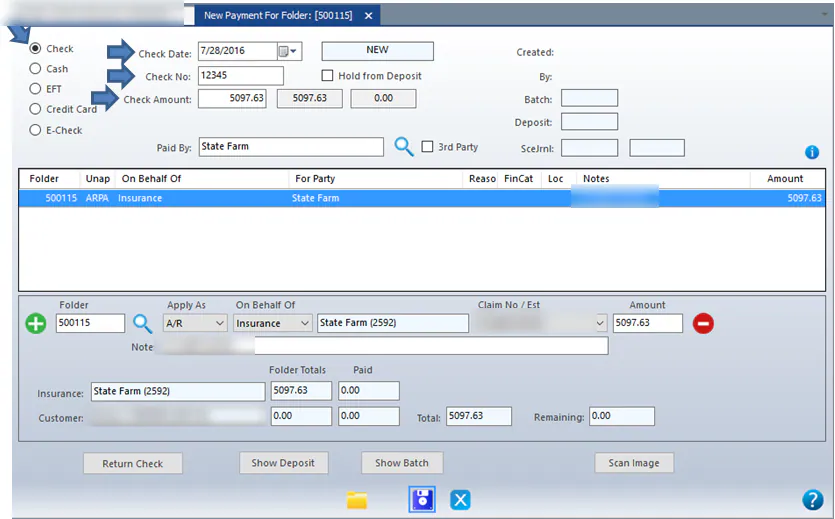
At the top of the payment screen, select the payment type, for example Check. The fields change to match the type you select.
-
Fill in the empty fields, such as Check Date, Check No and Check Amount. Paid By is filled in with the insurance company or the customer, depending on which button you selected.
-
Press Enter after the amount. The distribution line loads below.
-
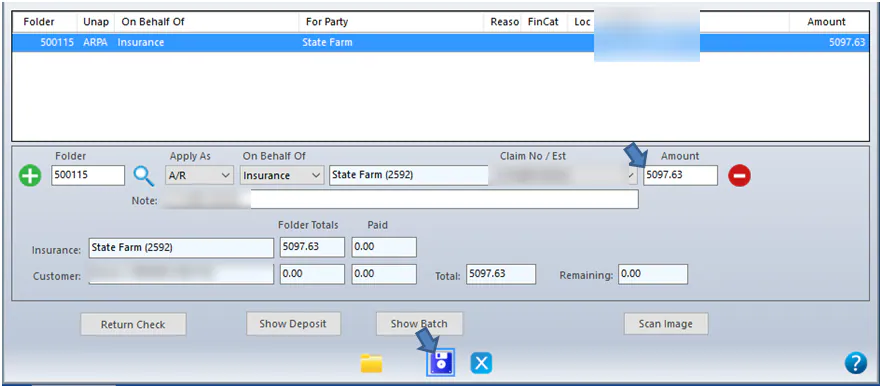
On the distribution line:
- Leave Apply As set to A/R.
- If the folder has more than one estimate, select the claim to apply the payment to in Claim No / Est.
- Amount shows the full amount due from the insurance company or customer. For a partial payment, replace it with the amount paid.
- Add a Note if you like. For insurance payments, the claim number is filled in as the note.
-
When the line amount matches the payment amount at the top, Save becomes available. Select Save.
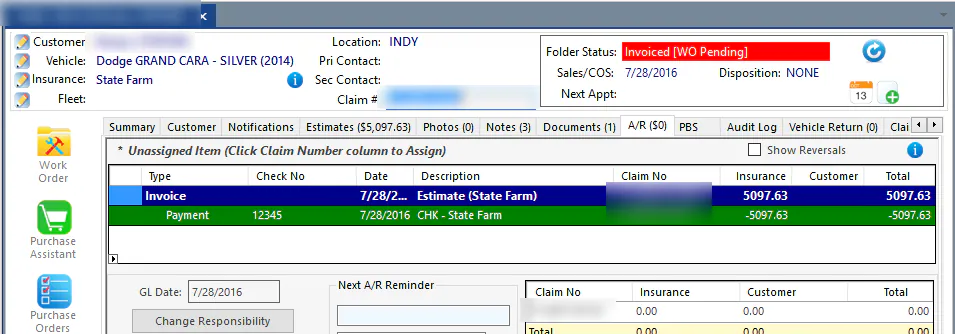
The payment shows in green under the invoice on the folder’s A/R tab.
For more about AR payments, see Enter an AR payment.
When a supplement arrives on an AR-only folder
Section titled “When a supplement arrives on an AR-only folder”If a late supplement arrives for a repair you entered as an AR-only folder, do one of the following:
- Create a new file in your estimating system for the supplement only, and create a new folder from that estimate.
- Create a new folder and write a Nexsyis estimate for the supplement lines. Use this only when there are just a few lines. See Write a Nexsyis estimate.