
Post a credit memo
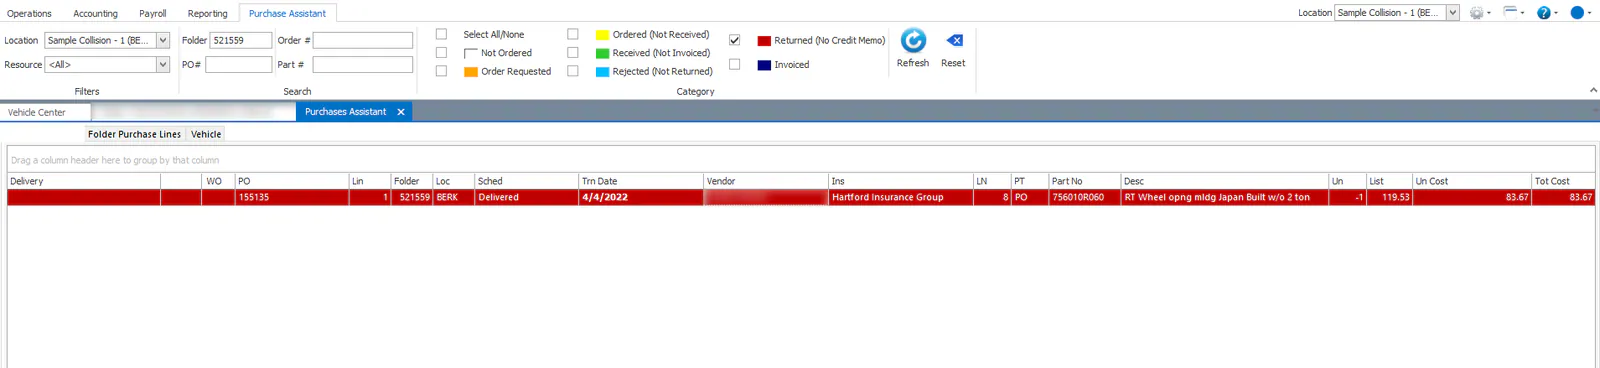
When a vendor sends a credit memo for a part you returned, enter it against the returned line. The line then turns navy (Invoiced).
Before you begin
Section titled “Before you begin”The part must be marked as returned in Nexsyis. It shows red (Returned (No Credit Memo)) in the Purchase Assistant. See Return a part.
Enter the credit memo
Section titled “Enter the credit memo”-
Open the Purchase Assistant for the folder.
-
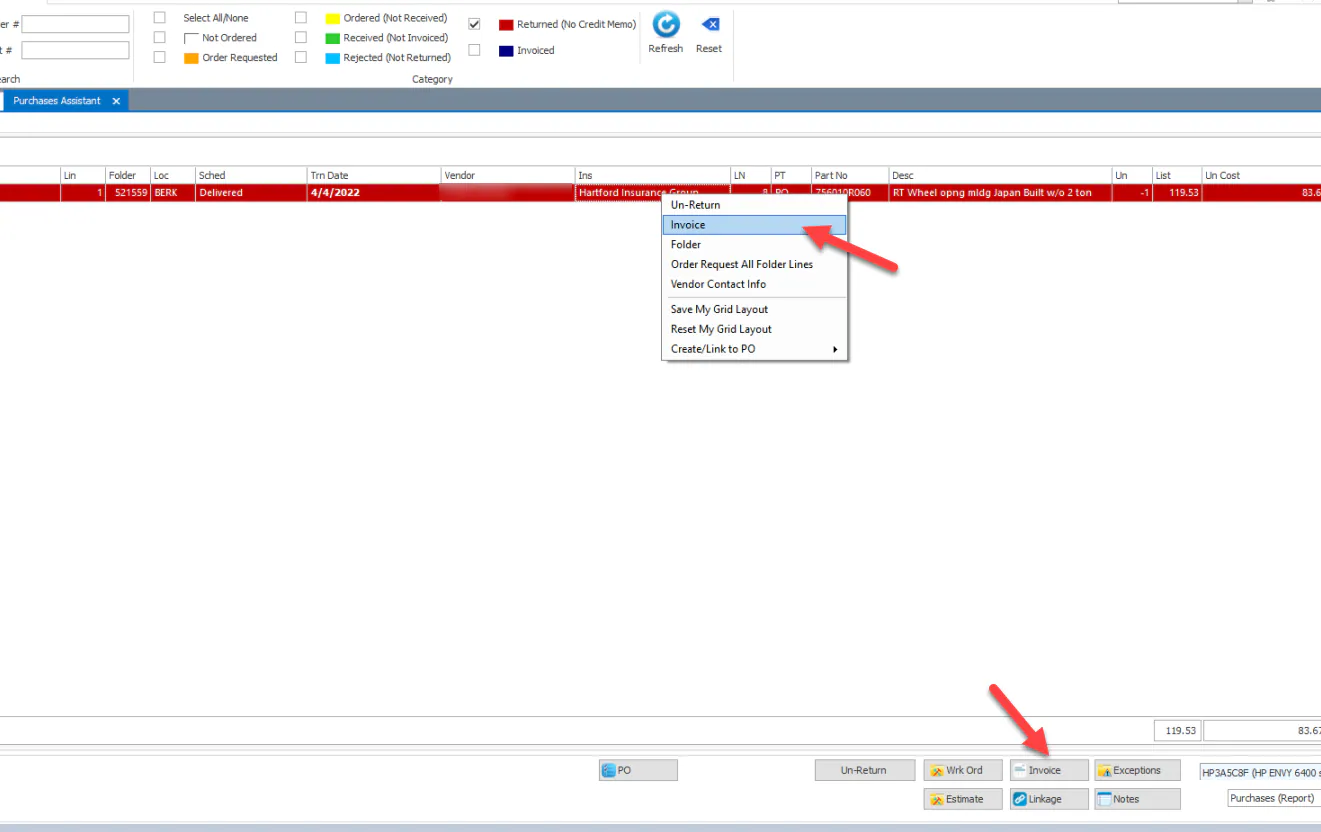
Select the returned line, then right-click and select Invoice, or select Invoice at the bottom of the screen.
-
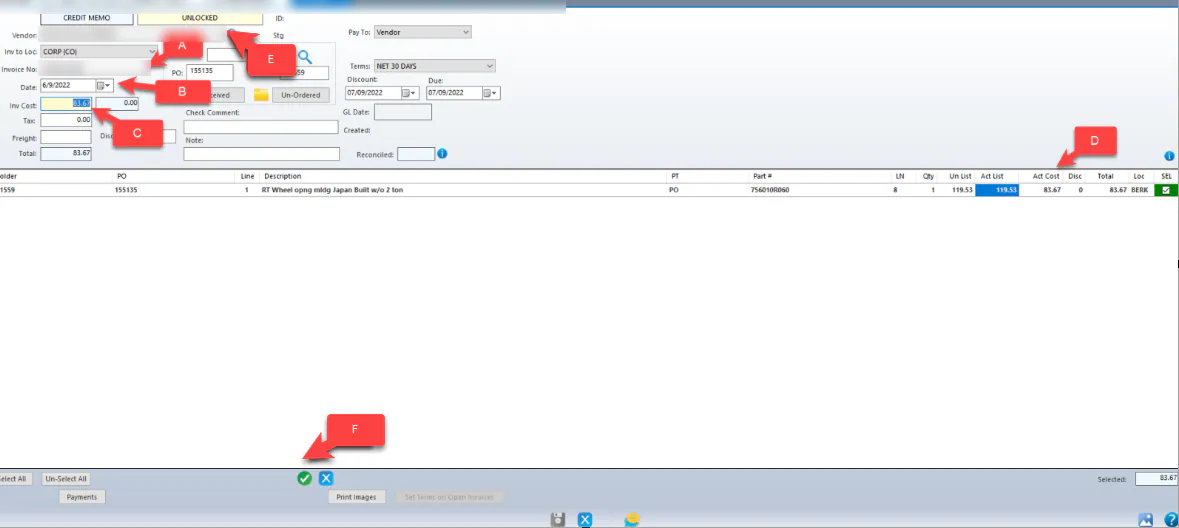
The credit memo screen opens. Fill it in:
- Enter the Invoice No from the credit memo.
- Enter the Date on the credit memo.
- Enter the credit memo total in Inv Cost. Don’t enter a negative number; Nexsyis already treats it as a credit.
- Check that the Act Cost of the part you’re crediting is correct. It usually is.
- Check that you’re crediting the correct vendor.
- Select the green check mark.
-
Select Save.
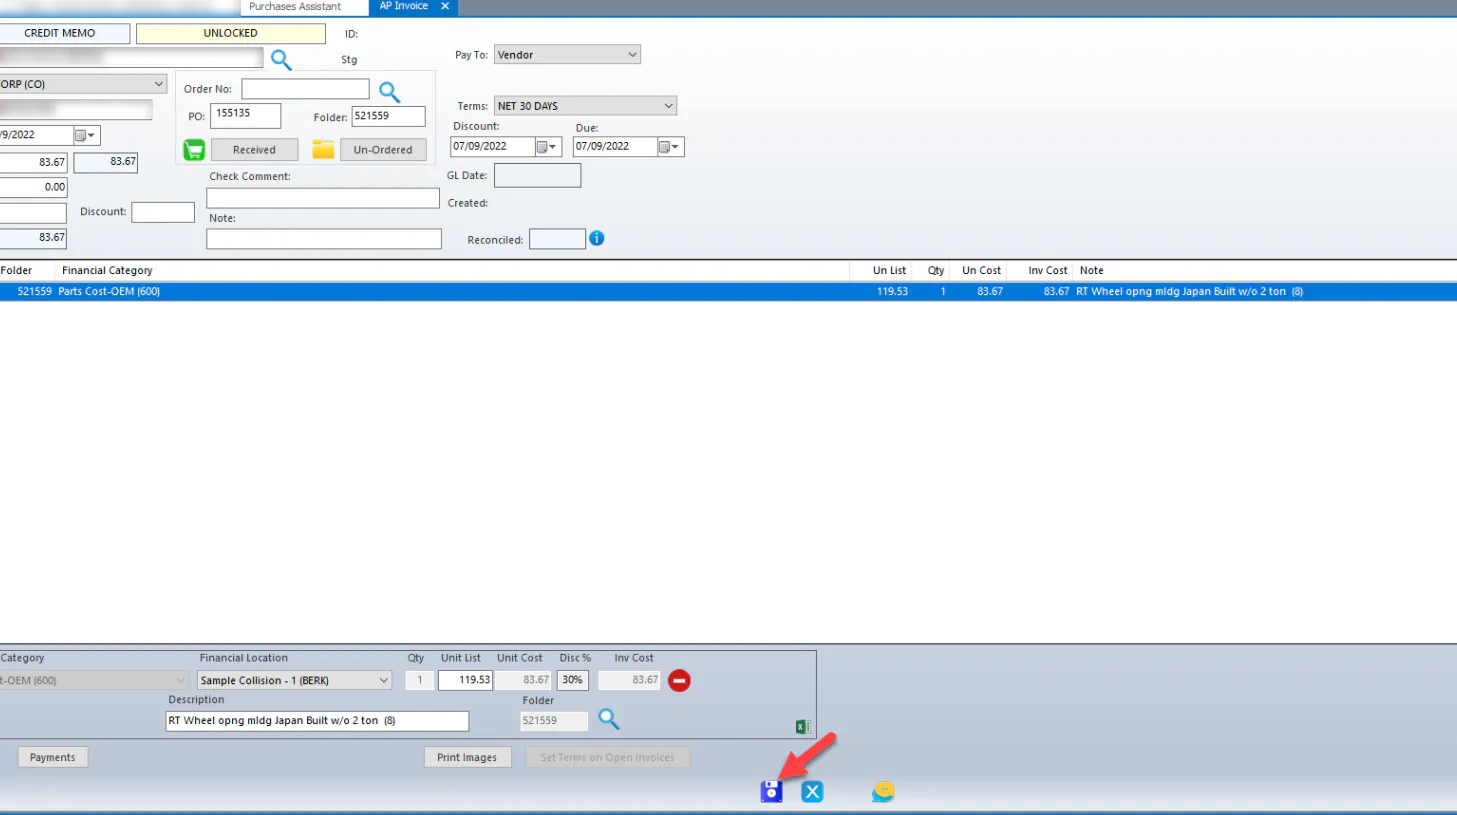
If Save is grayed out, the credit memo doesn’t balance. Check the amounts you entered.
In the Purchase Assistant, the credited line is now navy (Invoiced).
