Subscribe to reports
A report subscription emails a report automatically on a schedule you choose. You can subscribe to any report you have permission to run, and choose who receives it.
Create a subscription
Section titled “Create a subscription”-
On the Reporting tab, select Reports, then select the report on the Report List tab.
-
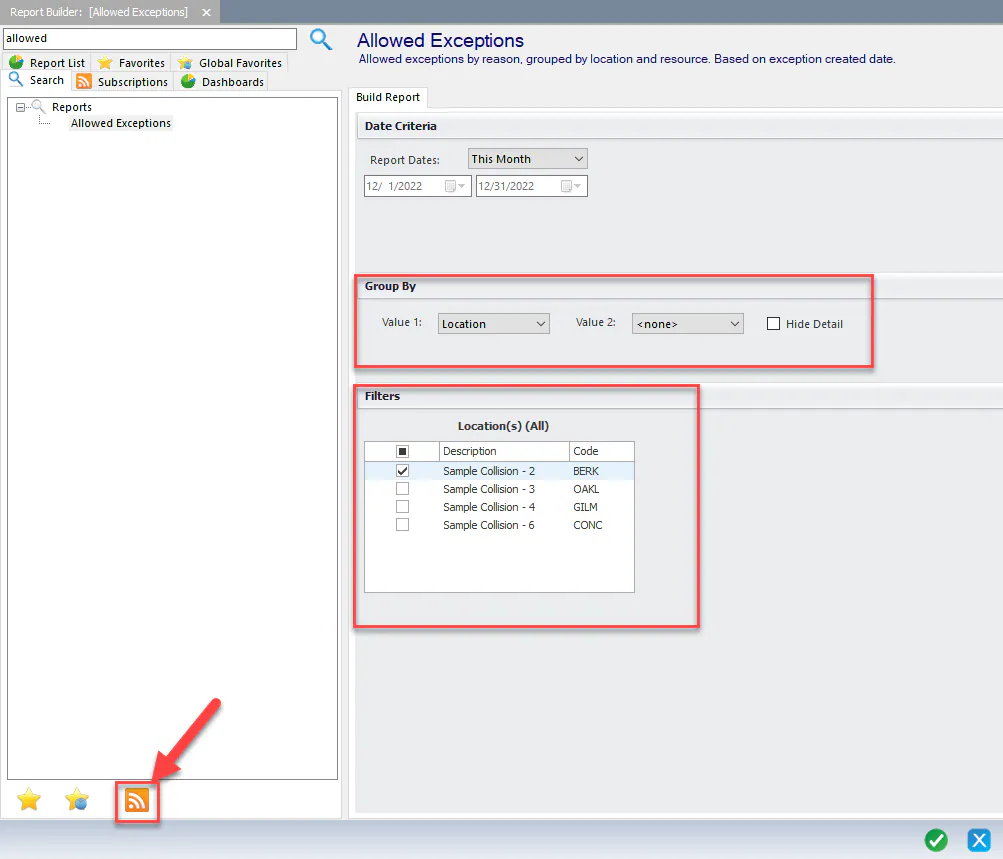
Under Date Criteria, choose a date range for Report Dates. The report always covers this range.
-
Make your choices under Group By and Filters, for example the locations to include.
-
Select the orange subscribe icon on the bottom left button bar.
-
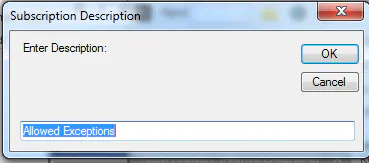
Type a name for the subscription, then select OK.
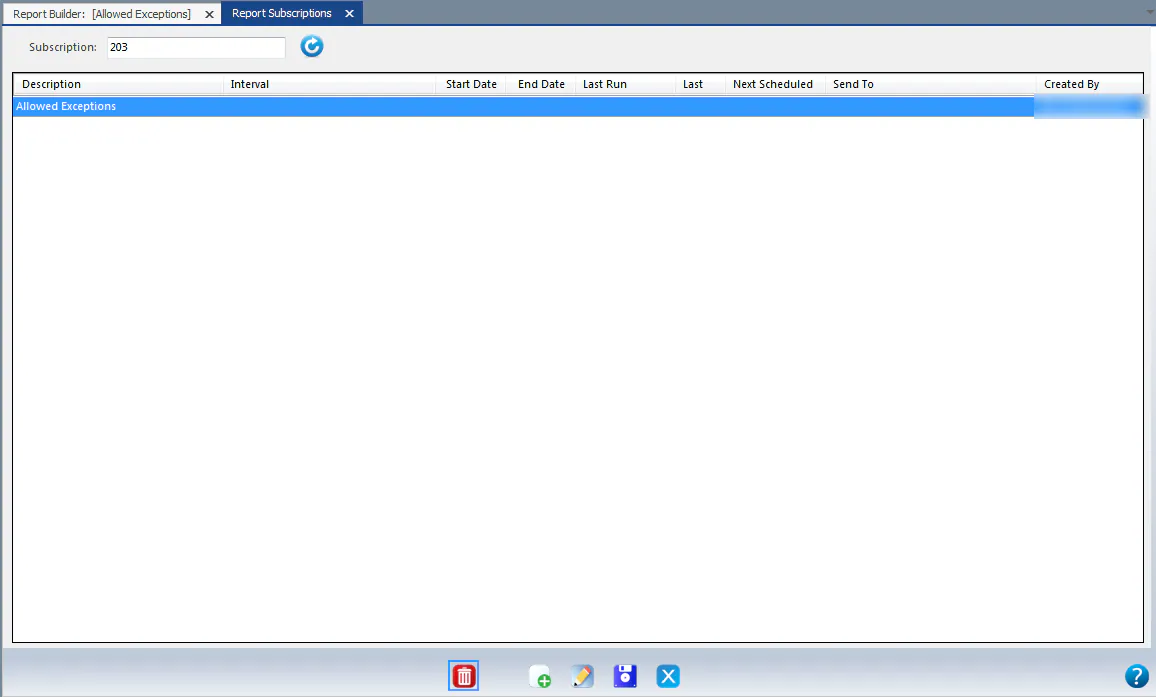
The Report Subscriptions screen opens, listing your new subscription.
-
Double-click the subscription to set up its schedule.
-
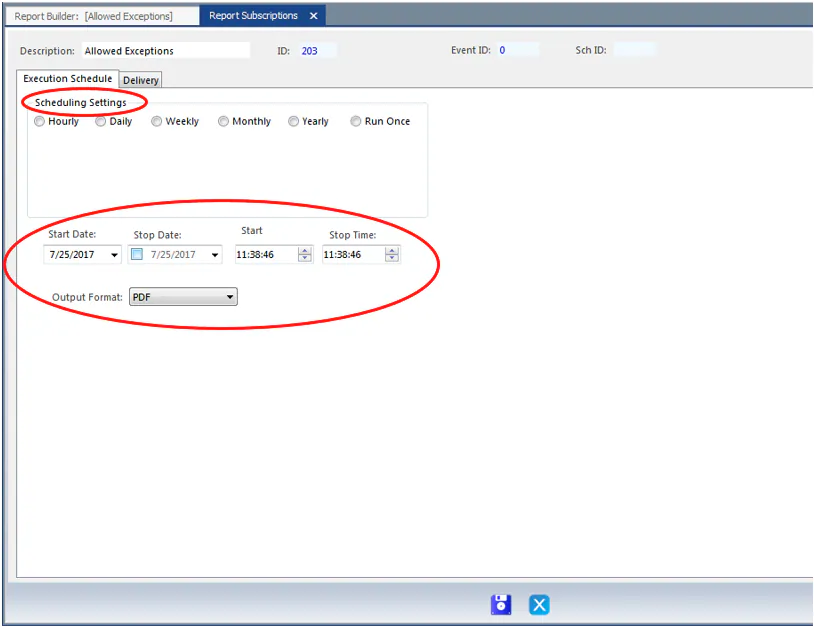
On the Execution Schedule tab:
- Under Scheduling Settings, choose how often to send the report.
- Choose a Start Date, Stop Date and Start time. The start time defaults to the current time.
- Choose an Output Format: PDF or Excel.
-
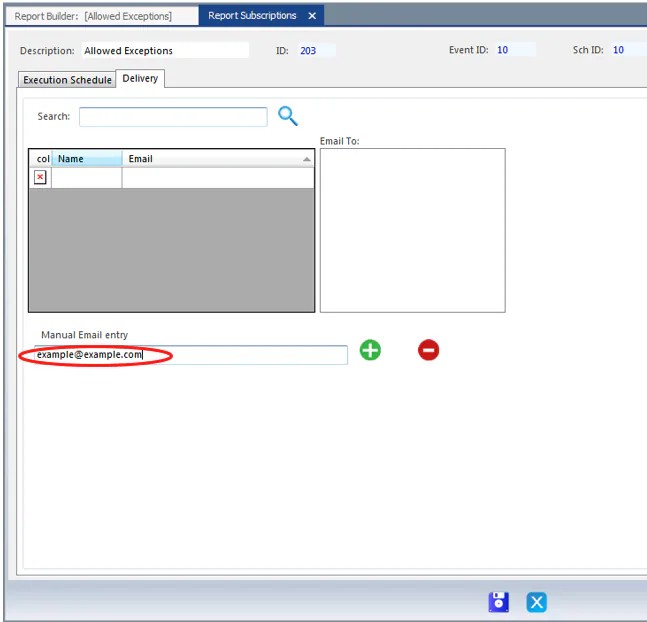
Select the Delivery tab.
-
Type an email address in Manual Email entry, then select the green plus button. Repeat for each person who should receive the report.
-
Select Save.
Change a subscription
Section titled “Change a subscription”You can set up and change your own subscriptions. To change a subscription someone else created, for example to add a recipient, you need the Manage all report subscriptions transaction permission.
Change the report parameters
Section titled “Change the report parameters”-
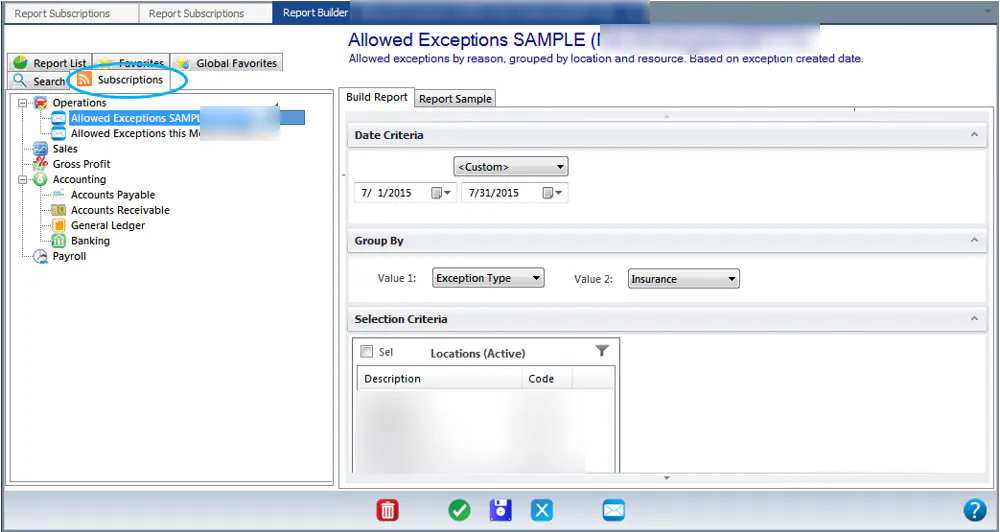
In the Report Builder, select the Subscriptions tab, then select the subscription on the left. Its parameters show on the right.
-
Make your changes, then select Save.
Change the schedule or recipients
Section titled “Change the schedule or recipients”-
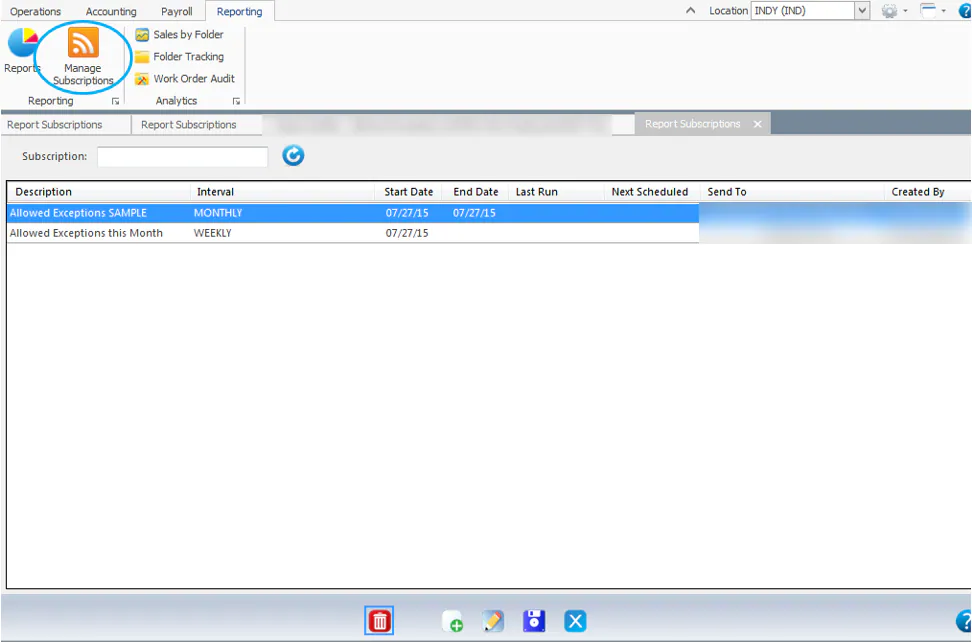
Select the email icon on the button bar of the parameters page, or select Manage Subscriptions on the Reporting tab.
-
Double-click the subscription to open its Execution Schedule and Delivery tabs.
-
Make your changes, then select Save.
To add or remove recipients, see Edit email addresses on an alert or subscription.
Create a subscription
Section titled “Create a subscription”-
Run the report with the parameters and display options you want. They carry over to the subscription.
-
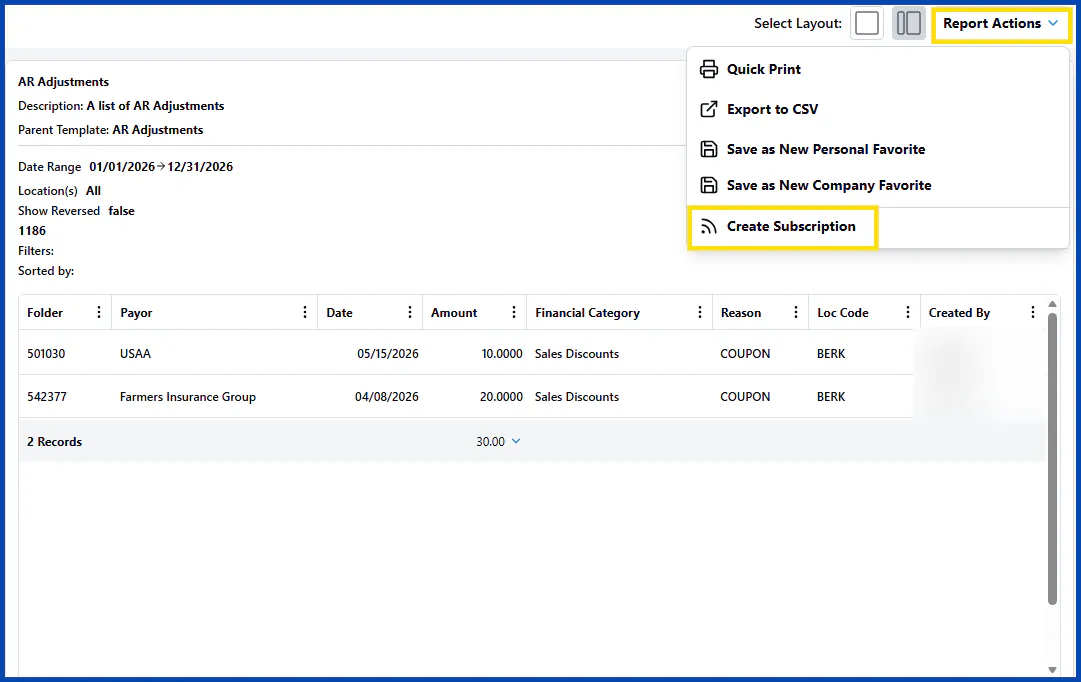
Select Report Actions, then Create Subscription.
-
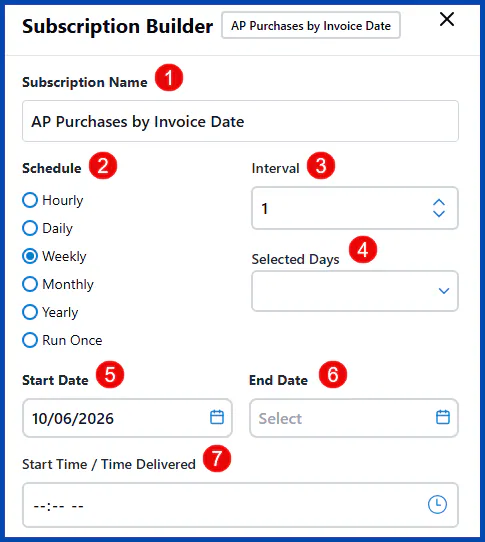
In the Subscription Builder, fill in the schedule:
- Subscription Name: a name for the subscription.
- Schedule: choose Hourly, Daily, Weekly, Monthly, Yearly or Run Once.
- Interval: how often the report is sent.
- Selected Days: for a weekly schedule, the days of the week to send it.
- Start Date: the date the subscription starts.
- End Date: if you only need the report for a while, the date it stops.
- Start Time / Time Delivered: the time of day to send the report.
-
Add the recipients and the format:
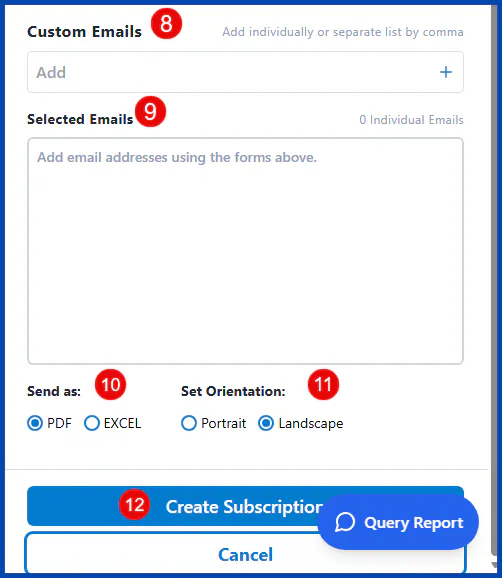
- Under Custom Emails, type each recipient’s email address and select +.
- Check that everyone is listed under Selected Emails.
- Under Send as, choose PDF or EXCEL.
- Under Set Orientation, choose Portrait or Landscape.
- Select Create Subscription.