Edit a paid AP invoice
Once an AP invoice is paid, it’s locked: you can’t change anything at the top of the invoice, but you can still change the distribution lines at the bottom. Use this to attach purchase order (PO) lines to a paid invoice, for example after you paid a vendor before the PO existed.
Before you begin
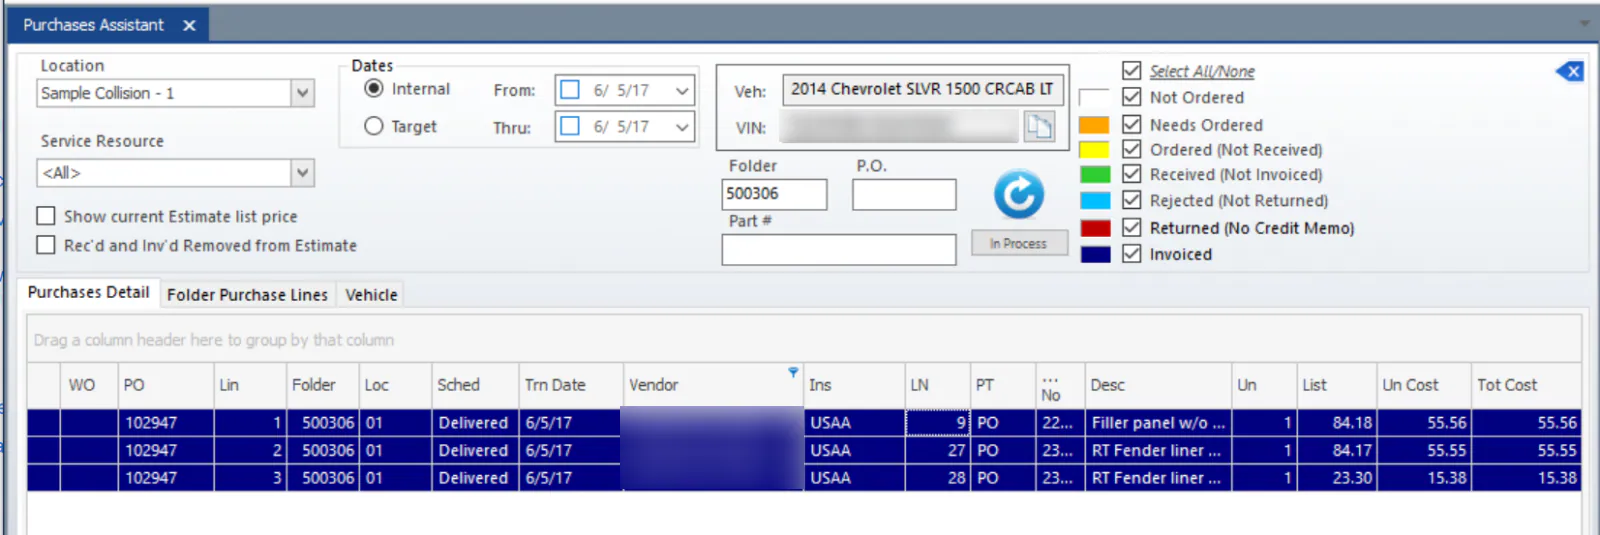
Section titled “Before you begin”The parts must be ordered from the vendor you paid and marked as received, so their lines are green (Received (Not Invoiced)). Note the PO # on the green lines.
Attach the PO lines
Section titled “Attach the PO lines”-
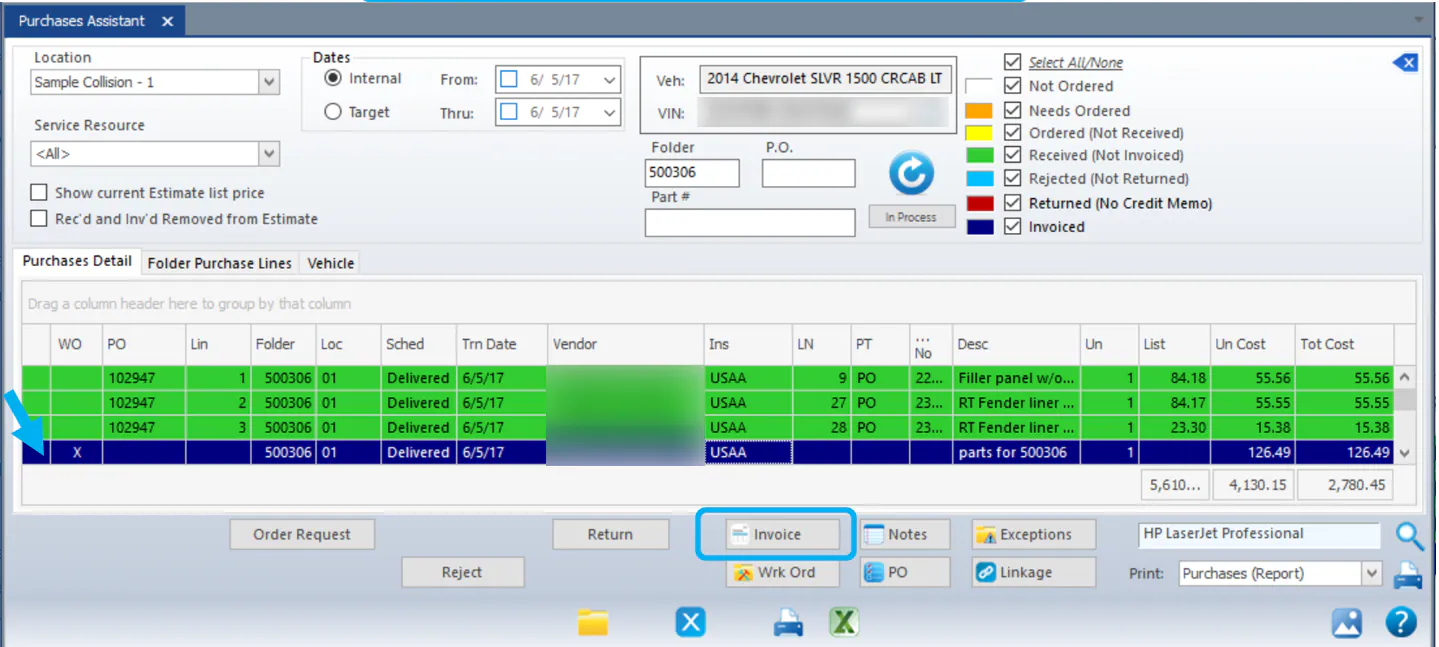
In the Purchase Assistant, select the navy invoiced line, then select Invoice to open the AP invoice.
-
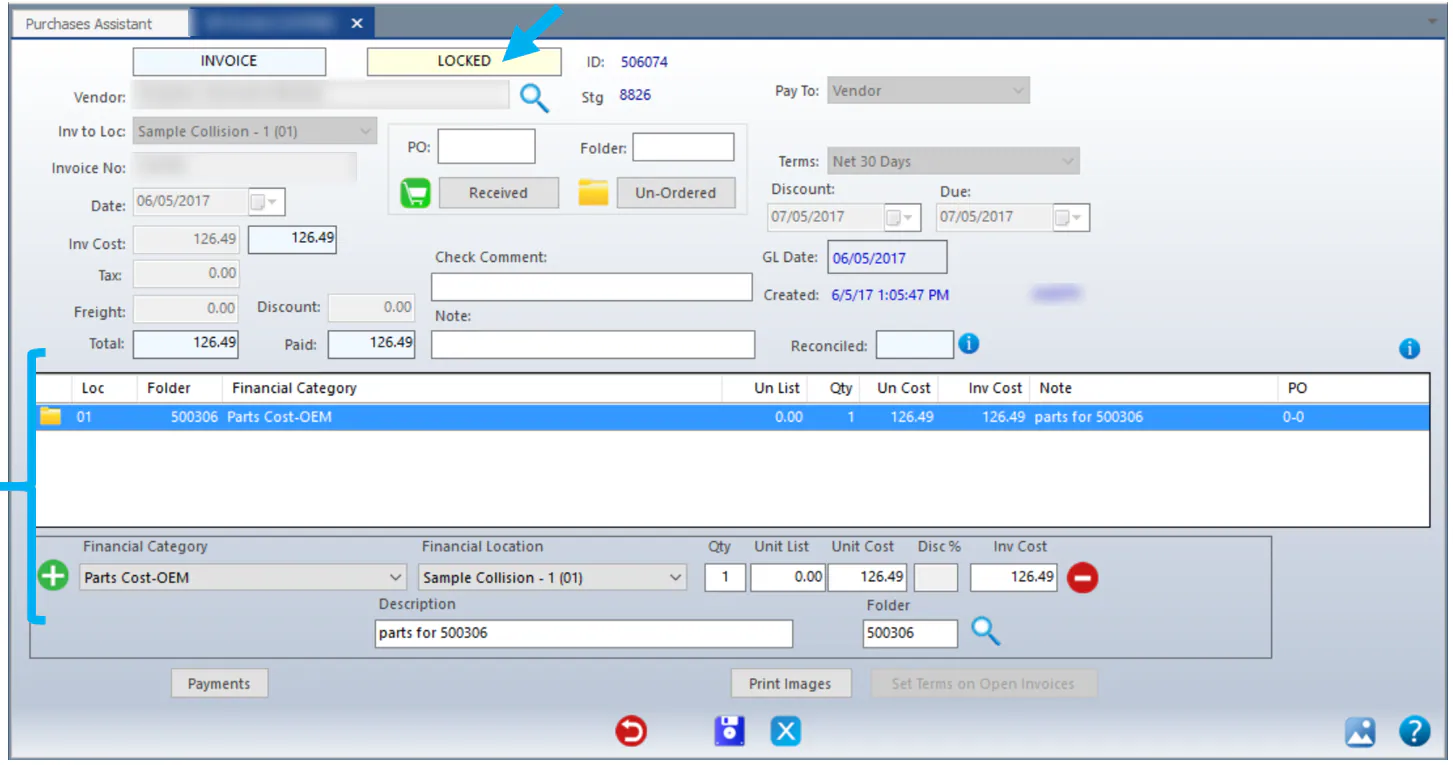
The invoice shows LOCKED at the top, because it’s been paid. You’ll change the distribution lines at the bottom.
-
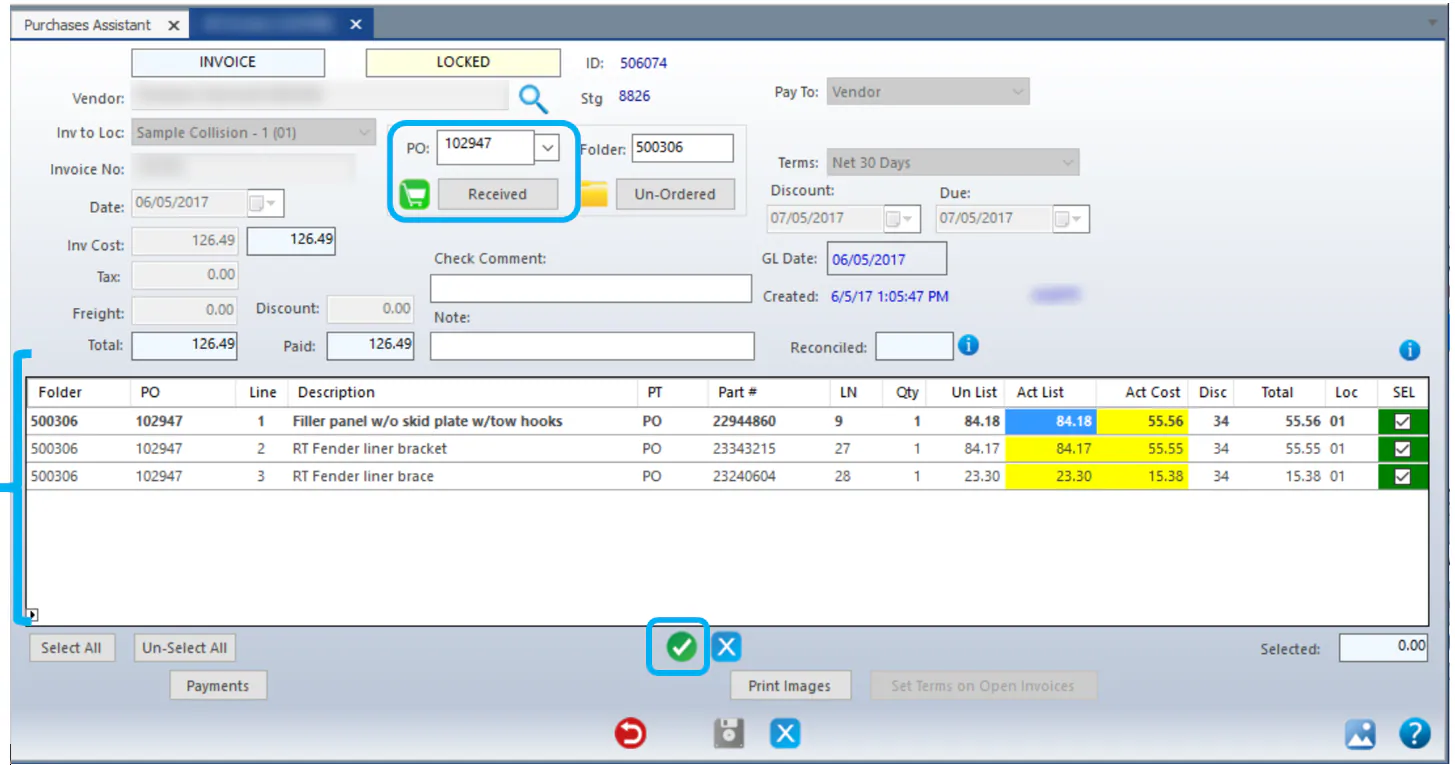
Enter the PO number in PO at the top middle of the screen and select Received to load the received lines for that PO.
-
Change the Act List and Act Cost as needed. The total of the costs must match the invoice total, or you can’t save.
-
Select the green check mark to set the lines.
-
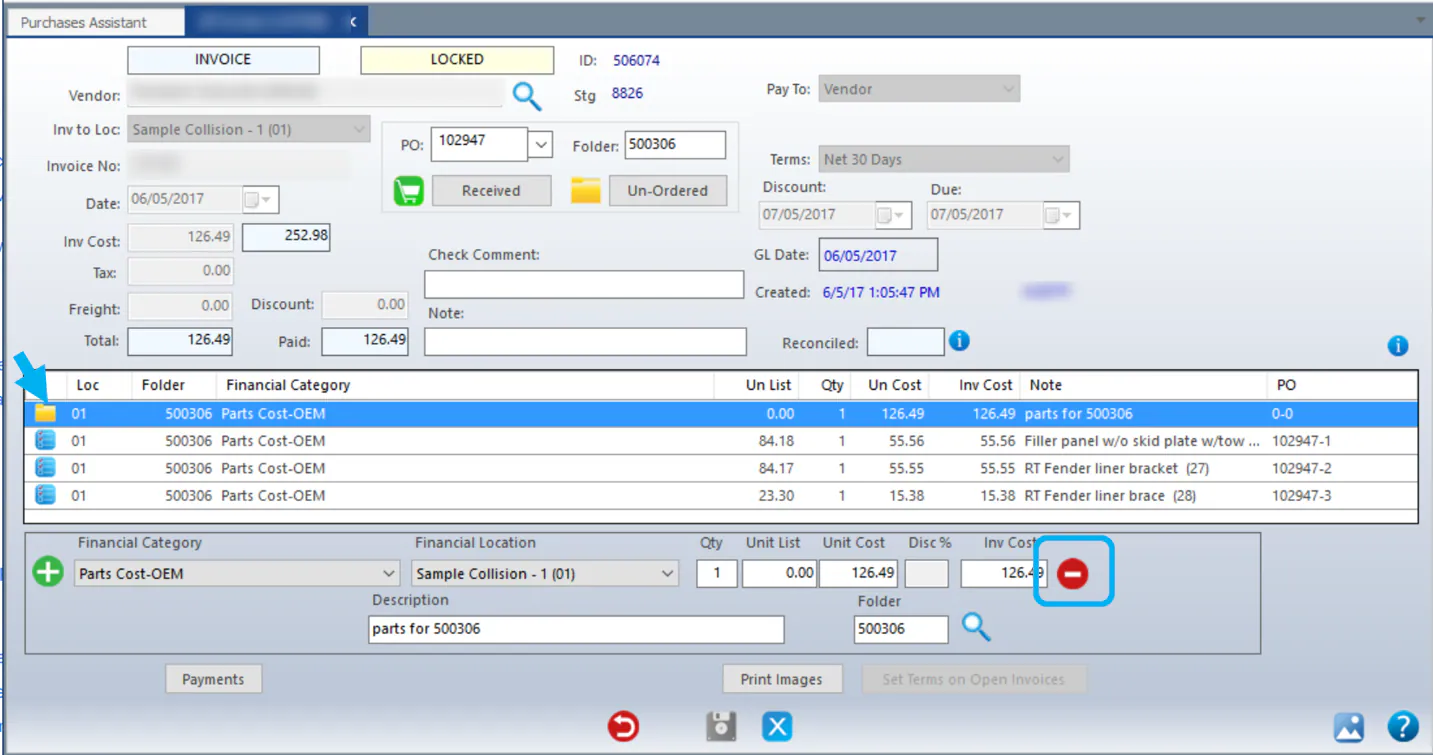
Select the placeholder line you added when you first entered the invoice, then select the red minus button to remove it.
-
When the PO lines add up to the Inv Cost, select Save.
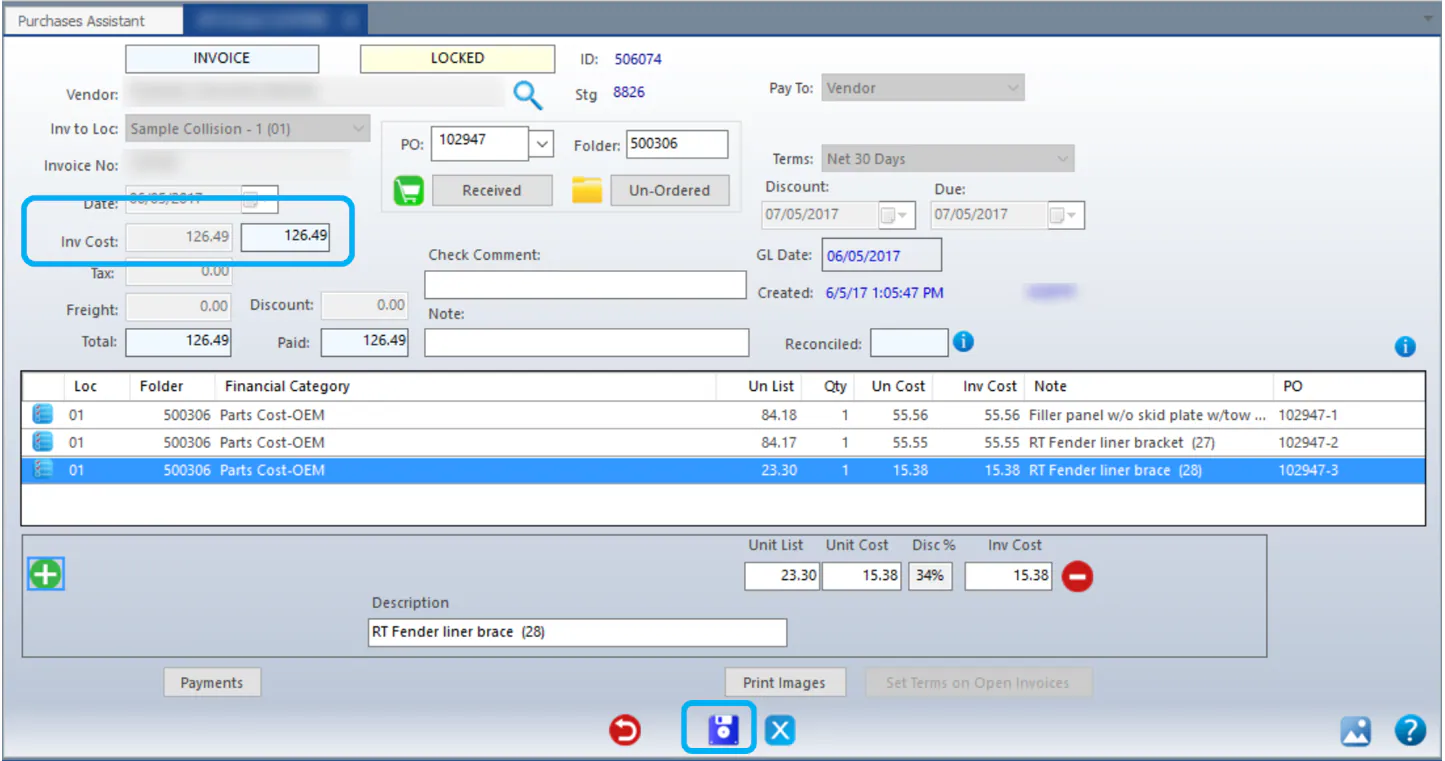
Refresh the Purchase Assistant. The lines now show navy (Invoiced), and the Cost, No Sale and Sale with No Cost exceptions are gone.