Pay vendors by ACH
Pay vendors electronically by creating an ACH file from a check batch and sending it to your bank.
Before you begin
Section titled “Before you begin”ACH payments need two things set up:
- Your bank account. Ask your bank for its ACH specifications and send them to Nexsyis. Nexsyis sets up the bank account for ACH and lets you know when it’s ready.
- Each vendor you pay by ACH. See the next section.
Set up a vendor for ACH
Section titled “Set up a vendor for ACH”- Open the A/P Vendor screen and select the vendor.
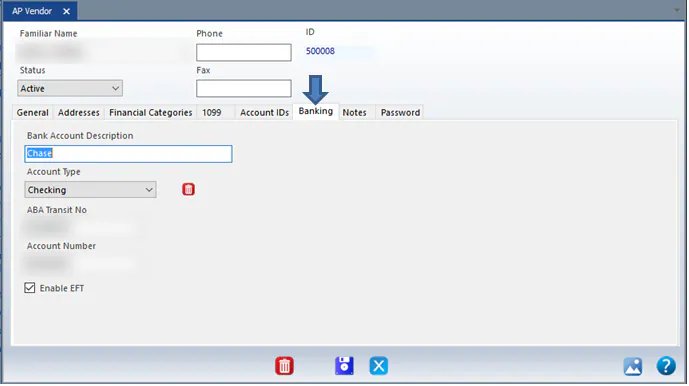
- On the Banking tab, enter the vendor’s bank account: Bank Account Description, Account Type, ABA Transit No and Account Number.
- Check Enable EFT and save.
Once the vendor’s bank account is set up, the vendor’s AP invoices are paid by ACH by default.
Pay invoices by ACH
Section titled “Pay invoices by ACH”-
On the Accounting tab, select A/P Payments, then Create A/P Check Batch.
-
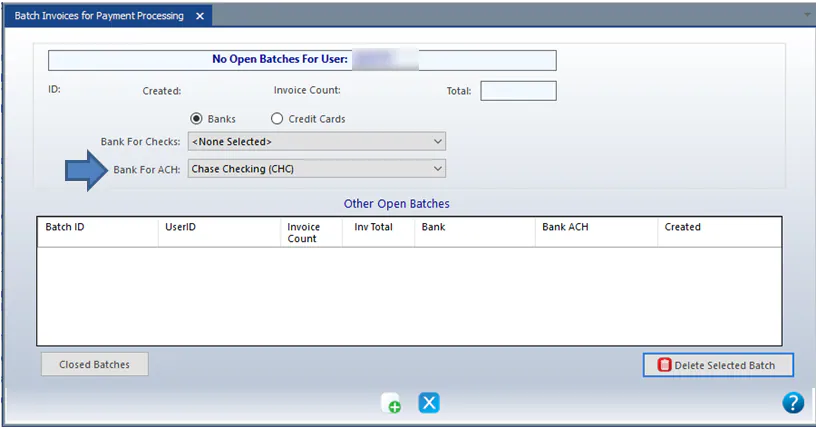
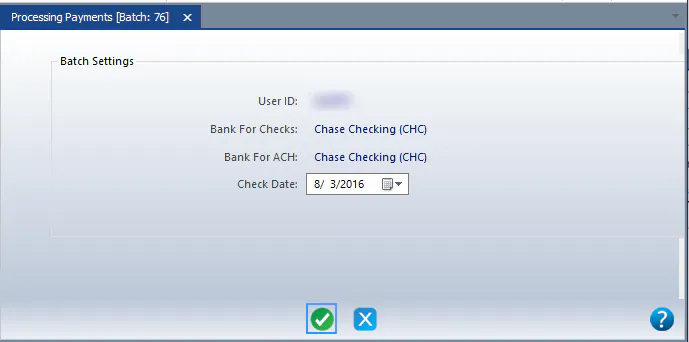
Select the Bank For Checks and the Bank For ACH to use, then select New.
-
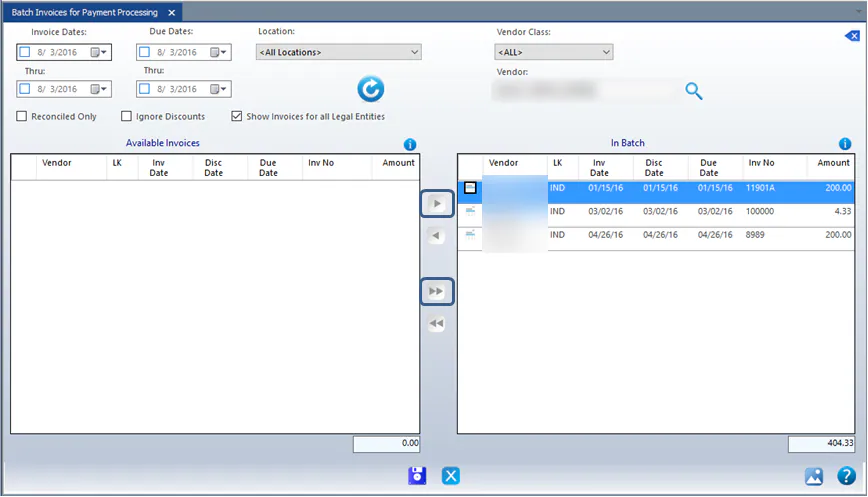
Find the invoices to pay. The vendor must be set up for ACH.
-
Use the center arrows to move the invoices to In Batch.
-
Select the check mark to continue.
-
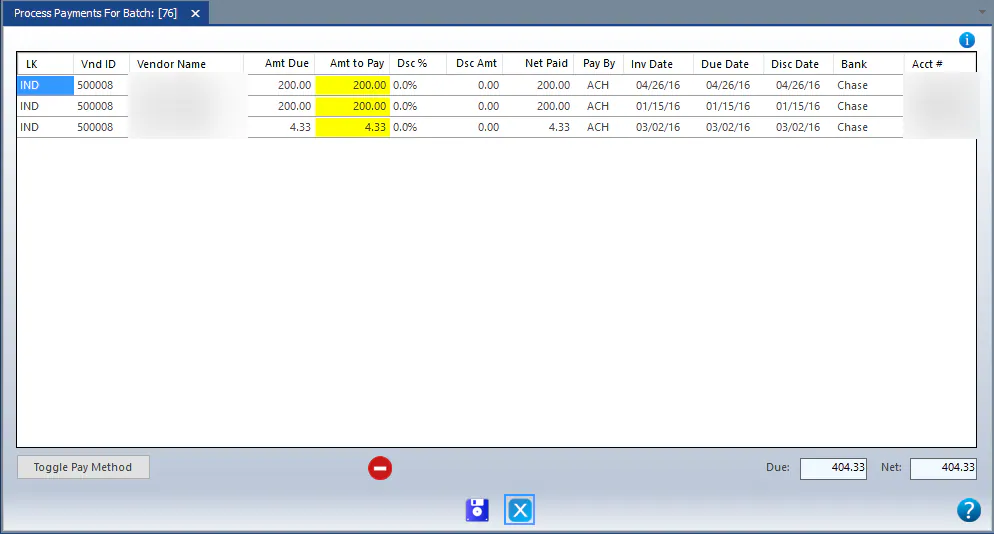
To pay only part of an invoice, change the amount in the yellow Amt to Pay box. Select Save.
-
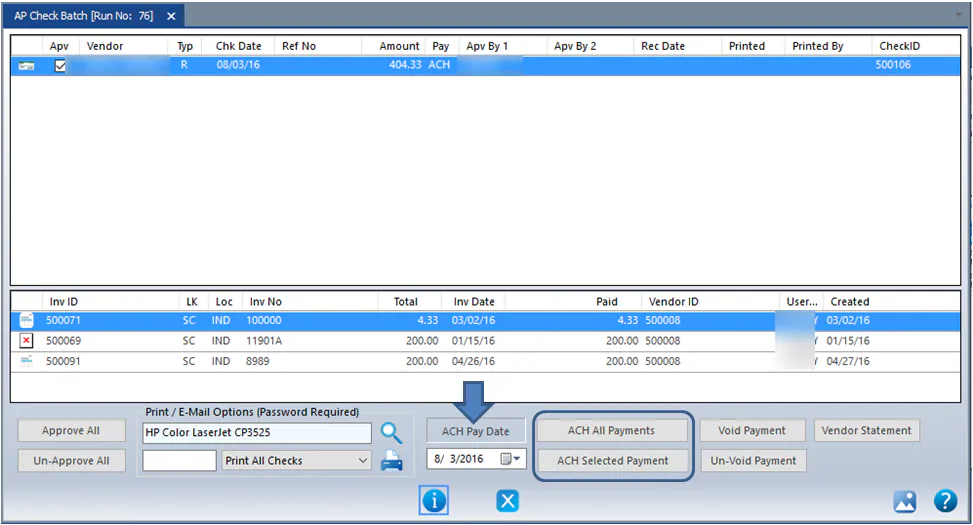
Select ACH All Payments, or select a line and select ACH Selected Payment.
-
When asked, name the ACH file and select Save to save it to your computer.
-
A message reminds you to send the file to your bank. Send it to your bank.
Send the remittance to the vendor
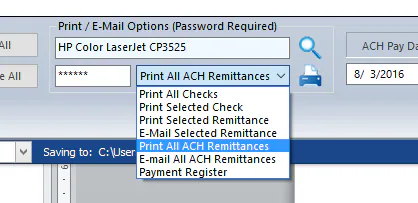
Section titled “Send the remittance to the vendor”- Enter your password in the box at the bottom.
- In the drop-down, select a remittance option, for example Print All ACH Remittances or E-mail All ACH Remittances.
- Select the Print icon.
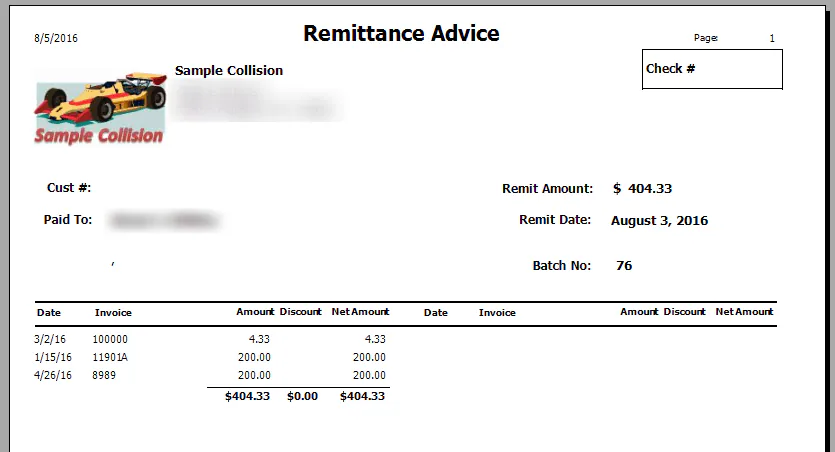
Here’s an example ACH remittance: