Check in a vehicle with e-Vehicle Check-In
Use e-Vehicle Check-In in NexsyisNow to check a vehicle into the shop. You confirm the customer and vehicle details with the customer, scan the VIN, and answer questions set up for the repair category. An e-Vehicle Check-In sheet is saved to the folder.
Check in a vehicle
Section titled “Check in a vehicle”-
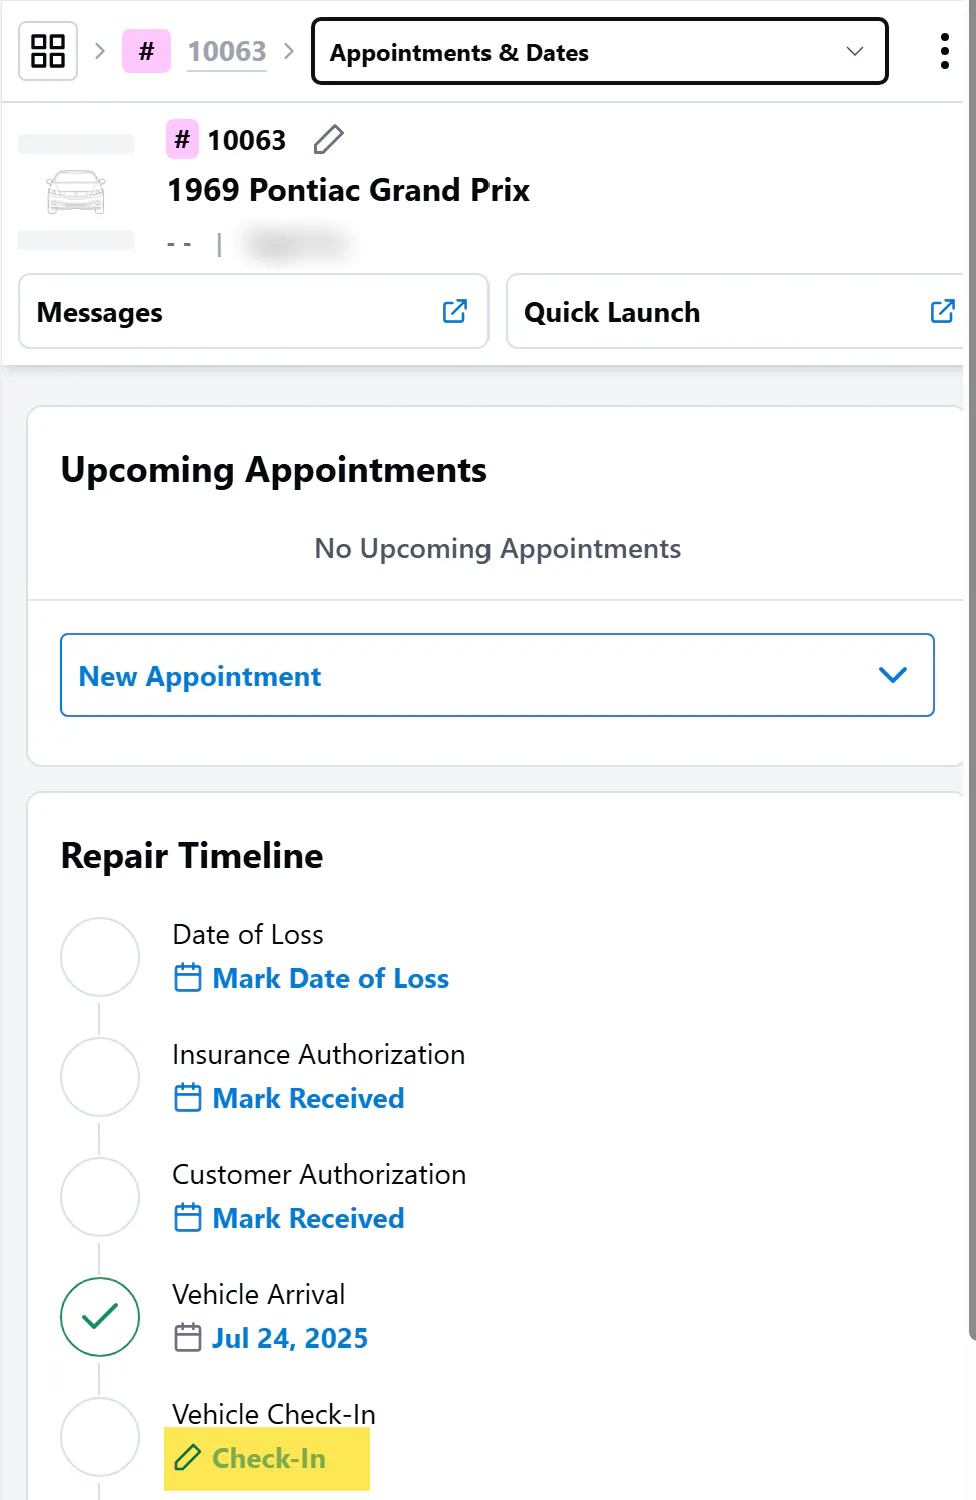
On the folder, go to Appointments & Dates. Under Repair Timeline, select Check-In next to Vehicle Check-In.
-
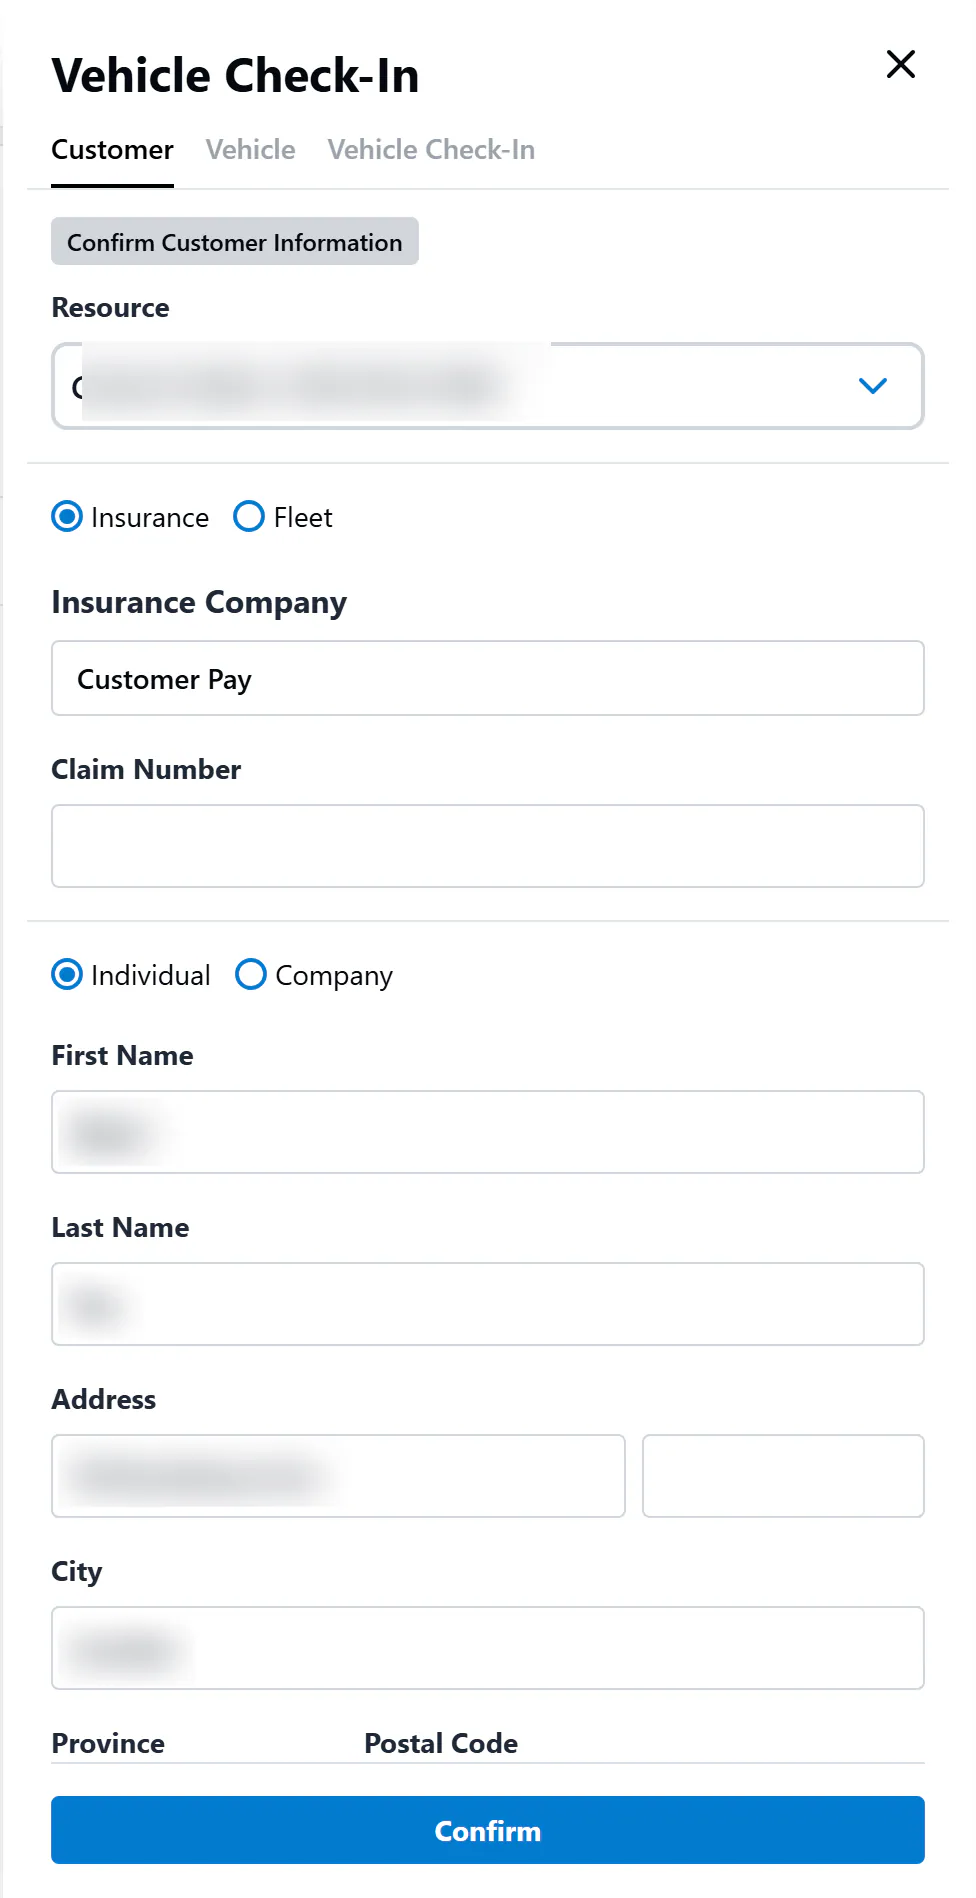
On the Customer tab, check that the customer information is correct and fill in anything missing. Then select Confirm.
-
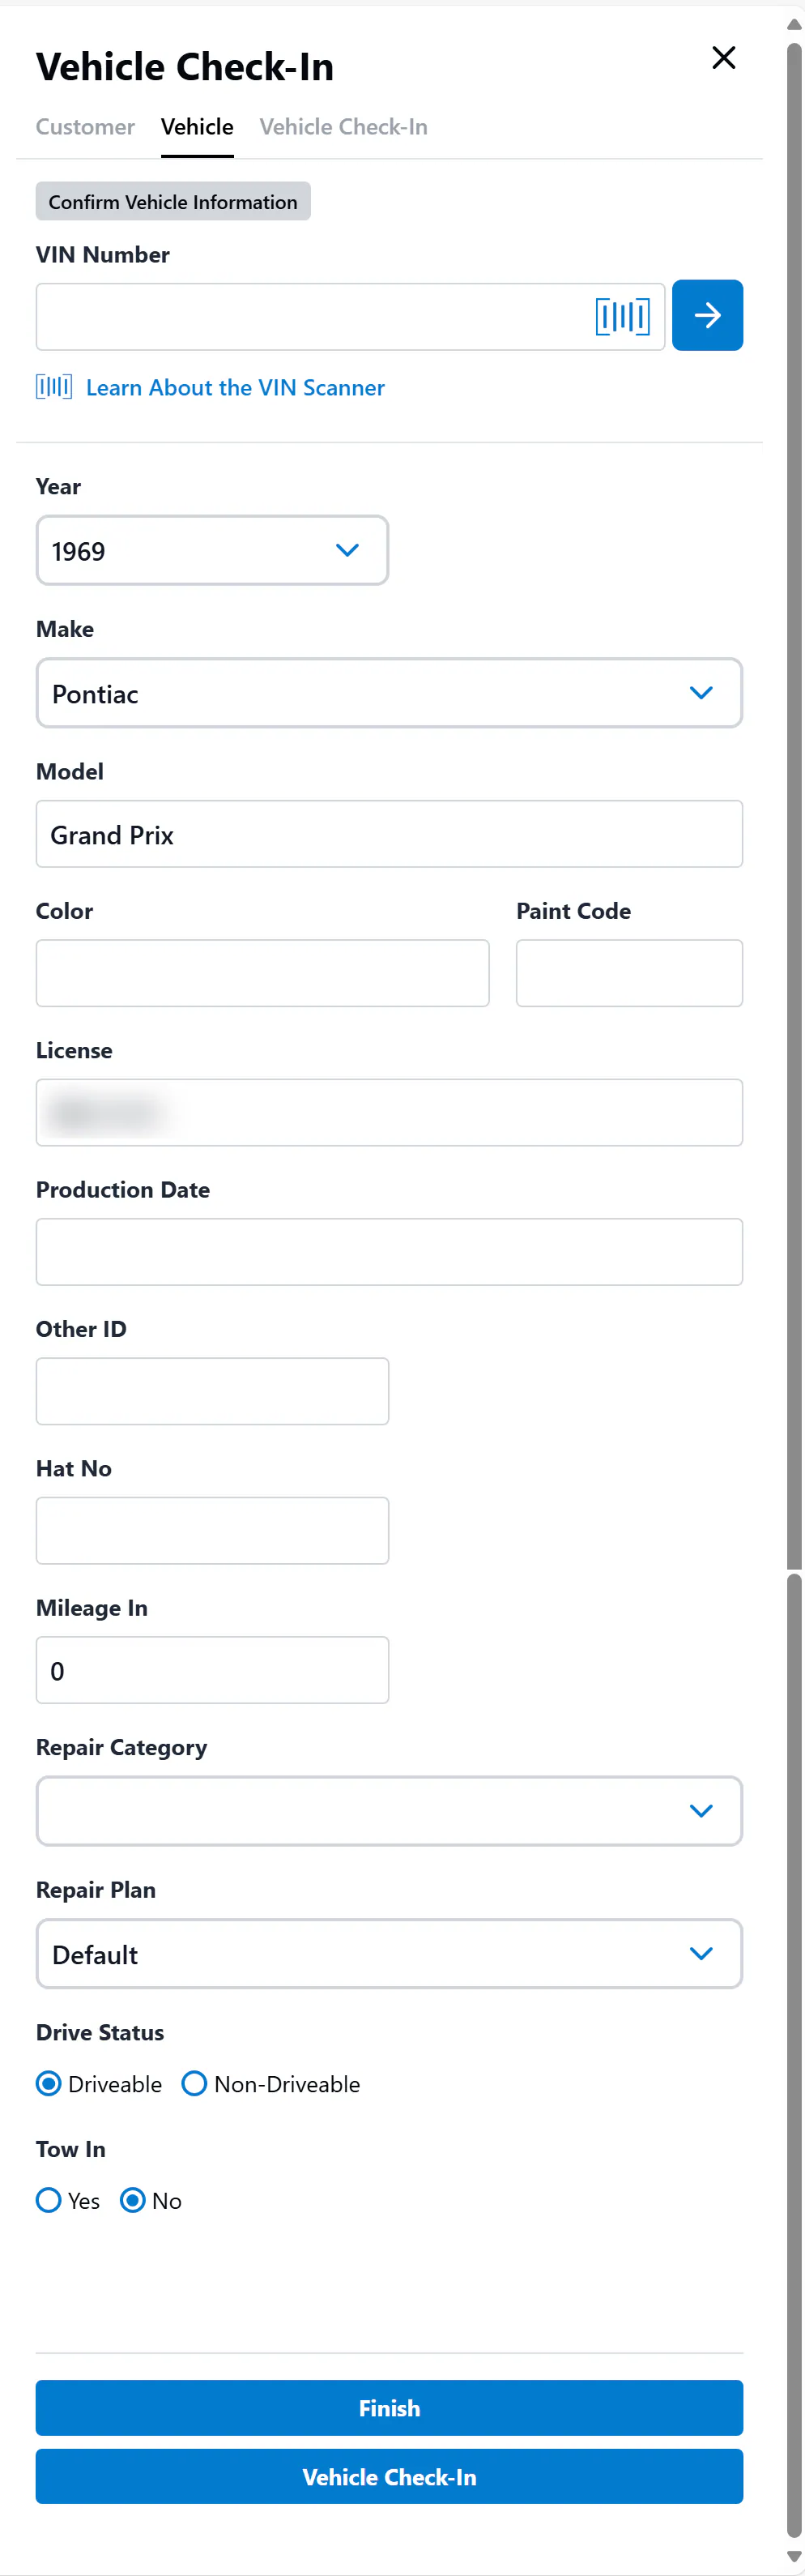
On the Vehicle tab, review the vehicle details. To fill in the VIN, year, make and model, select the barcode icon to open the VIN scanner, then scan the VIN sticker.
-
Choose how to finish:
- Select Finish to complete the check-in now.
- Or select Vehicle Check-In to load the questions for the repair category.
-
If you selected Vehicle Check-In, the questions for the Repair Category appear. Go through them with the customer, then select Confirm.
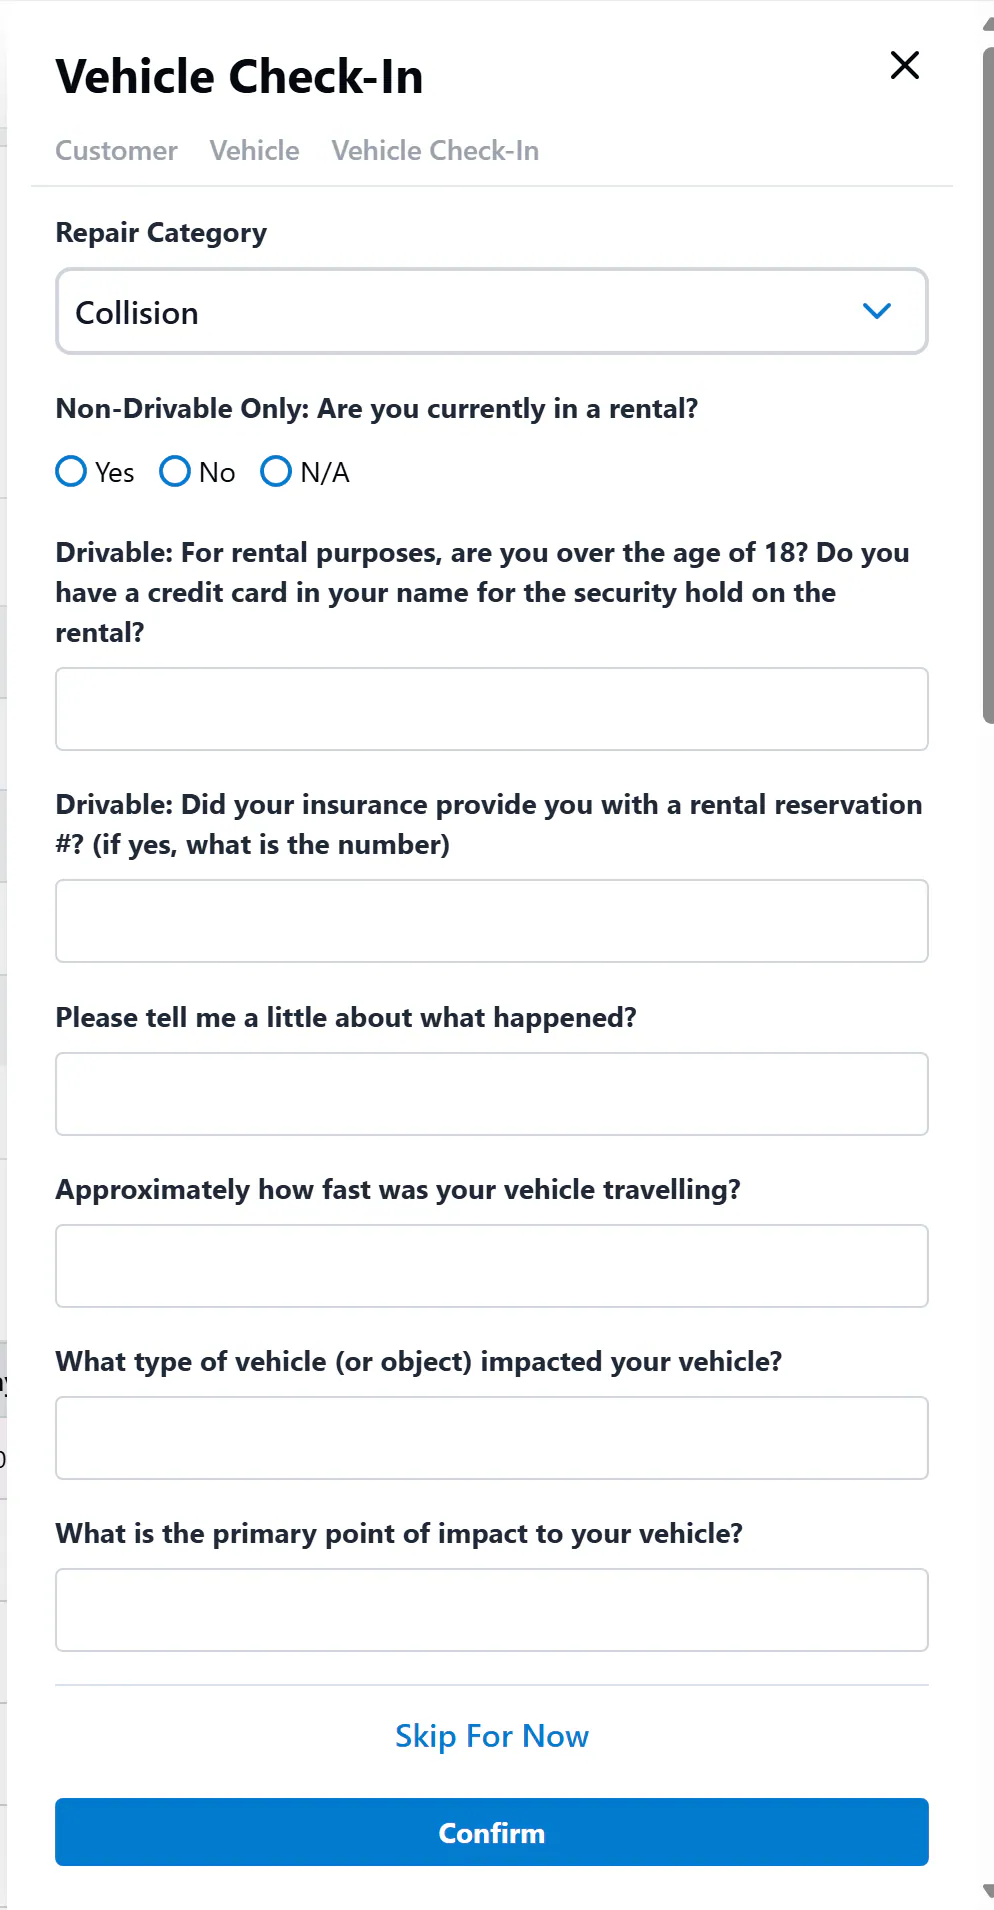
When the check-in is complete:
- Vehicle Check-In on the Repair Timeline is marked complete.
- The customer and vehicle information you updated is saved in Nexsyis.
- An e-Vehicle Check-In Sheet is added to the folder’s Documents tab.
Set up repair questions
Section titled “Set up repair questions”The repair types and questions are specific to your company. Each repair category can have its own questions, and each question can have its own answers.
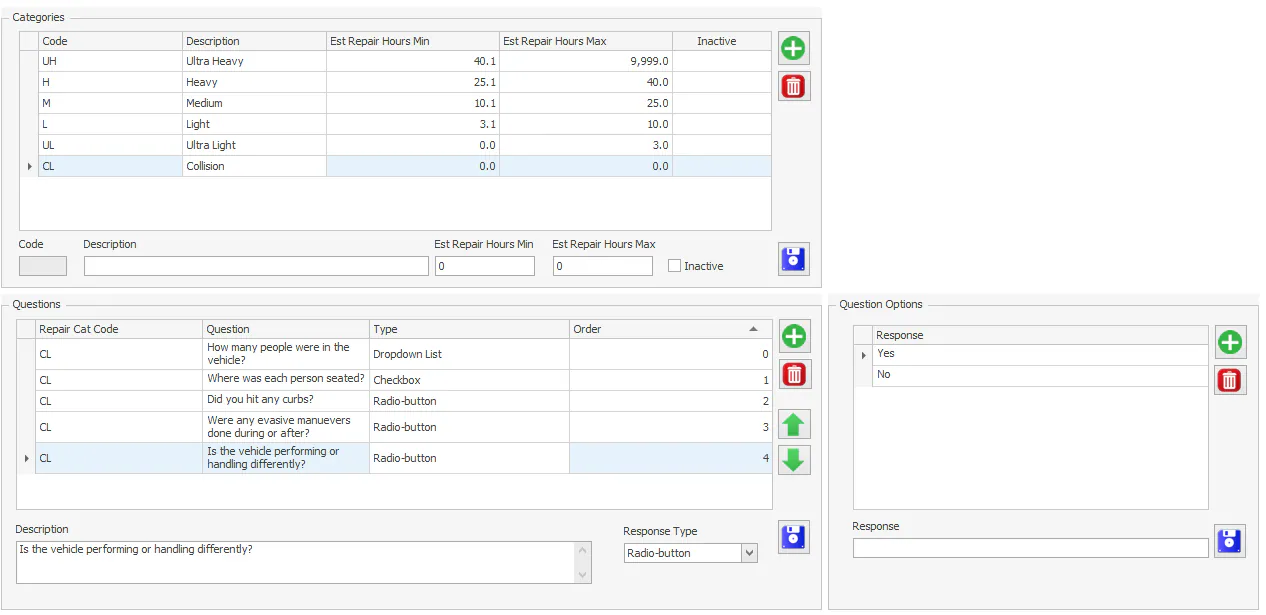
Open System › Setup, then select Production › Repair Categories.
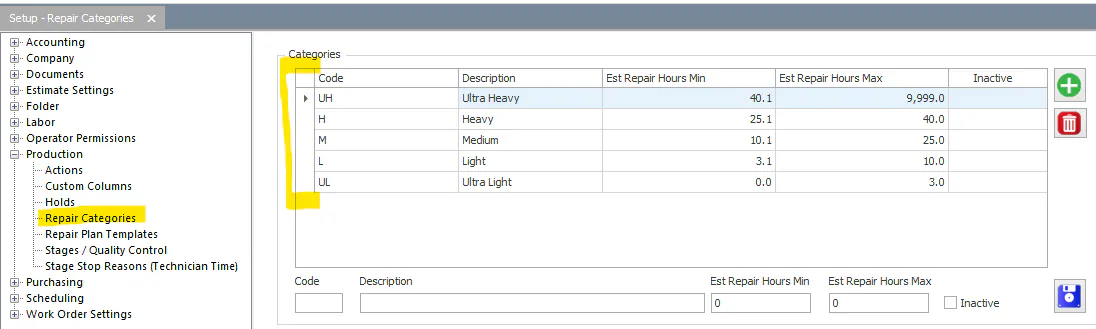
Add a repair category
Section titled “Add a repair category”The categories make up the Repair Category list. Nexsyis comes with default categories. To stop using one, select it and select the delete button on the right.
- Enter a Code and Description.
- Select the save button.
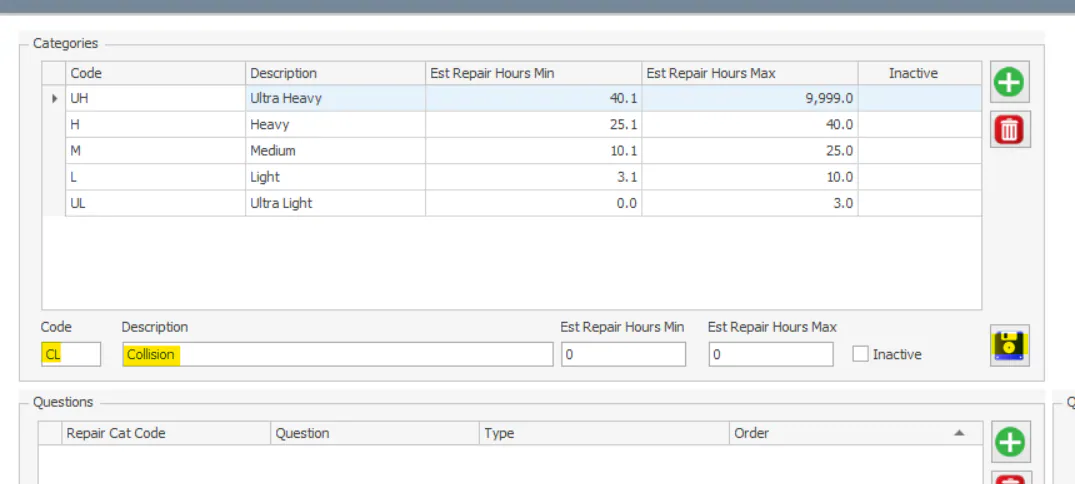
Add questions to a category
Section titled “Add questions to a category”- Select the category at the top.
- Under Questions, enter the question in Description.
- Choose the Response Type: Checkbox, Dropdown List, Radio-button (use it for two answers, such as Yes and No) or Text.
- Select the save button. The question is added to the list.
- Repeat for each question in the category.
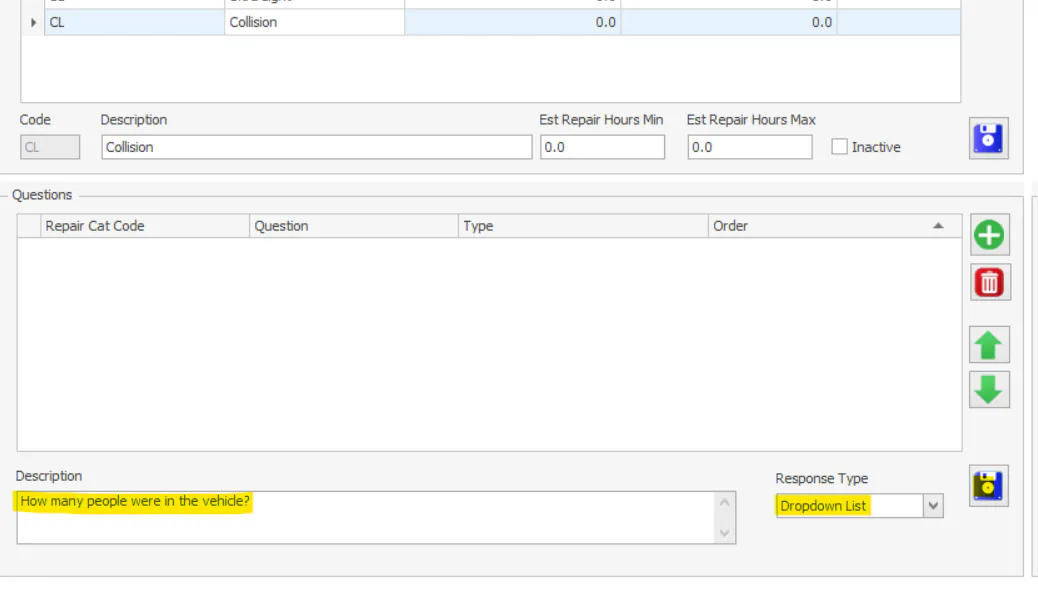
Add answer options to a question
Section titled “Add answer options to a question”- Select the question.
- Under Question Options, enter an answer in Response.
- Select the save button. The answer is added to the list.
- Repeat for each answer.
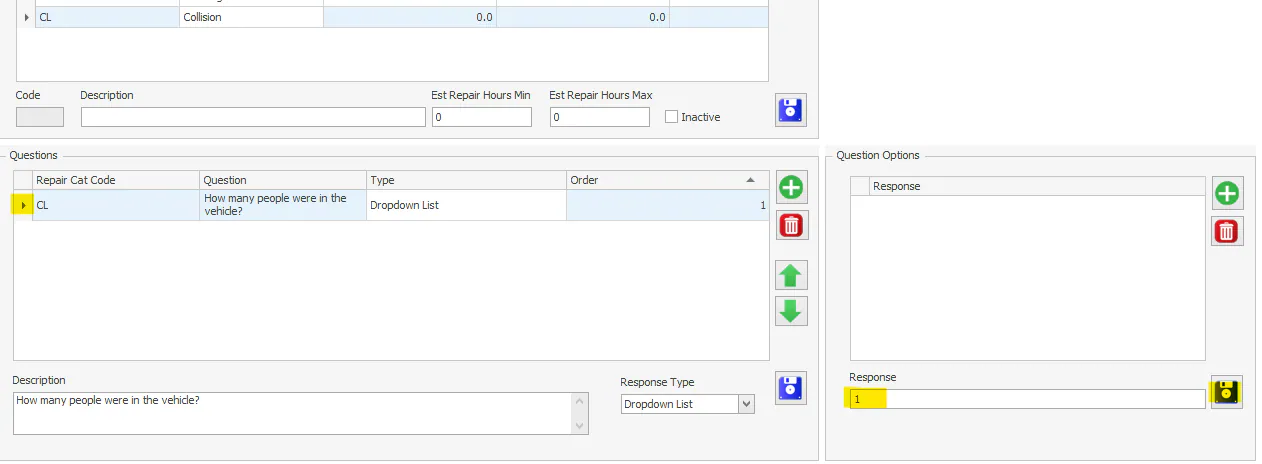
A finished category with its questions and answers looks like this: