
Refund a customer
Enter a refund when you give money back to a customer or insurance company, for example after an overpayment or a deposit on a repair that didn’t go ahead. If you’re refunding by company check, you then create and print the check.
Enter a refund
Section titled “Enter a refund”-
Open the refund screen in either of these ways:
-
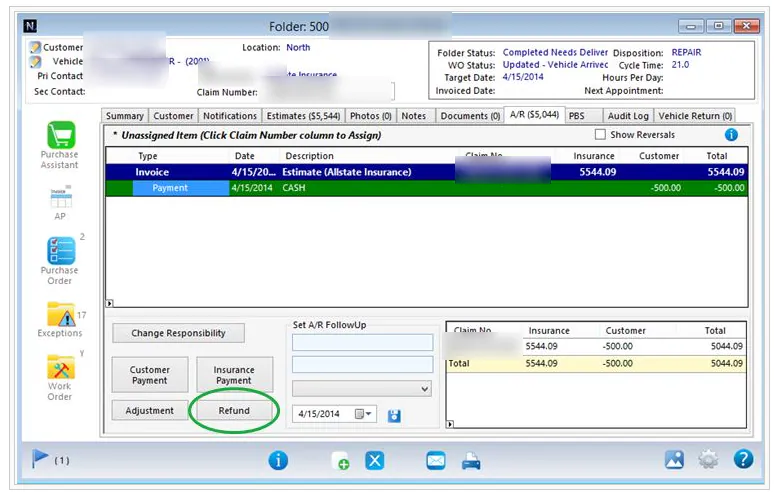
On the folder’s A/R tab, select Refund.
-
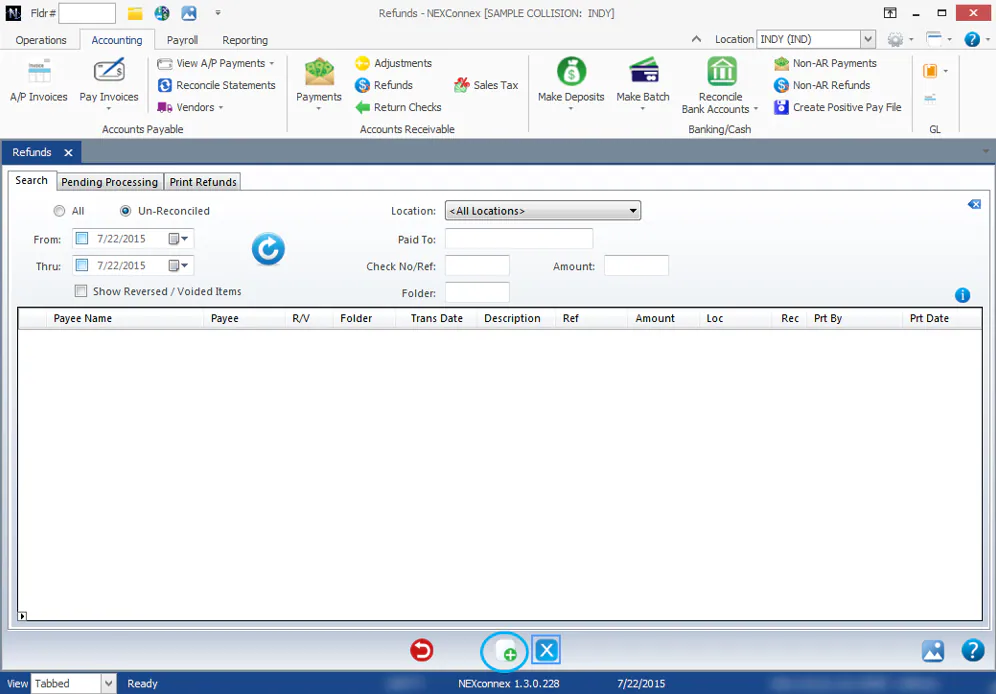
Go to Accounting › Accounts Receivable › Refunds. Search first to make sure the refund hasn’t already been entered, then select New.
-
-
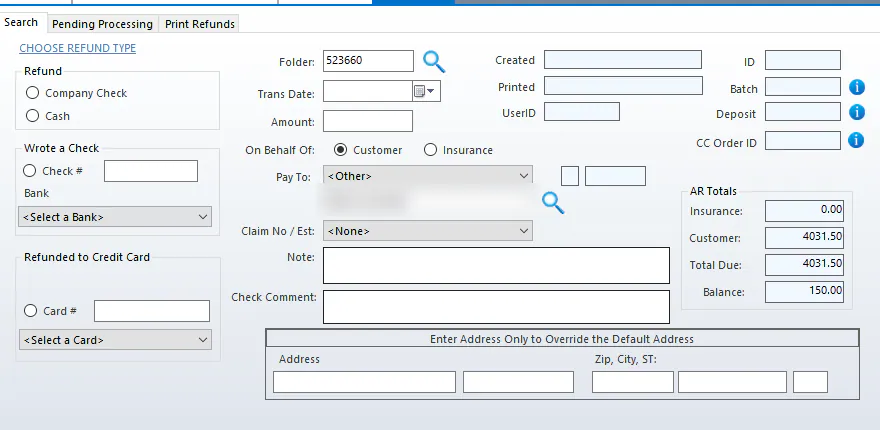
On the left, choose how you’re giving the refund:
- Refund › Company Check: you’ll print a refund check from Nexsyis.
- Refund › Cash: you’re giving the customer or insurance company cash.
- Wrote a Check: you already wrote a check from a company checkbook. Enter the Check # and choose the Bank.
- Refunded to Credit Card: you refunded the amount to a card.
-
On the right, fill in the refund details: Trans Date, Amount, On Behalf Of (Customer or Insurance), Pay To, and a Note if you want one.
-
If the refund must go to a different address than the usual one, for example an insurance company with a separate refund address, enter it under Enter Address Only to Override the Default Address.
-
Select Save.
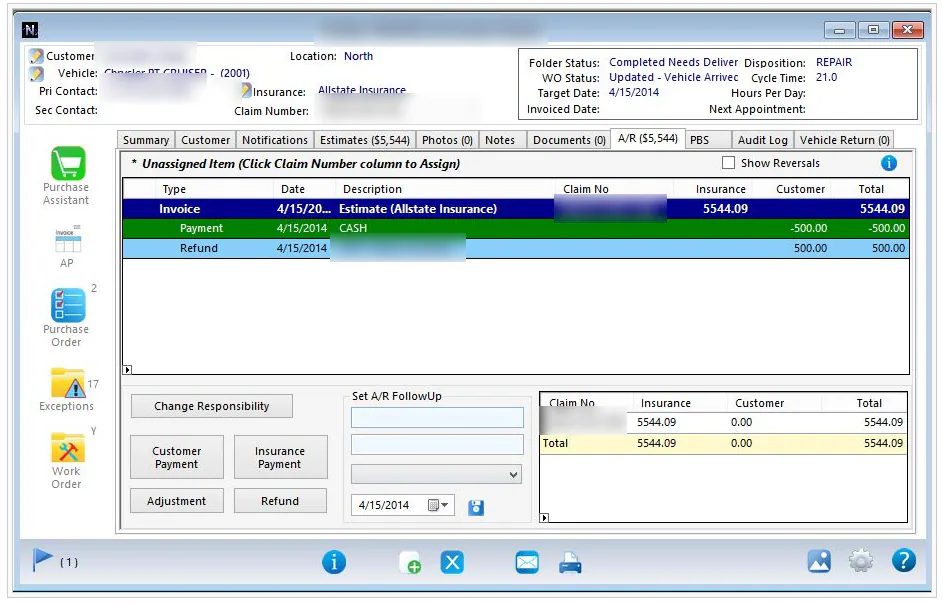
The refund shows on the folder’s A/R tab as a light blue line.
Print refund checks
Section titled “Print refund checks”Refunds entered as Company Check wait on the Pending Processing tab until you create the checks.
-
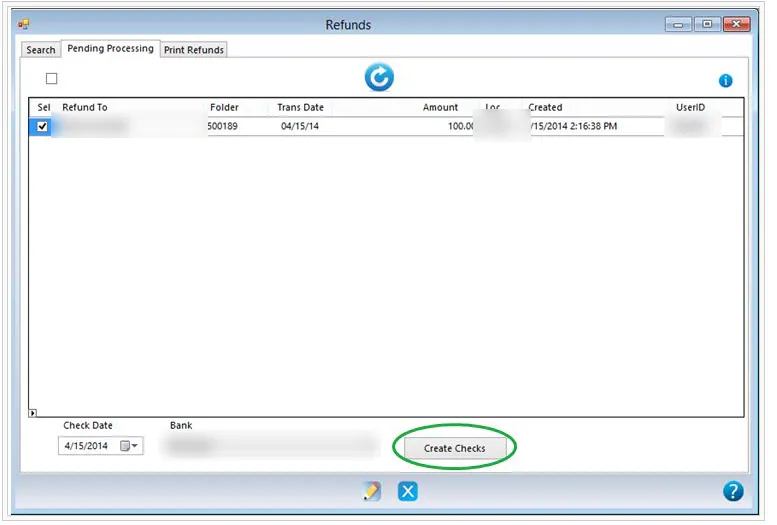
Go to Accounting › Accounts Receivable › Refunds and select the Pending Processing tab.
-
Select the checkbox in the Sel column for each refund you want to create a check for.
-
At the bottom, choose the Check Date and Bank, then select Create Checks.
-
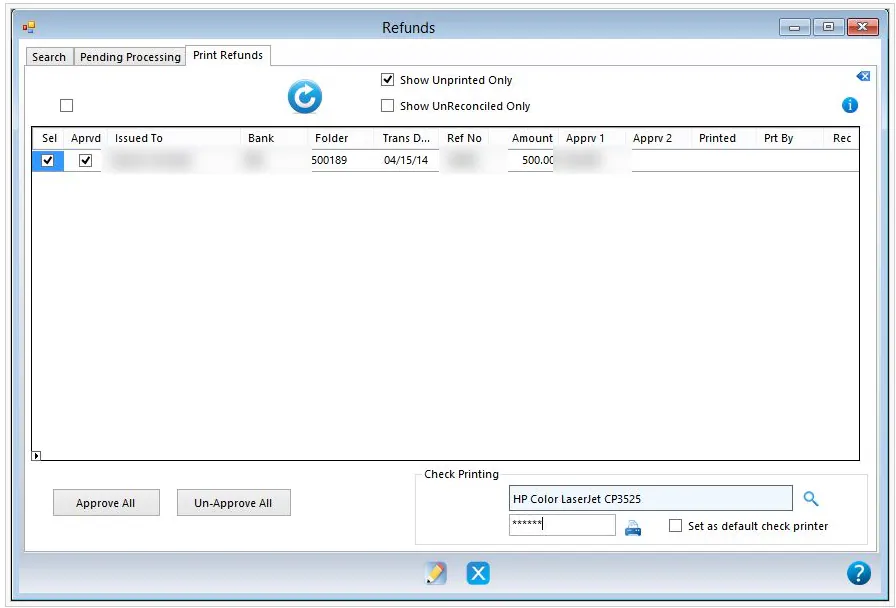
Select the Print Refunds tab. The checks you just created are listed.
-
Approve the checks: you, or someone with approval permission, select the checkbox in the Aprvd column, or select Approve All.
-
Select the checkbox in the Sel column for each check you want to print.
-
Enter your Nexsyis password in the box under Check Printing, then select the print button.
-
When you’re asked whether to mark the checks as printed, select Yes unless you expect to print another copy.
Pay a non-AR refund
Section titled “Pay a non-AR refund”A refund that isn’t tied to a folder’s AR is paid through accounts payable:
- Create a new AP invoice.
- Distribute it to the financial category of the party you’re refunding.
- Pay the invoice by creating an AP check batch.
- Print the check.
See Print a check batch.