Purchase Assistant overview
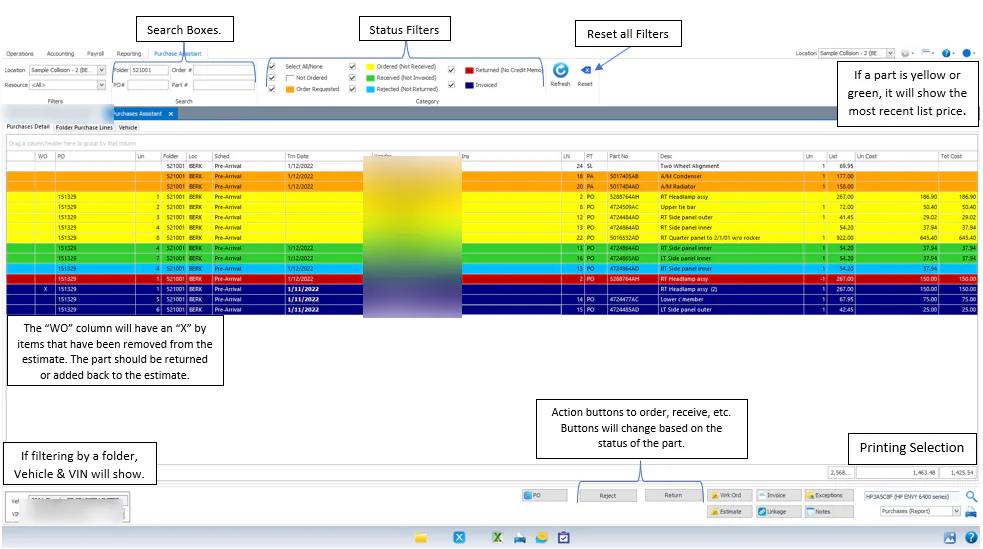
The Purchase Assistant lists the purchase lines from your work orders and shows what still needs to happen to each one: ordering, receiving, invoicing or returning. It’s a to-do list for purchases, not a full history of a repair’s parts.
Open it from the Operations tab, or from within a folder.
Order status colors
Section titled “Order status colors”Each line’s color shows its status.
| Color | Status | Meaning |
|---|---|---|
| White | Not Ordered | No action has been taken. |
| Orange | Order Requested | Optional. The part has been marked as needing to be ordered. |
| Yellow | Ordered (Not Received) | The part has been ordered but hasn’t arrived. |
| Purple | Back Ordered | The vendor has the part on back order. |
| Green | Received (Not Invoiced) | The part has arrived but hasn’t been invoiced. |
| Cyan | Rejected (Not Returned) | The part is wrong, damaged or no longer needed, and is still at the shop. |
| Red | Returned (No Credit Memo) | The vendor has picked up the part, but no credit memo has been entered. |
| Navy | Invoiced | The invoice or credit memo has been entered. |

The Trn Date column
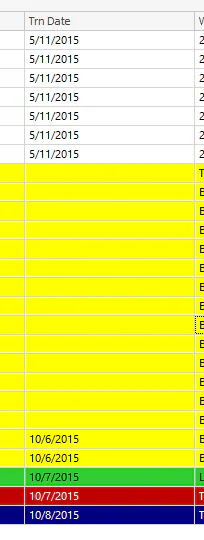
Section titled “The Trn Date column”The Trn (transaction) date shows a different date depending on the line’s status:
- Not Ordered: the date the work order was created.
- Ordered (Not Received): blank, unless an expected delivery date was set. See Set expected delivery on a PO.
- Received (Not Invoiced): the date the part was received.
- Rejected (Not Returned) and Returned (No Credit Memo): the date the part was rejected or returned.
- Invoiced: the invoice date.
The Status Note column
Section titled “The Status Note column”Use Status Note to add a note to a line while it’s in its current status. When the status changes, for example from ordered to received, the note no longer shows. This keeps each status’s note separate as a part moves through receiving, rejecting and reordering.

Print from the Purchase Assistant
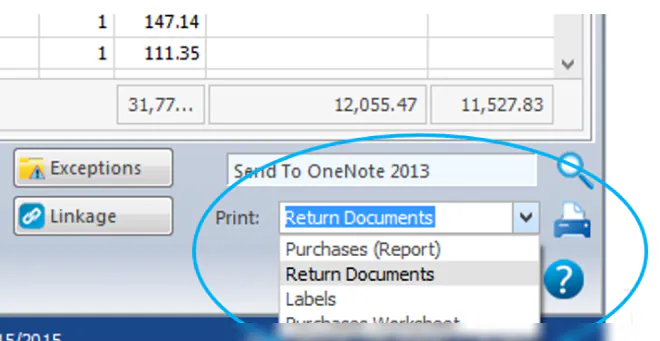
Section titled “Print from the Purchase Assistant”Choose an option from the Print list at the bottom right, then select the print icon:
- Print: prints the grid as it’s shown.
- Purchases: a formatted report of what’s on screen.
- Return Documents: return documents for rejected parts. See Print return documents.
- Labels: part, invoice or folder labels. See Print parts labels.
- Purchases Worksheet: the purchase lines from the work order, useful for comparing list prices with the estimate.
Customize the grid
Section titled “Customize the grid”- Filter: use the grid filters to show lines for a vendor, insurance company, vehicle status and more.
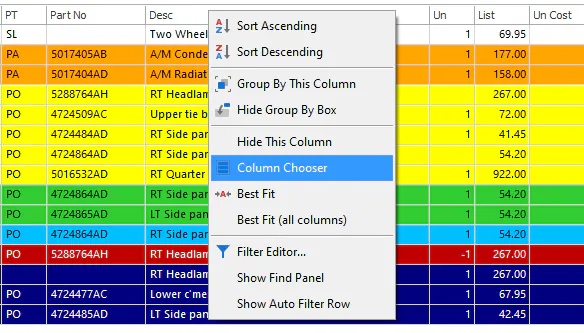
- Add a column: right-click the grid and select Column Chooser. To remove a column, drag it off the grid.
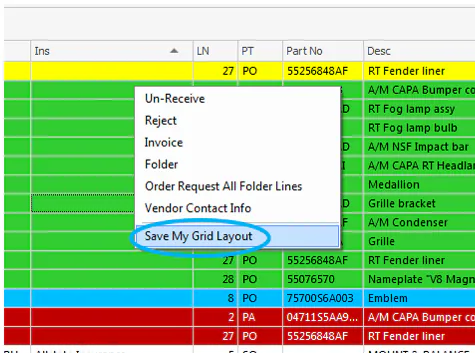
- Save your layout: right-click the grid and select Save My Grid Layout.