
Reconcile a bank account
Reconciling matches the transactions you imported from the bank to the transactions in the Nexsyis check register. Most items match automatically; you match the rest on the Reconcile Items tab.
How it works
Section titled “How it works”Nexsyis keeps the bank statement and the check register separately and matches them one transaction at a time. You can reconcile at any time, not only at month-end, so differences show up at the transaction level as they happen. Credit card accounts are reconciled the same way.
The steps are:
- Download the statement from the bank and import it.
- Accept the auto-matched items.
- Reconcile the remaining items: cash and check deposits, EFT and credit card deposits, fees, returned checks, transfers and small differences.
Before you begin
Section titled “Before you begin”Import the bank file. See Import bank and credit card transactions.
Open the reconciliation
Section titled “Open the reconciliation”-
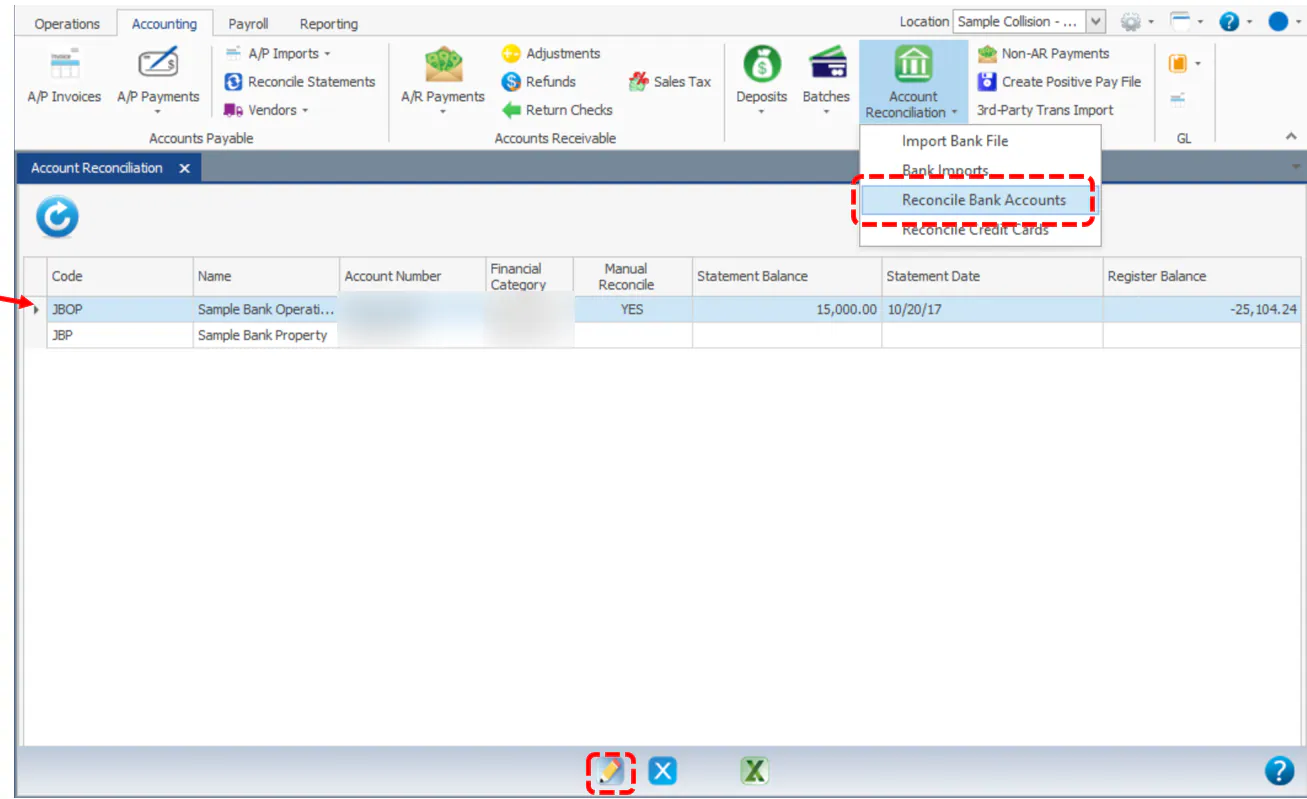
On the Accounting tab, select Account Reconciliation, then Reconcile Bank Accounts.
-
Select the bank account in Account.
Accept auto-matched items
Section titled “Accept auto-matched items”The Auto-Match tab matches items on the bank statement (left) with entries in Nexsyis (right). Clear any item you don’t want reconciled yet, then select Save to reconcile the rest.
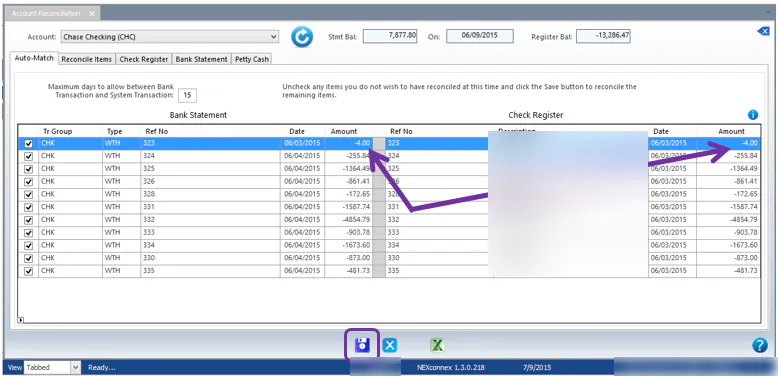
Maximum days to allow between Bank Transaction and System Transaction sets how far apart the dates can be for an automatic match.
Reconcile the remaining items
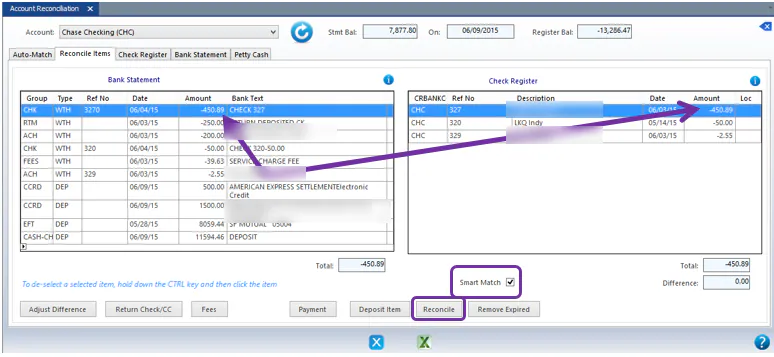
Section titled “Reconcile the remaining items”The Reconcile Items tab lists items that couldn’t be matched automatically: the bank statement on the left and the check register on the right.
To clear a selected item, hold down Ctrl and select it.
Cash and check deposits
Section titled “Cash and check deposits”Many payments have the same amount, such as $250 or $500 deductibles, so Nexsyis can’t match them all automatically.
- Select Smart Match.
- Select a transaction on the left. If the check register has a transaction with the same amount, it’s highlighted and moved to the top of the list on the right.
- Select the matching items, then select Reconcile.
EFT deposits
Section titled “EFT deposits”-
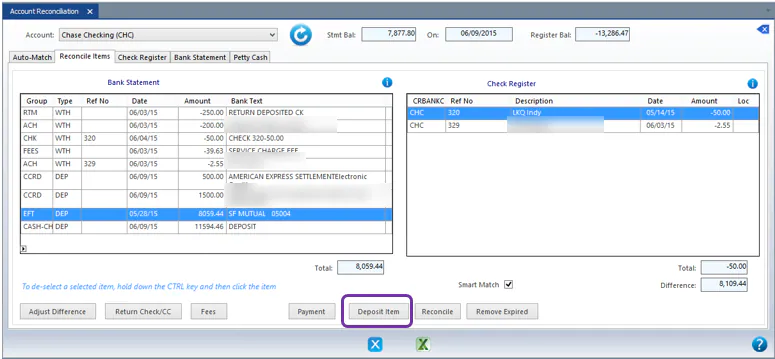
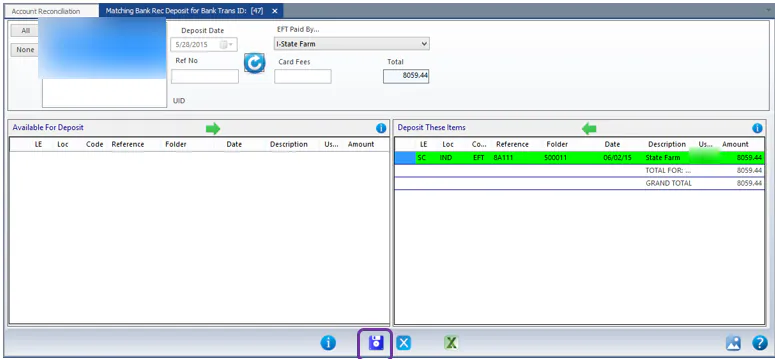
Select the EFT line and select Deposit Item.
-
If no payer is assigned, select it under EFT Paid By. Select a location to narrow the results.
-
Find the payments that make up the EFT. Move any that don’t belong to the left with the green arrow above the grid.
-
When the deposit total matches the bank amount, select Save.
Credit card deposits
Section titled “Credit card deposits”-
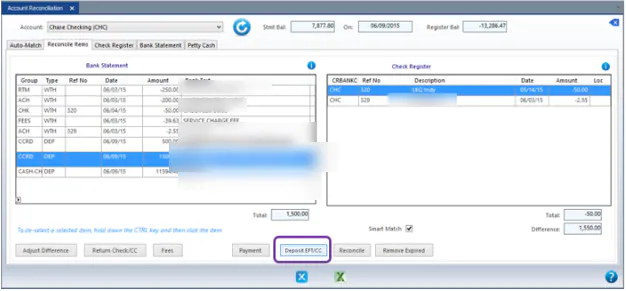
Select the credit card line (its Group shows CCRD) and select Deposit EFT/CC.
-
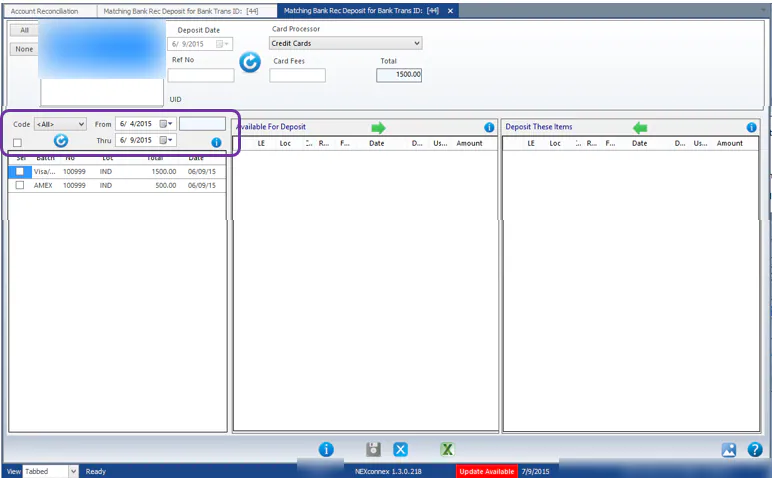
In the bottom-left grid, the date range is set to within a week of the selected transaction.
-
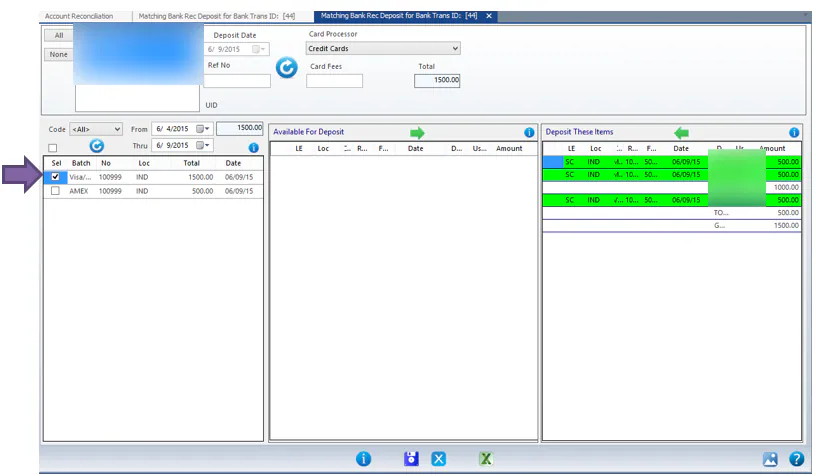
Select the checkbox of the batch that matches the bank statement.
-
If your card processor takes its fees out of the deposit, enter the fee amount in Card Fees.
-
When the amounts are equal, select Save.
For how batches are created, see Complete a credit card batch.
Bank fees
Section titled “Bank fees”For card or bank fees charged separately, create a reconciling transaction:
-
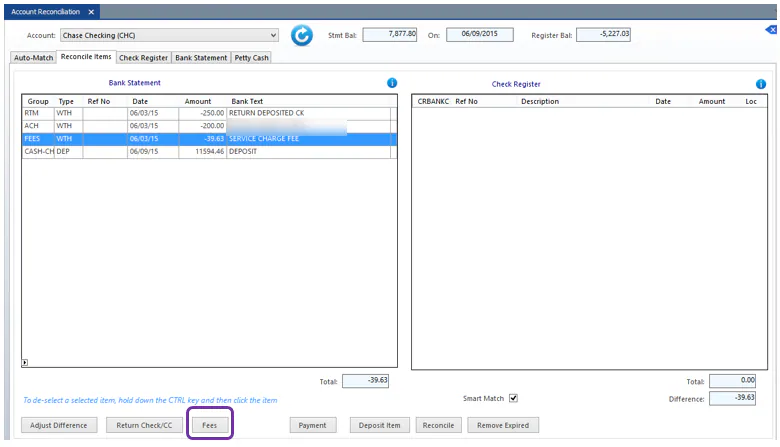
Make sure the line’s Group is FEES. Select the line, then select Fees.
-
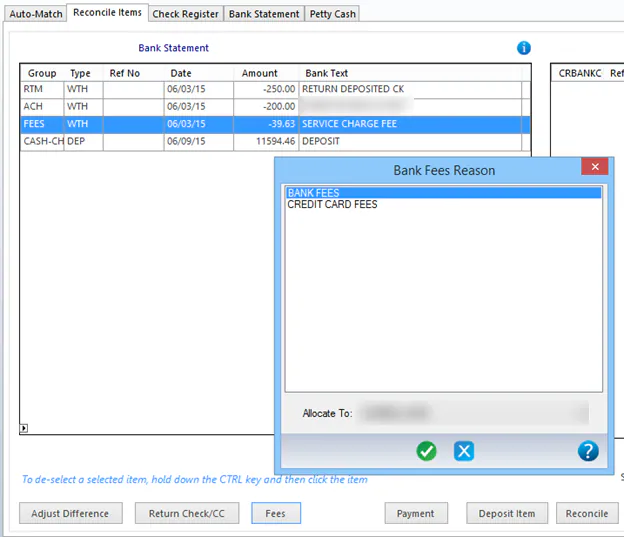
In Bank Fees Reason, select the fee type, for example BANK FEES or CREDIT CARD FEES.
-
If you want, select a location in Allocate To, then confirm.
Returned checks
Section titled “Returned checks”When a check bounces and you get a return notice, find the original payment by its amount.
-
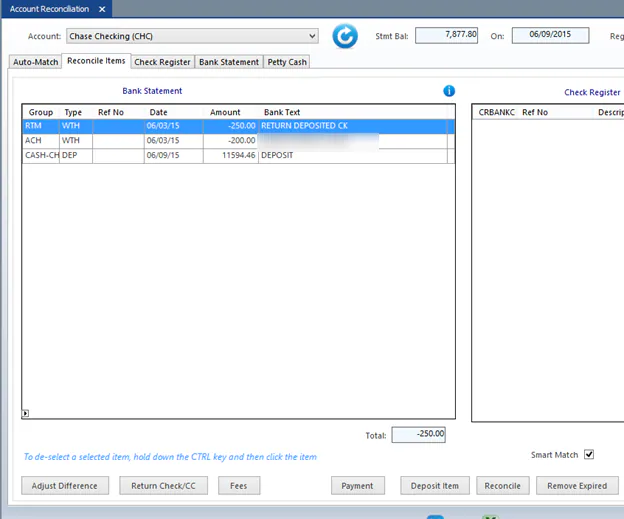
Select the returned item line and select Return Check/CC.
-
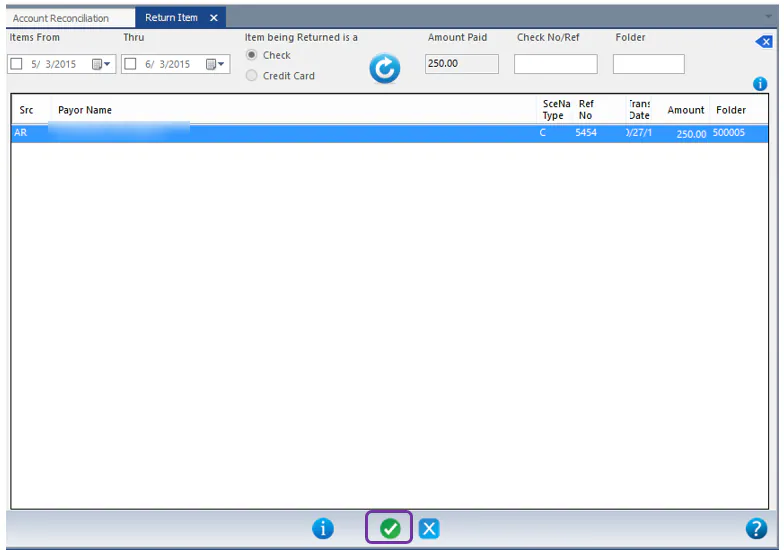
On the Return Item screen, check the date range and select refresh. Payments matching the amount in that range are listed.
-
Select the right payment and select the select button.
-
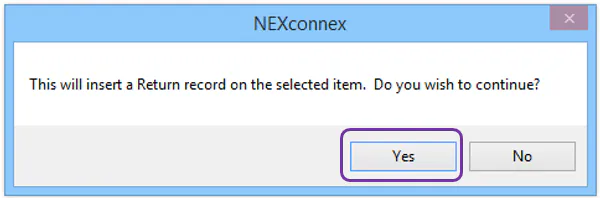
Select Yes to continue.
The returned check shows in gray on the folder’s A/R tab.

For more, see Record a returned check.
Small balance adjustments
Section titled “Small balance adjustments”If a line is off by a few cents and you can’t find why, write off the difference. The difference should be less than a dollar.
- Select the line on the left and the line that should match it on the right.
- Select Adjust Difference.
- When asked whether to write off the difference, select Yes if it’s correct.

Remove expired (unclaimed) items
Section titled “Remove expired (unclaimed) items”To move an old item that never cleared from the check register to a balance sheet account, select it and select Remove Expired at the bottom right. To find older items, sort by the date column. The screen refreshes when the item is removed.

Transfers
Section titled “Transfers”Transfers between your bank and credit card accounts post to the general ledger through bank reconciliation, but only when Nexsyis reconciles both accounts. If Nexsyis reconciles only one side, record the transfer with an AP payment or a non-AR payment instead.
- Both sides must have the TRF trans group, in both accounts. Set up trans group mapping so most transfers are marked TRF on import. If a transfer isn’t, select its group box and choose Transfer Between Cash Ac.
- When both sides are classified, their dates and amounts match, and there’s only one transfer of that amount that day, Nexsyis records the transfer automatically when you select next after the Auto-Match tab.
- Otherwise, select the transfer, pick the other side in the box that shows, and select the transfer button at the bottom.
The GL entry debits the financial category of the account transferred to and credits the financial category of the account transferred from. If the accounts belong to different legal entities, entries also post to the inter-legal-entity accounts.