
Enter an AR payment
Enter each payment you receive against the folder and the party that paid it. The payment then shows on the folder’s A/R tab and is ready to deposit.
Open the payment screen
Section titled “Open the payment screen”Use either method:
-
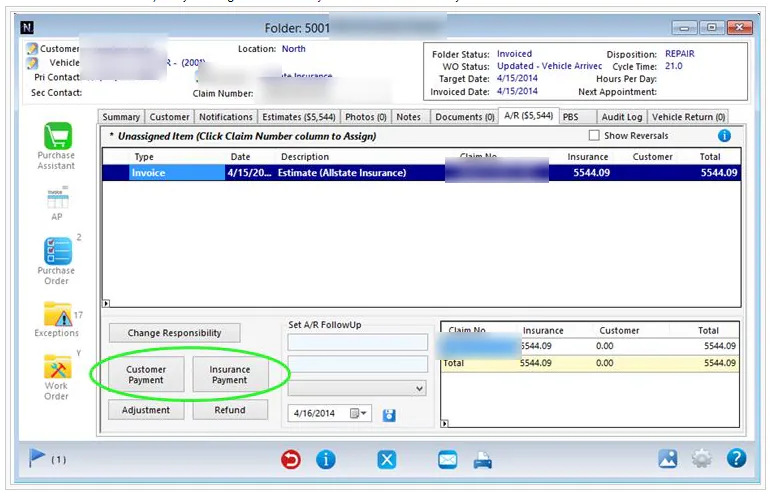
On the folder’s A/R tab, select Customer Payment or Insurance Payment.
-
Go to Accounting › Accounts Receivable › Payments. Search first to make sure the payment hasn’t already been entered, then select New.
Enter the payment
Section titled “Enter the payment”-
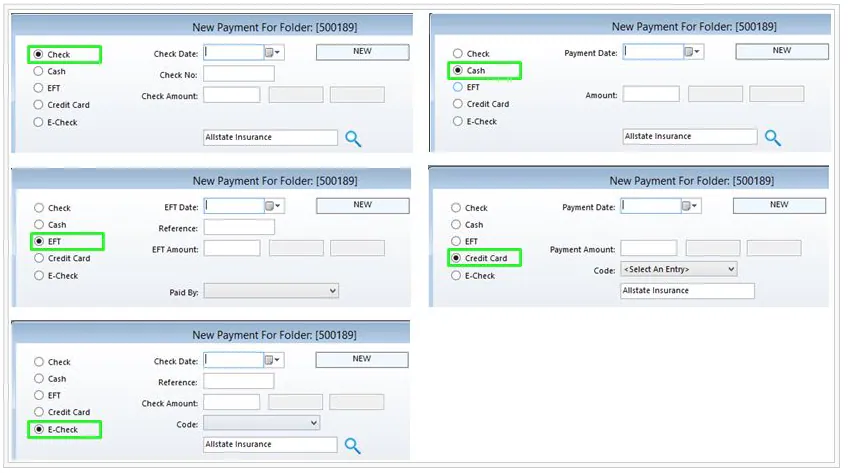
Select the payment type: Check, Cash, EFT, Credit Card or E-Check. The fields change to match the type.
-
Fill in the date, reference or check number, and amount.
The insurance company or customer is filled in automatically for check, cash, credit card and e-check payments, depending on which button you used. For an EFT, choose the payer in Paid By yourself. See Enter an EFT payment.
-
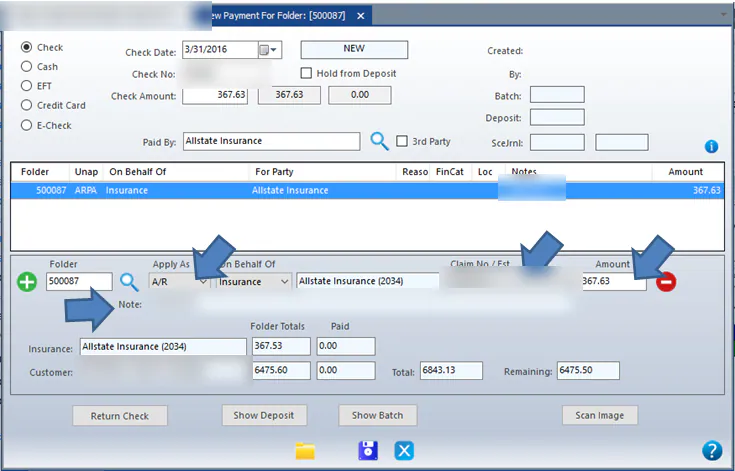
Press Enter after the amount. A distribution line is added below for the folder.
If one payment covers several folders, see Apply one payment across several folders.
-
On the distribution line:
- Leave Apply As set to A/R. To put part of the payment somewhere else, see Split a payment between AR and non-AR.
- If the folder has more than one estimate, choose the claim in Claim No / Est.
- Amount shows the full amount due from the insurance company or customer. For a partial payment, replace it with the amount paid.
- Add a Note if you want. For insurance payments, the claim number is filled in as the note.
-
When the line amounts add up to the payment amount, Save becomes available. Select Save.
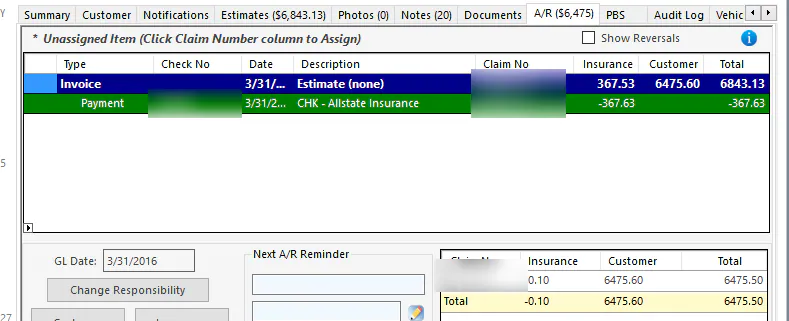
The payment shows under the invoice on the folder’s A/R tab.
Move a payment to the other party
Section titled “Move a payment to the other party”If you entered a payment against the insurance company when it should have been a customer payment, or the other way round, you don’t need to reverse it.
-
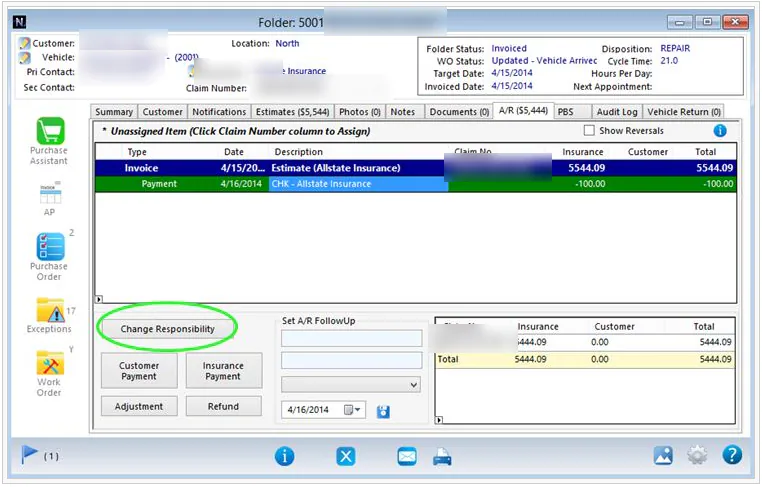
On the folder’s A/R tab, select the payment line.
-
Select Change Responsibility, or right-click the line and select Change Responsibility.
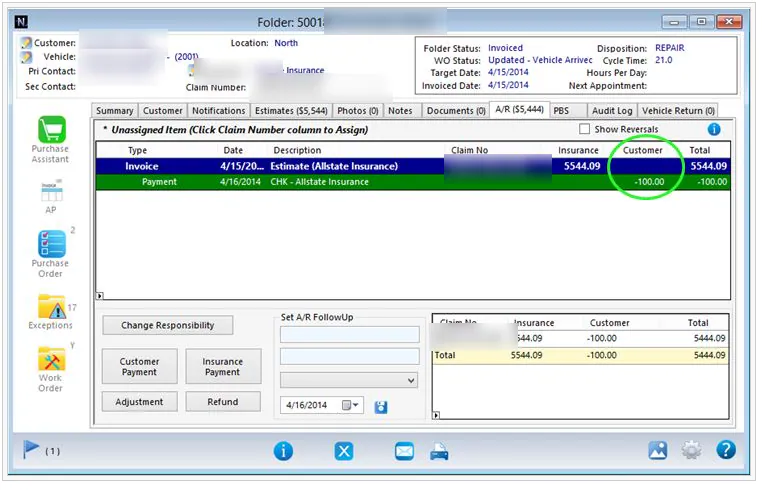
The payment now shows under the other party.
Attach the payment image
Section titled “Attach the payment image”-
Scan the check or payment notice.
-
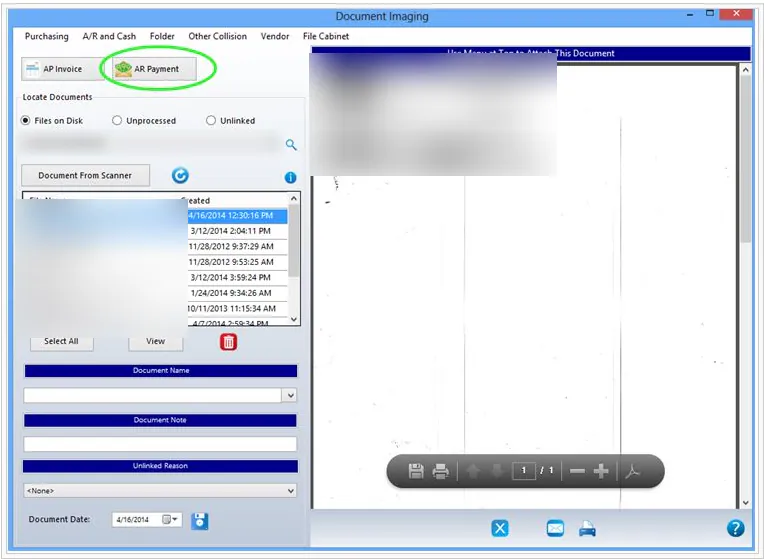
Open the File Index screen from the Imaging menu, browse to the document, and select AR Payment.
-
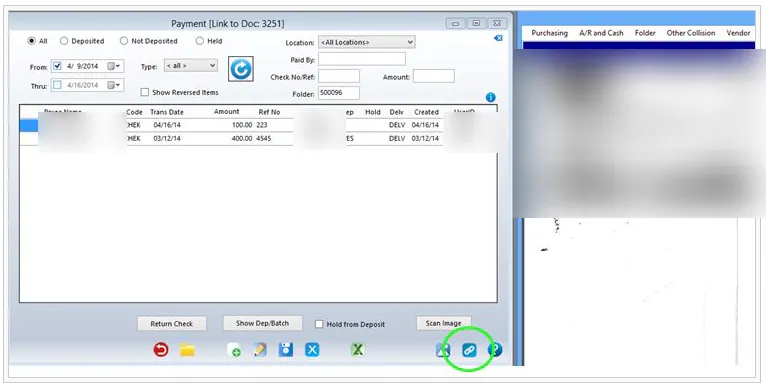
The Payments screen opens. Either:
-
Search for the existing payment, select it, and select the blue link icon at the bottom right.
-
Or select New and enter the payment. The image is linked when you save.
-