
Record a returned check
When a customer’s check bounces, the bank sends a return notice and the returned item shows on your bank statement. Record the return against the original payment so the folder shows the balance as owed again.
Mark a check as returned in the bank reconciliation
Section titled “Mark a check as returned in the bank reconciliation”Return notices are often vague, so you find the original payment by its amount.
-
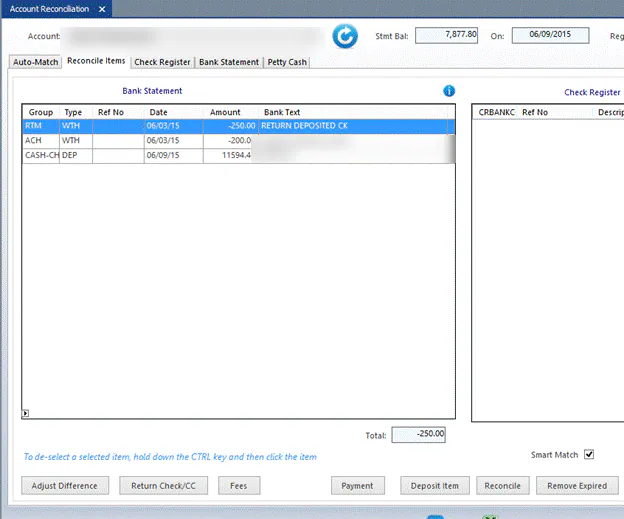
In the bank reconciliation, on the Reconcile Items tab, select the returned item line.
-
Select Return Check/CC.
-
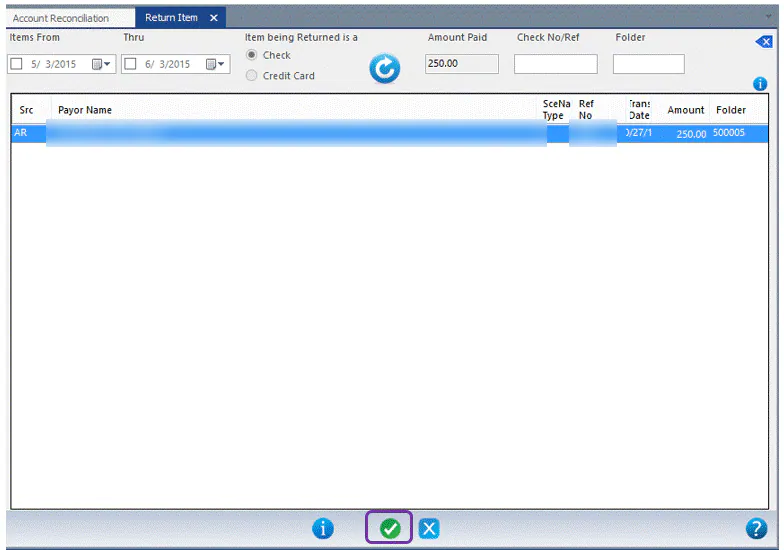
The Return Item screen opens, showing payments that match the amount. Check the date range and select the refresh button if you need to.
-
Select the original payment, then select the green check button.
-
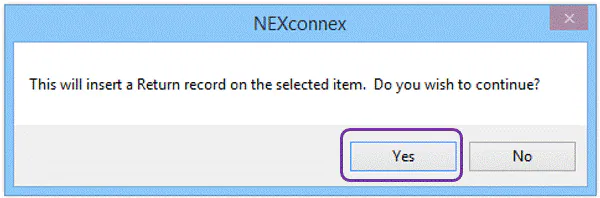
Select Yes to insert the return record.
The folder’s A/R tab shows the returned check in gray, next to the original payment.

Find returned payments
Section titled “Find returned payments”-
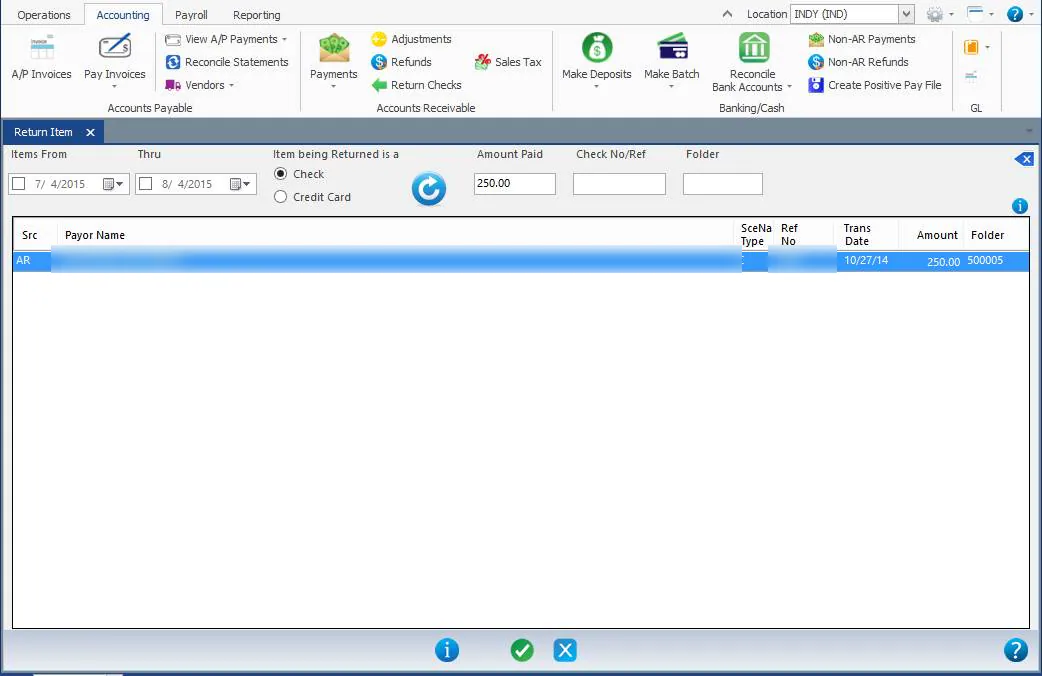
Go to Accounting › Accounts Receivable › Return Checks.
-
Under Item being Returned is a, select Check or Credit Card, enter the Amount Paid, and select the refresh button.
-
To see a payment, select it and select the details button.