Attach documents to a folder
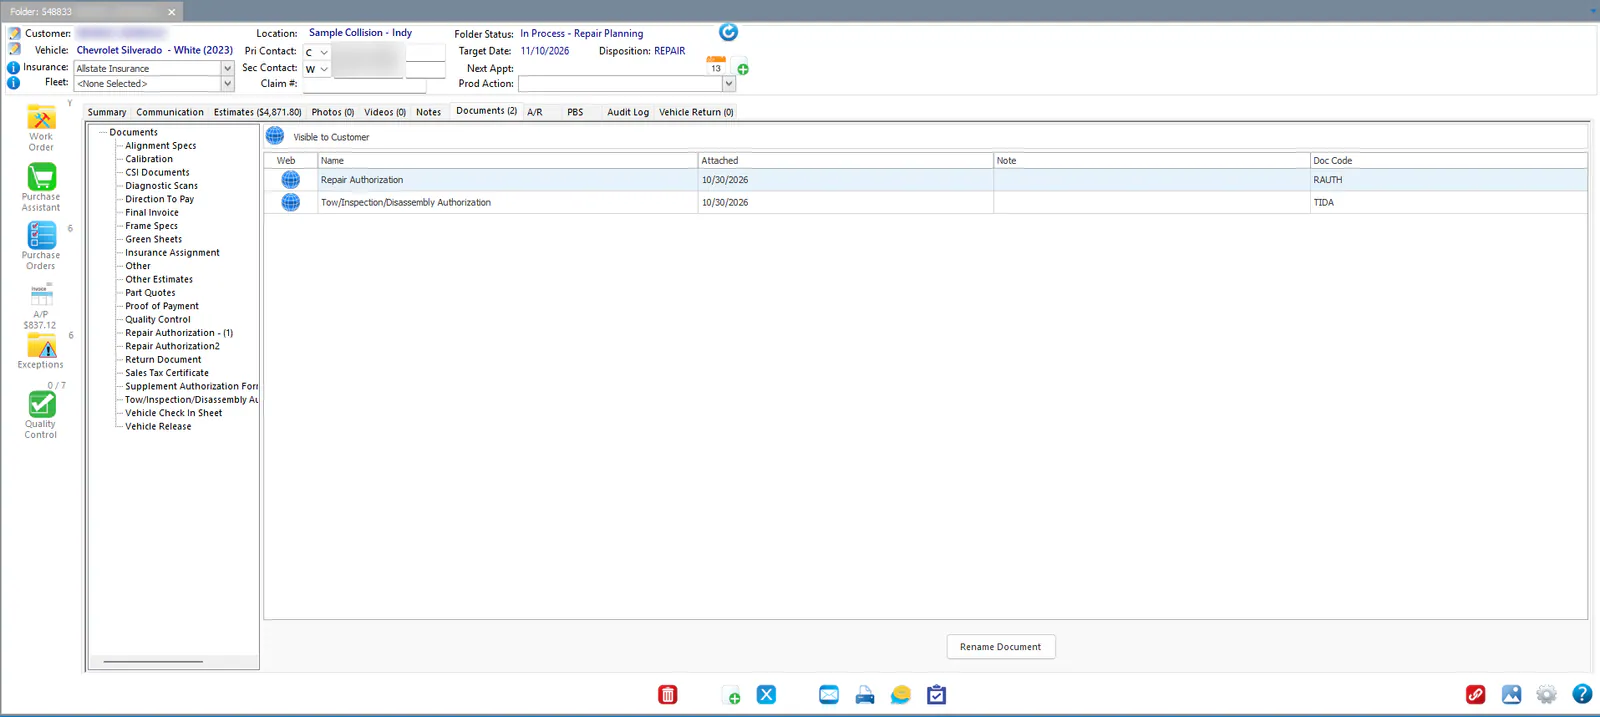
The folder’s Documents tab holds the scanned and attached documents for a repair, sorted by document type. Use it to attach a document from a file or straight from a scanner, view and rename documents, and unlink documents that belong somewhere else.
Find documents on a folder
Section titled “Find documents on a folder”The document types are listed on the left of the Documents tab. Select Documents at the top of the list to see every document on the folder, or select a type to see only those documents.
Attach a document
Section titled “Attach a document”-
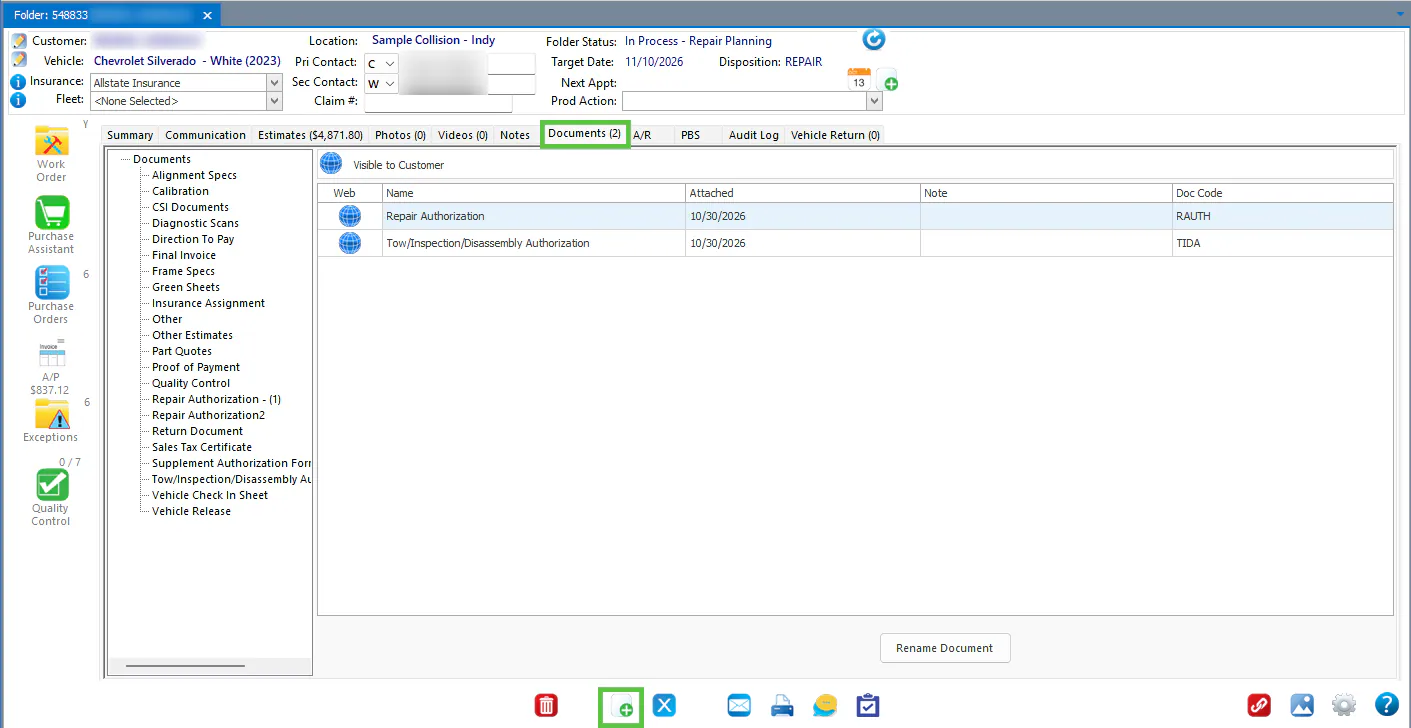
On the folder’s Documents tab, select a document type on the left.
-
Select the new document button (green +) on the button bar at the bottom.
-
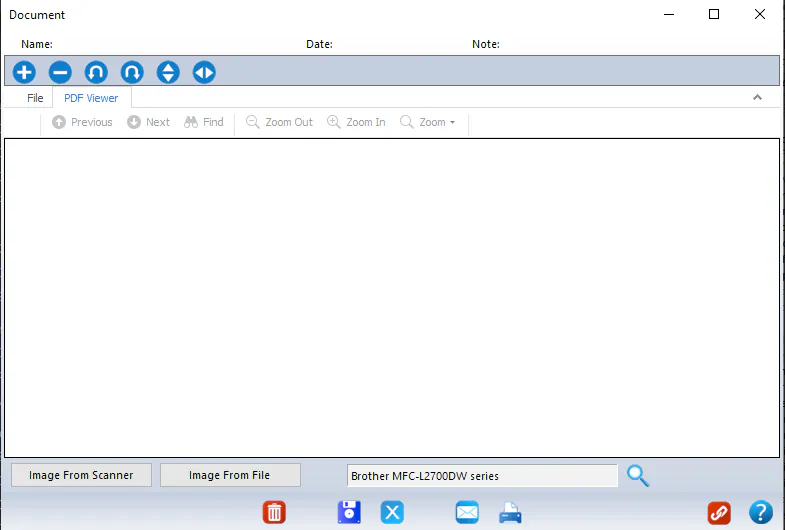
In the window that opens, choose where the document comes from:
- Image From Scanner to scan the document now. See Scan a document straight into the folder.
- Image From File to choose a document saved on your computer.
-
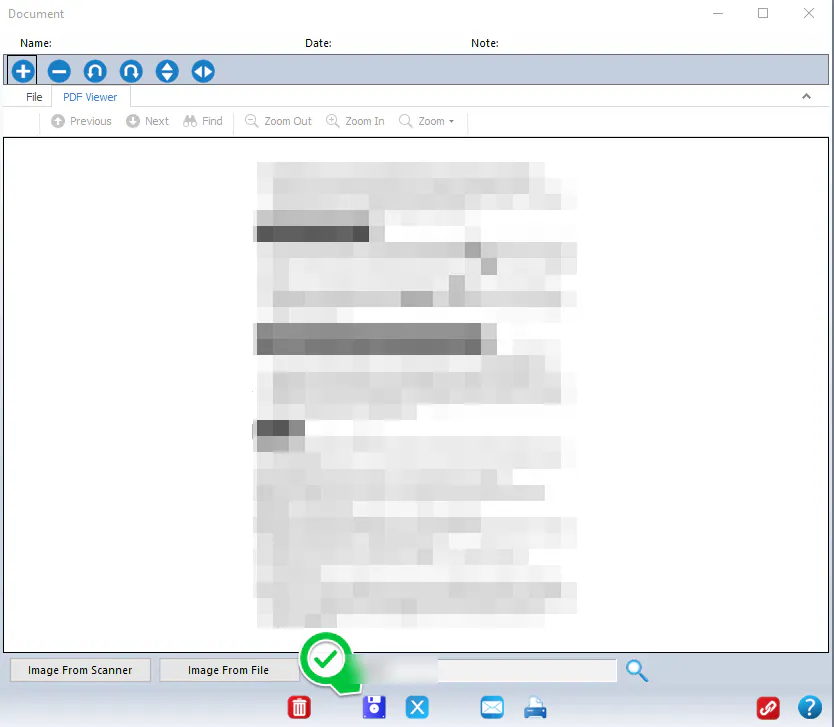
When the document shows in the window, select Save and close the window.
The document is listed under the document type you chose.
Scan a document straight into the folder
Section titled “Scan a document straight into the folder”You can scan from the folder’s Documents tab with Image From Scanner, or from the document imaging screen with Document From Scanner. The steps are the same.
-
Select Image From Scanner (or Document From Scanner).
-
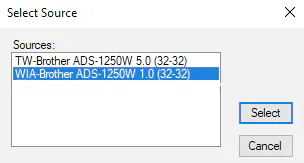
Select your scanner from the list, then select Select.
-
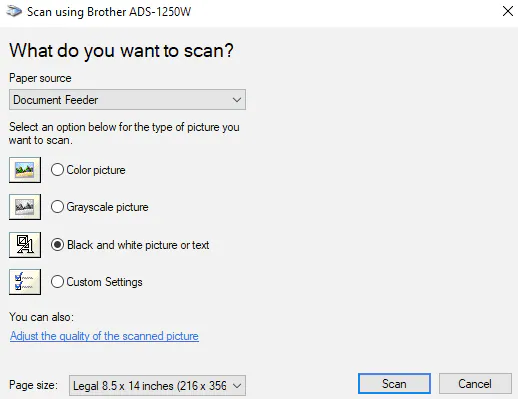
Scan the document using your scanner’s own window. Your scanner’s options will look different from this example.
-
Select Save.
To link scanned documents from the document imaging screen instead, see Link documents.
Capture a document with a phone in NexsyisNow
Section titled “Capture a document with a phone in NexsyisNow”You can capture a document with your phone’s camera in NexsyisNow.
- On the folder’s Documents tab, select Capture Document.
- Select the document type.
- Take a photo of each page of the document.
The document is saved to the folder’s Documents tab as a multi-page PDF.
View a document
Section titled “View a document”Double-click the document, or select it and then select the blue image icon at the bottom right.
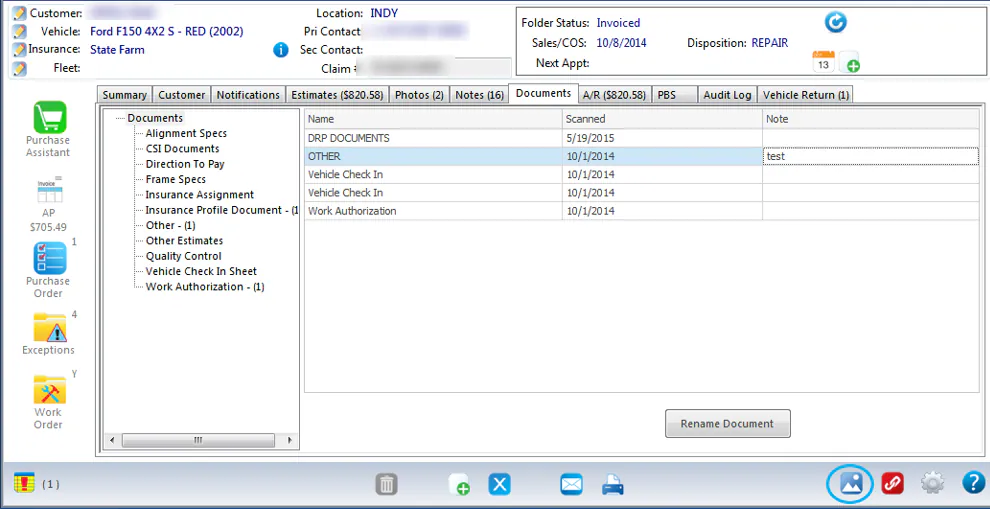
The document opens in a viewer, where you can print it, email it or delete it.
To add a note to a document, double-click its Note column.
Rename a document
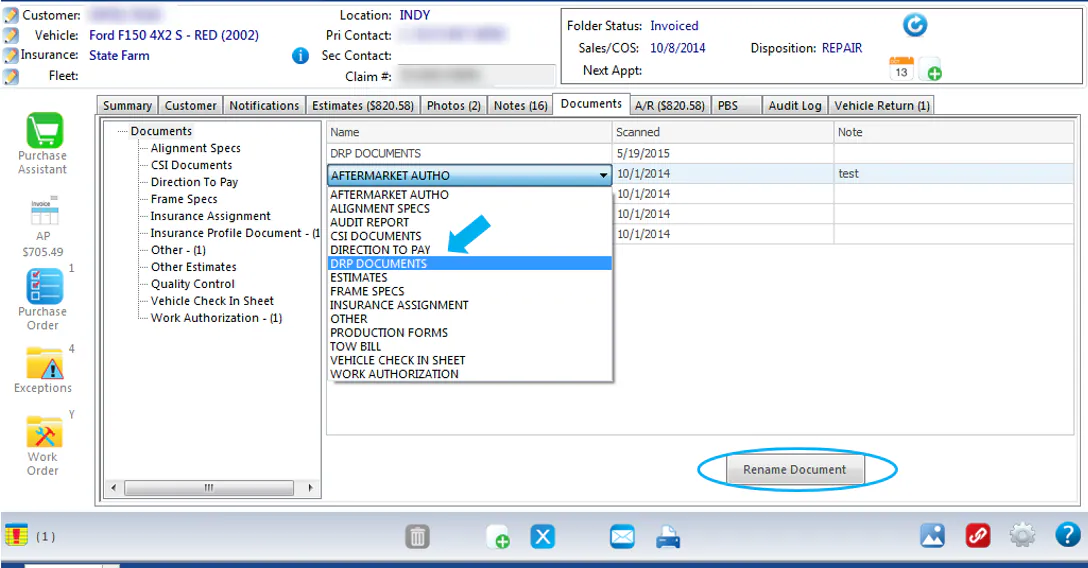
Section titled “Rename a document”Nexsyis names a document automatically when it’s imaged. To give it a different name:
- Select the document.
- Select Rename Document.
- Choose the new name from the list that opens in the Name column.
Unlink a document
Section titled “Unlink a document”Unlink a document that was attached to the wrong folder or type.
- Select the document on the Documents tab, or open it in the viewer.
- Select the red Unlink button at the bottom right.
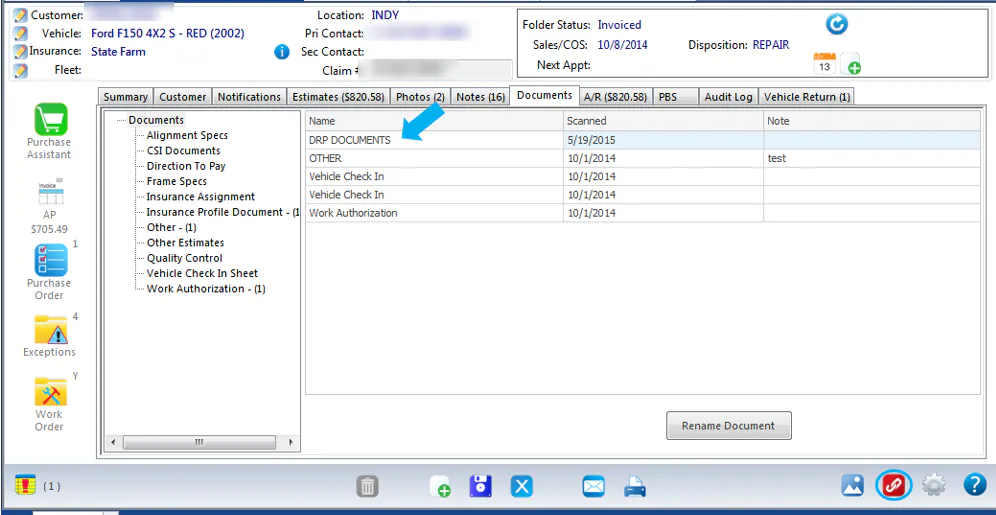
The document moves to the Unlinked bucket on the document imaging screen, where you can link it to another folder.
Delete a document
Section titled “Delete a document”Select the document, then select the red delete button on the button bar.
Drag files out of Nexsyis
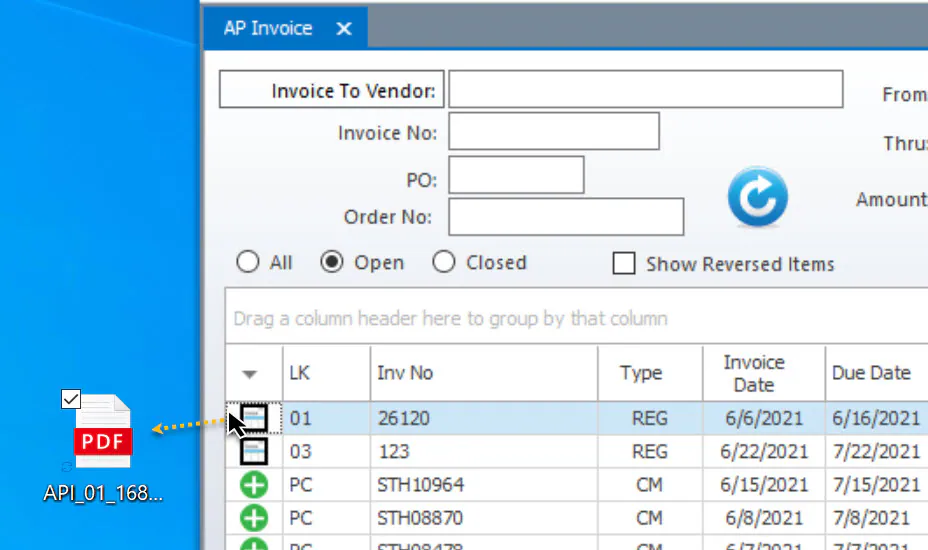
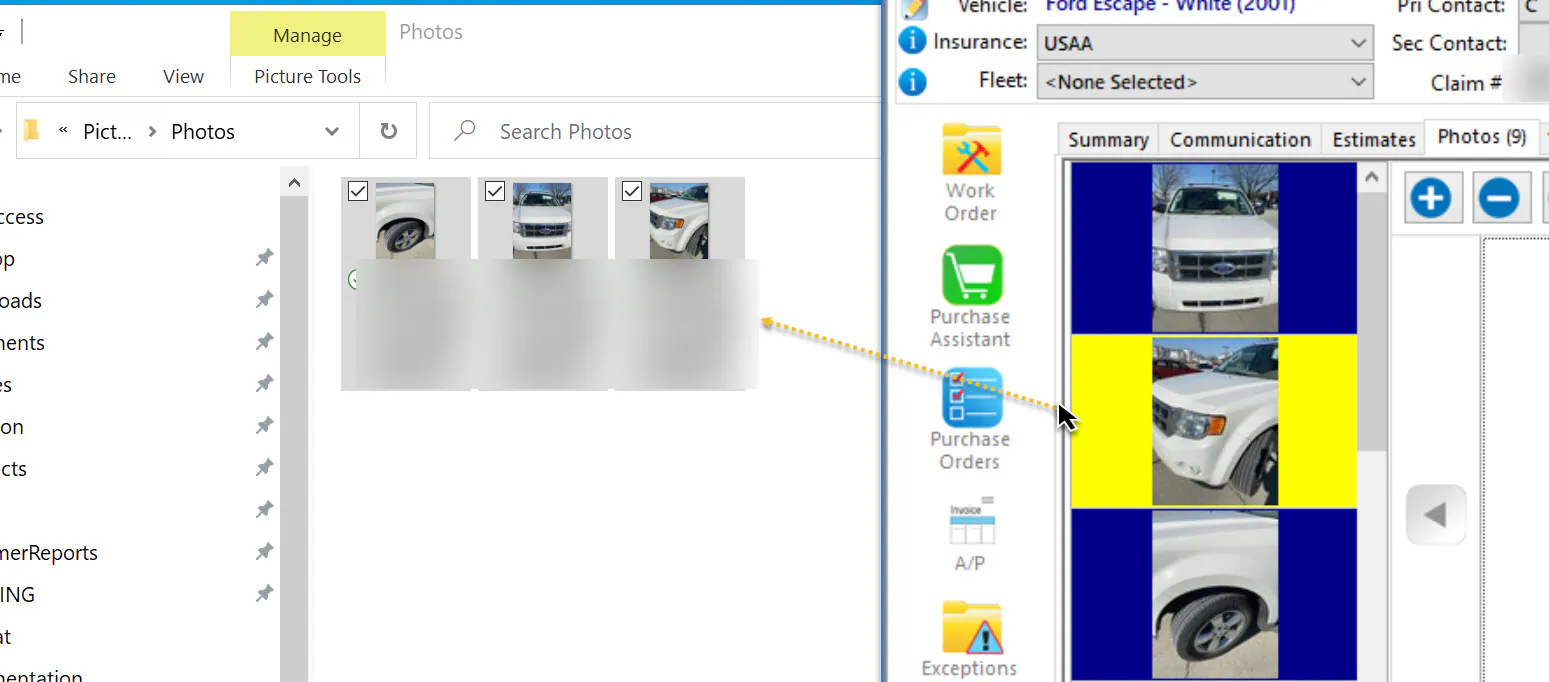
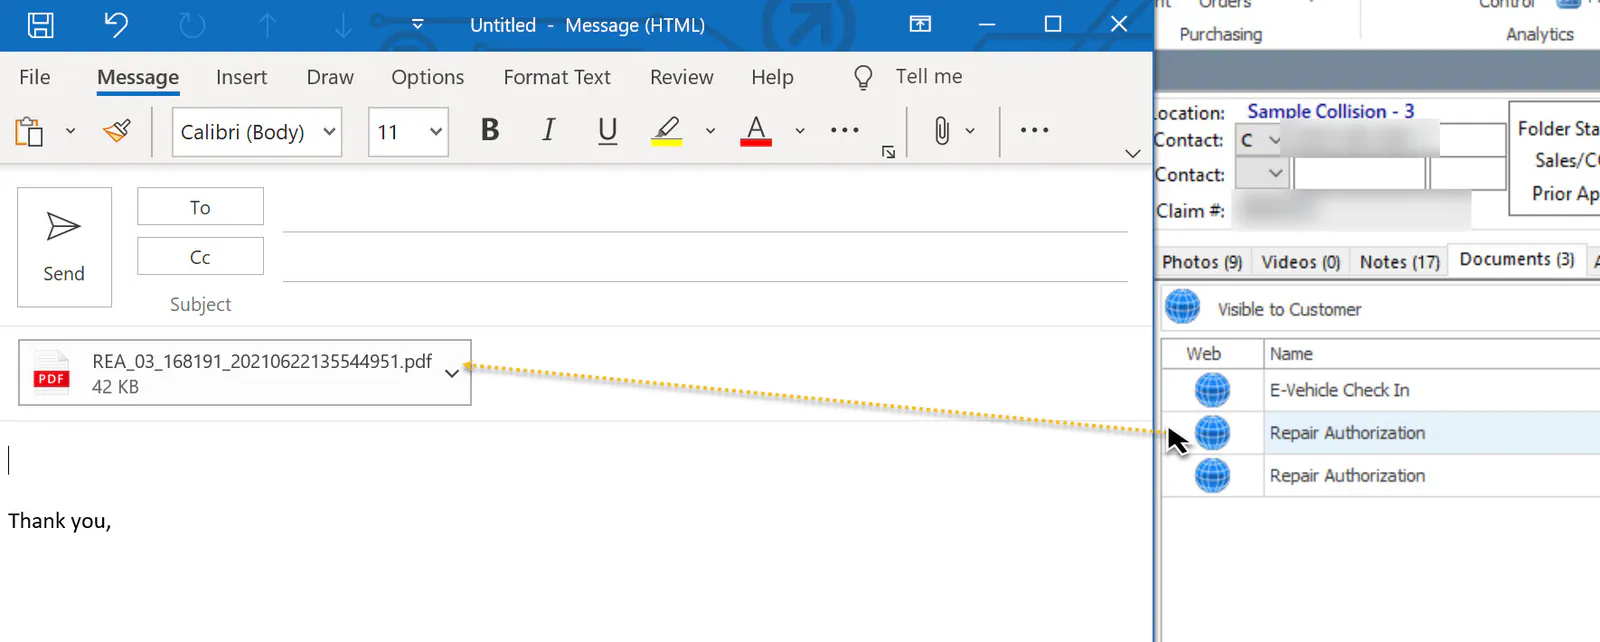
Section titled “Drag files out of Nexsyis”You can drag photos, documents and AP invoices out of Nexsyis into another program, such as a File Explorer folder or an email.
-
Photos: on the folder’s Photos tab, select the photo or one or more thumbnails, and drag them to where you want them.
-
Documents: on the folder’s Documents tab, select a document line and drag it.
-
AP invoices: on the AP Invoice grid, select one or more invoice lines and drag them.