
Order parts
Order a folder’s parts from the Purchase Assistant, then email, print or phone in the purchase order (PO). Each vendor’s order gets its own PO #, which you use later to receive and invoice the parts.
Before you begin
Section titled “Before you begin”- The folder must have a work order.
- Set up vendor contacts in advance so they’re available when you send the order. See Manage vendor contacts.
Order the parts
Section titled “Order the parts”-
Open the Purchase Assistant from the Operations tab or from the folder.
-
Select Not Ordered to show only the white lines.
-
Select the part line to order, then select Order.
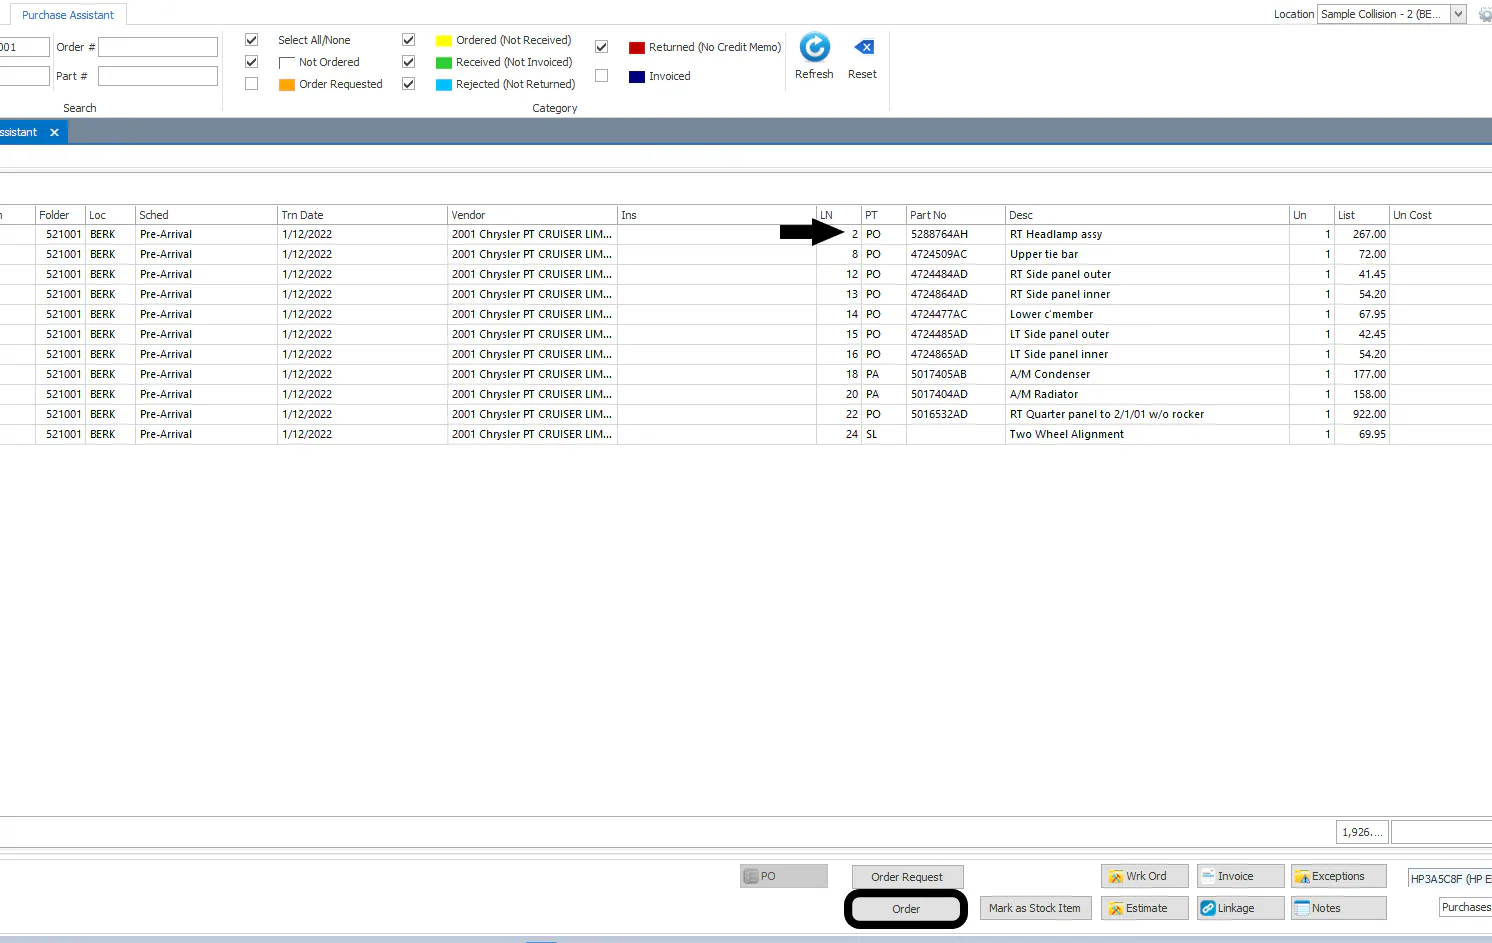
-
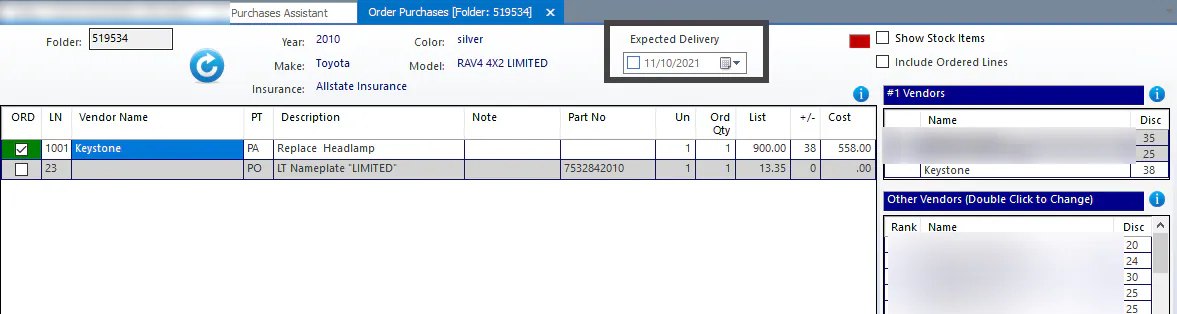
Select the ORD box for each part you want to order.
-
Check the vendor. If only one vendor is sourced for the part, or only one is ranked 1, it’s selected for you. To choose a different vendor, double-click it in the list on the right.
-
If you know it, enter the Expected Delivery Date at the top of the screen.
-
To add a comment to the printed purchase order, enter it in the Note column.

-
Select Save.
The screen for sending the purchase order opens.
-
Send the order:
- Choose how to send it, for example email or print. If you’re ordering by phone, close the screen.
- Set the Expected Delivery Date for each line if you haven’t already.
- To add a note to the PO, type it in the large text box. You can also attach photos or the estimate to an emailed order. See Send a PO to a vendor.
- Select the green check mark.
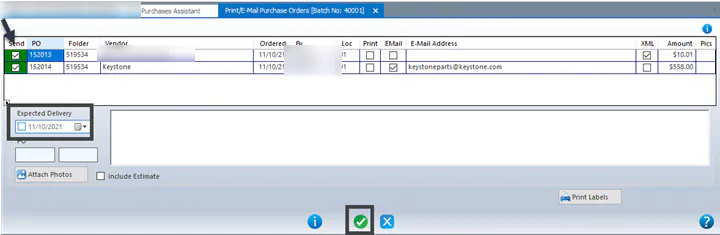
The parts now show in yellow in the Purchase Assistant: Ordered (Not Received).
