Create a folder
A folder represents a visit, or potential visit, to your shop. Create a new folder for every new point of contact, after you’ve searched to make sure one doesn’t already exist.
When to create a new folder
Section titled “When to create a new folder”- Repairs made at the same time go in the same folder, however many claims there are.
- If a customer comes back months later for a second repair, create a new folder, but select the existing customer record.
- Warranty work on a vehicle return goes in the folder of the original repair. See Record a vehicle return.
Start a new folder
Section titled “Start a new folder”-
On the Operations tab, select Folders.
-
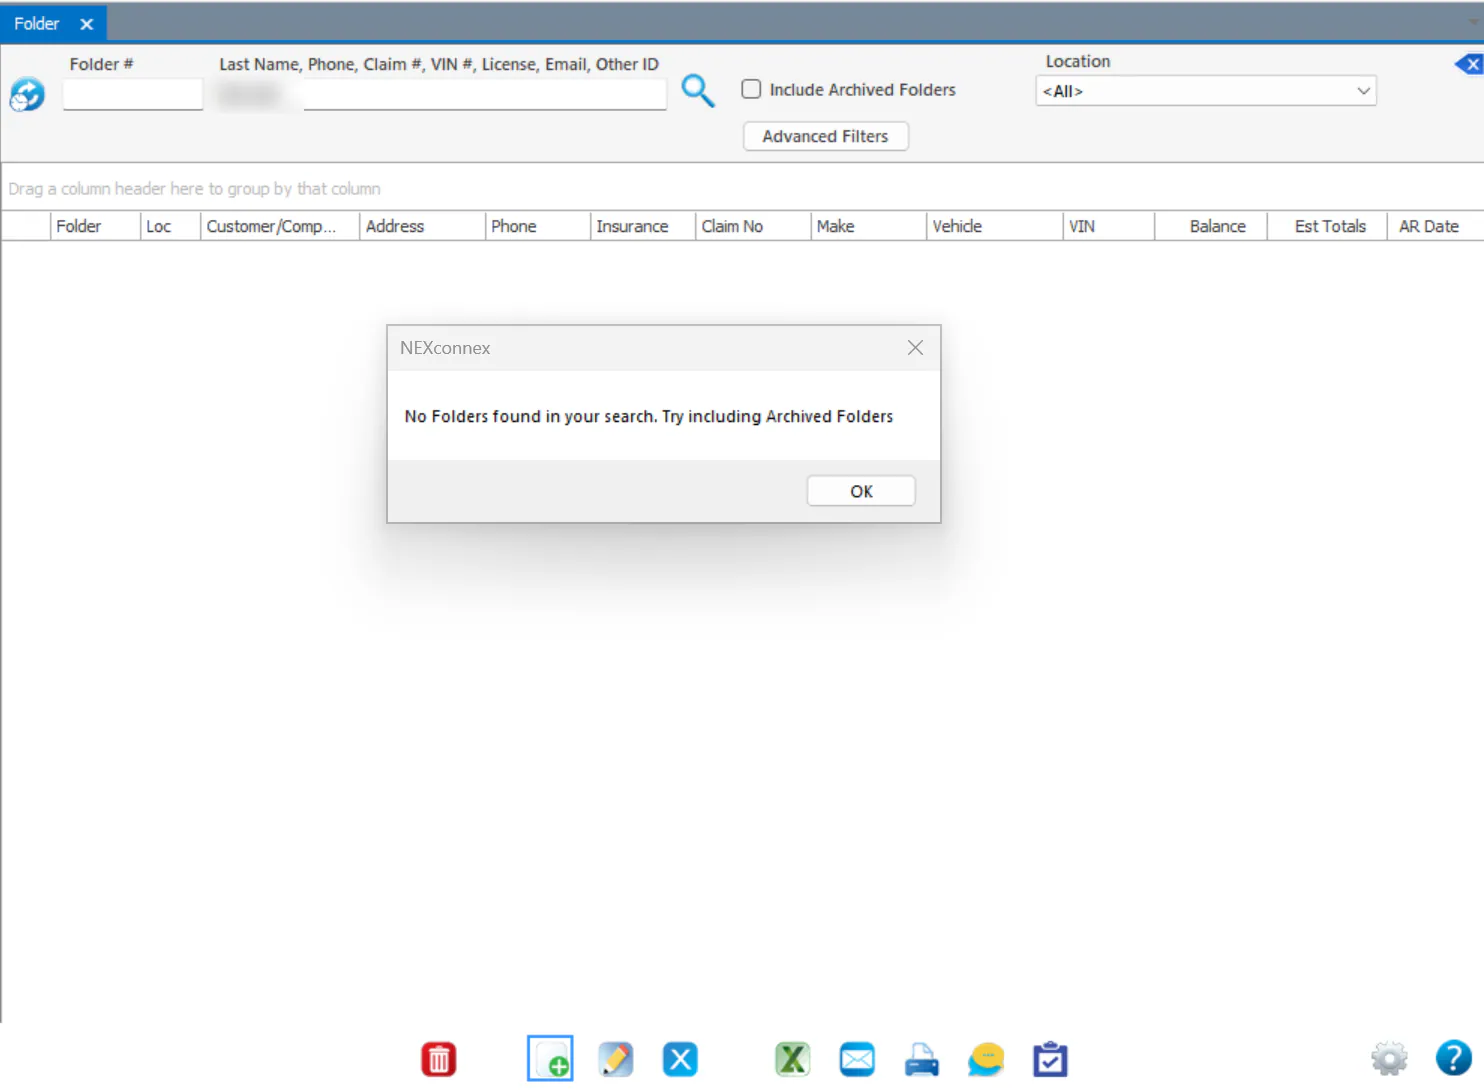
Search for the customer to make sure the folder doesn’t already exist. See Find a folder.
-
If there are no results, select New on the button bar.
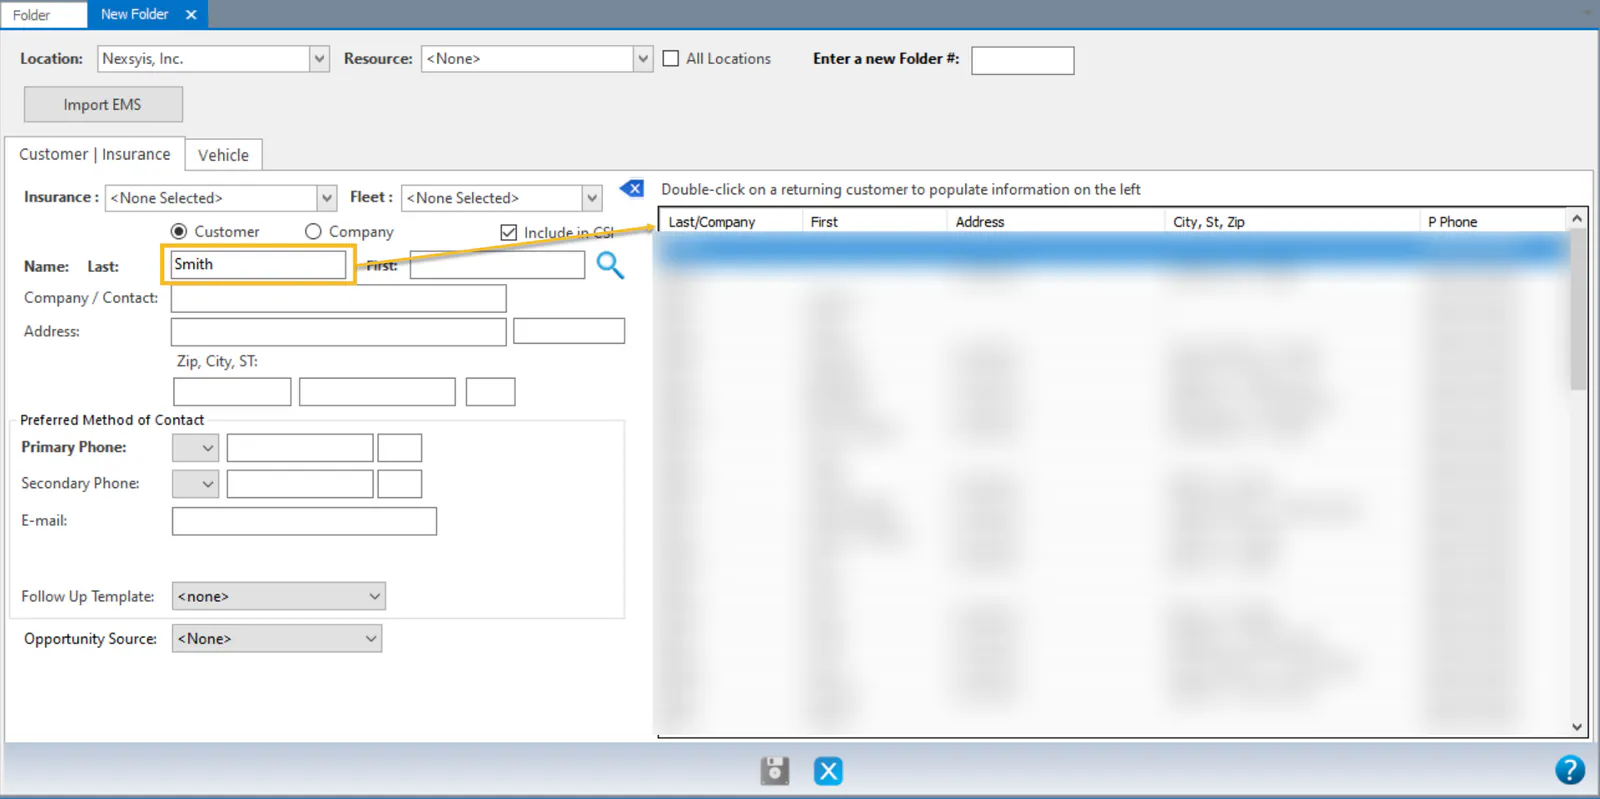
The New Folder screen opens. Fields in bold are required, and Save becomes available once they’re filled in:
- Location, at the top. It defaults to your default location.
- On the Customer | Insurance tab: the customer name (or company name) and Primary Phone.
- On the Vehicle tab: Year, Make and Model. You can choose “unknown” for these.
You can fill in the customer in one of three ways: select a returning customer, enter a new customer, or import an estimate file.
Option 1: Select a returning customer
Section titled “Option 1: Select a returning customer”-
On the Customer | Insurance tab, type the customer’s last name in Last, and the first name if you like. Press Enter or select the magnifying glass.
-
Matching customers show on the right. Double-click the right customer to fill in the fields on the left. Update anything that has changed.
-
Select the Vehicle tab. The customer’s earlier vehicles show on the right. Double-click one to fill in the vehicle fields, or enter a new vehicle.
Option 2: Enter a new customer
Section titled “Option 2: Enter a new customer”-
If no matching record shows, select Customer (an individual) or Company.
-
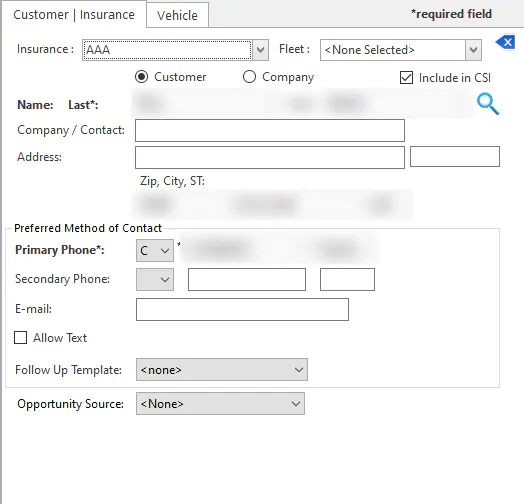
Enter the contact information.
- Type the zip code and press Enter to fill in the city and state.
- For each phone number, choose C for cell, H for home or W for work.
-
Select the insurance company, if there is one.
-
Include in CSI is selected by default. Clear it only if management doesn’t want this folder included in the Consumer Survey Index.
Option 3: Import an estimate file
Section titled “Option 3: Import an estimate file”If you already have an estimate, select Import Estimate on the New Folder screen to create the folder from the estimate file. The customer and vehicle details fill in from the estimate. See Create a folder from an estimate file.
Enter the vehicle and save
Section titled “Enter the vehicle and save”-
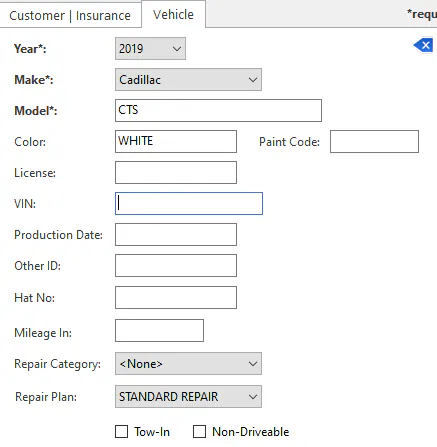
Select the Vehicle tab and enter the vehicle information. Fields in bold are required.
You can enter the VIN and production date, but if you import an estimate later, the estimate’s vehicle information replaces them.
-
Select Save.
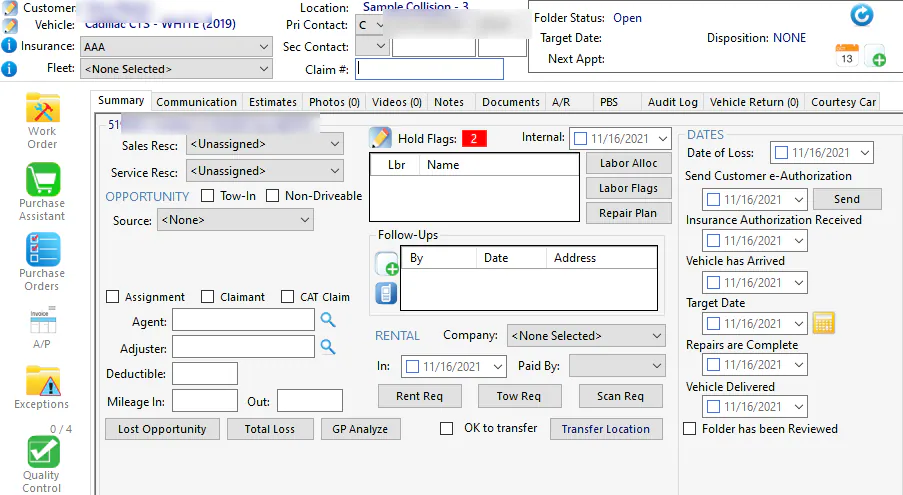
The folder opens on the Summary tab. Fill in the rest of the folder information there. See Folder overview.
-
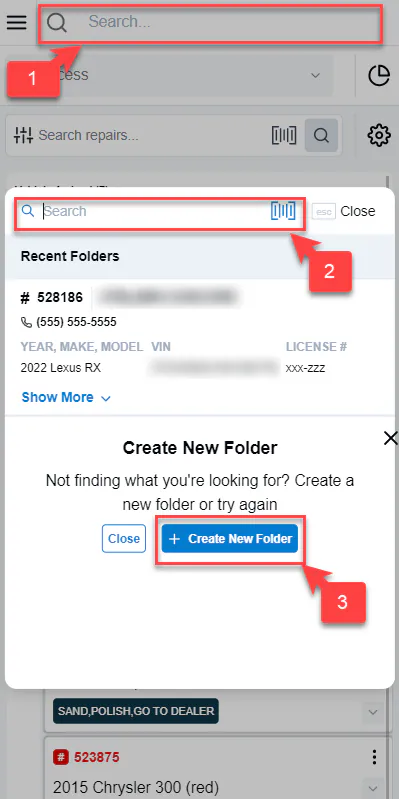
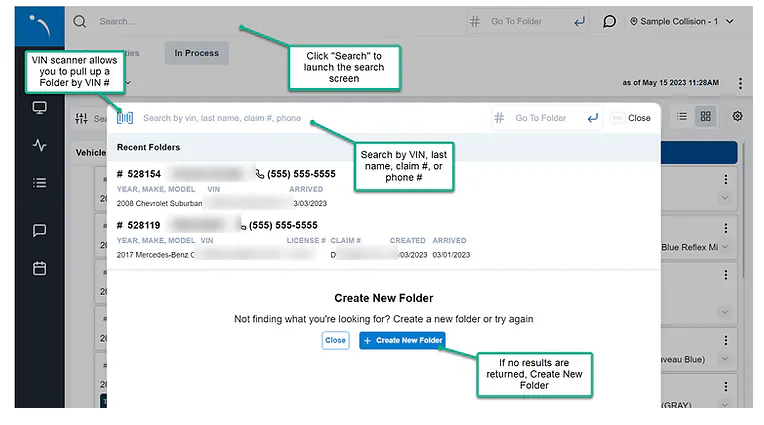
Select the search bar at the top of the screen, and search for the folder by last name, claim number, VIN or phone number. You can also select the barcode icon to scan a VIN or window tag with your camera.
-
If the folder doesn’t exist, select Create New Folder.
-
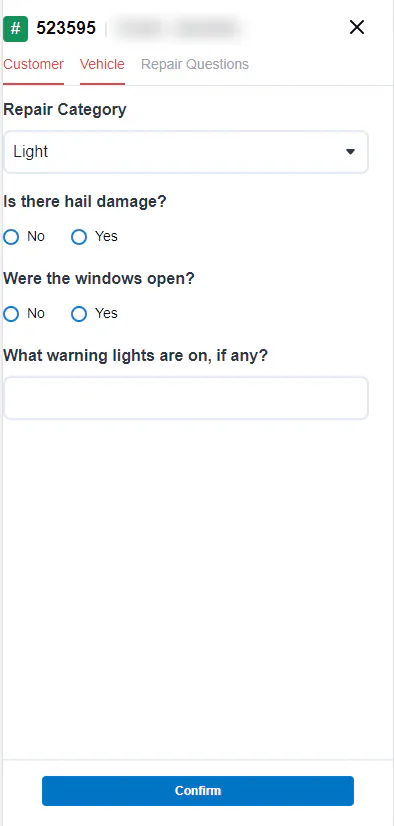
Enter the folder details. Required fields are marked with an asterisk (*):
- Folder resource
- Customer first and last name, or company name*
- Address, city, state and zip
- Preferred contact method
- Phone number* and phone type*
- Secondary contact information and email
- Opportunity source*
- Insurance or fleet, insurance company and claim number
- VIN (you can scan it)
- Vehicle year*, make* and model*
- License, color, paint code, production date, other ID and Hat No
- Mileage in*
- Repair category*, and repair plan
- Drive status (drivable or not drivable) and tow-in
- Repair type* and its questions
-
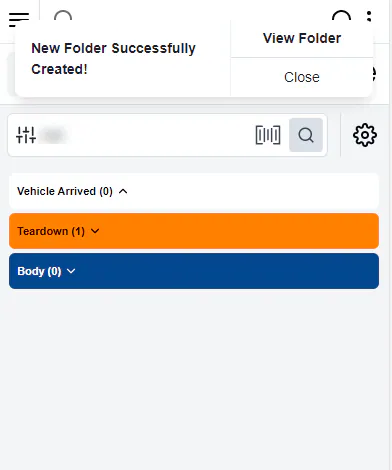
When you finish, the folder is created in Nexsyis. Select View Folder to open it, or Close.
On a computer, NexsyisNow works the same way: select the search bar at the top of the screen to search or create a folder.
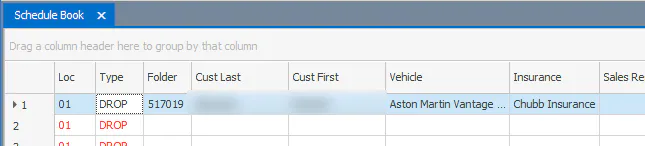
Create a folder from a slot on the Scheduling screen
Section titled “Create a folder from a slot on the Scheduling screen”You can create a folder while you book an appointment on the Scheduling screen.
-
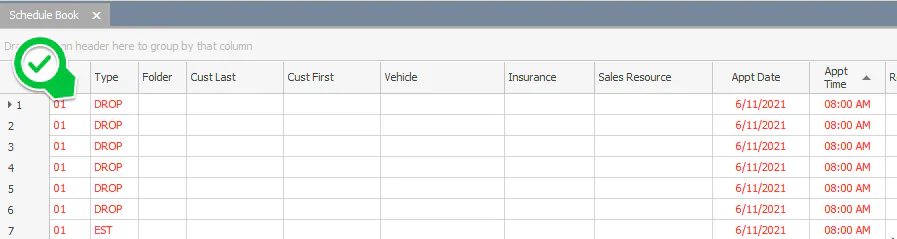
On the Scheduling screen, select an open slot, then double-click it or select New.
-
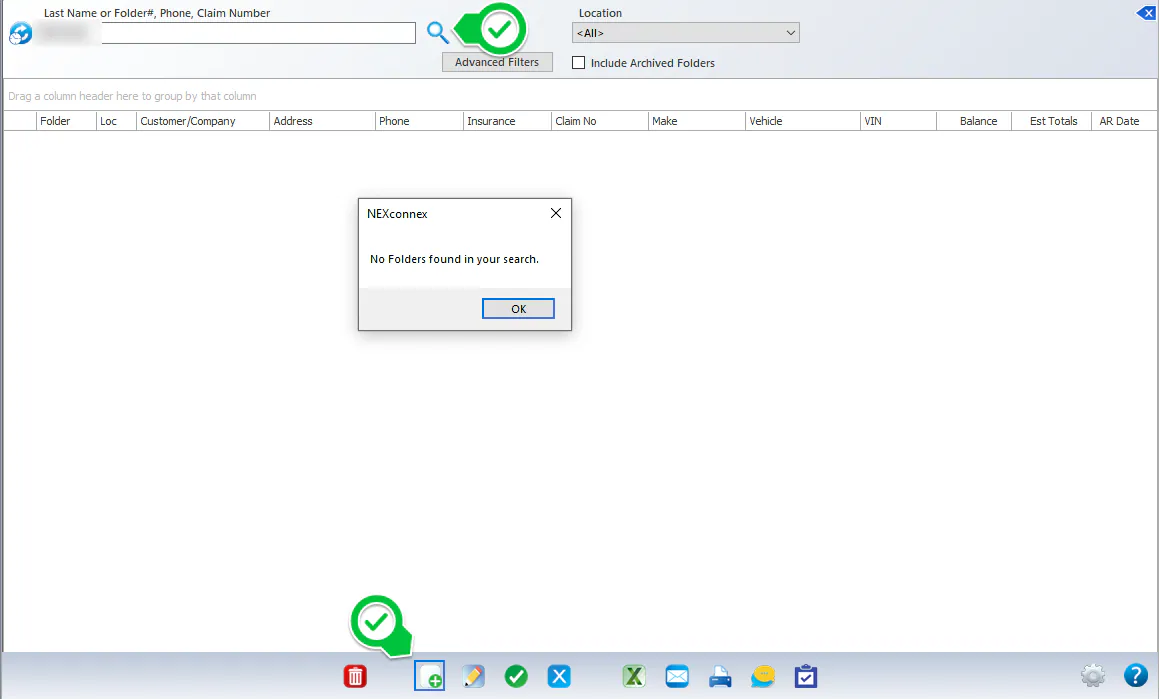
Search for the customer, for example “Sample”. If no folder exists, select New and create the folder.
-
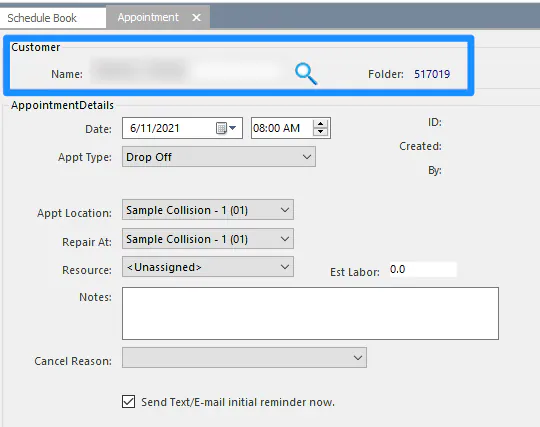
When the folder is created, the appointment screen opens with the customer and folder filled in.
-
Select Save. The appointment is booked in the slot.