
Approve AP checks
Approve AP checks before they print. You set up who can create checks and how much each person can approve, then approve the checks in each batch and print them.
Before you begin
Section titled “Before you begin”To work with an invoice and its check, an operator needs permission to see the invoice:
- Go to Setup › Operator Permissions › By Operator.
- Select the operator, then select the Locations tab. Give the operator permission to the financial location the invoice is posted to.
- Select the A/P Vendor Class tab. Turn on the vendor classes for the vendors the operator should see.
Let an operator create checks
Section titled “Let an operator create checks”- Go to Setup › Operator Permissions › By Operator.
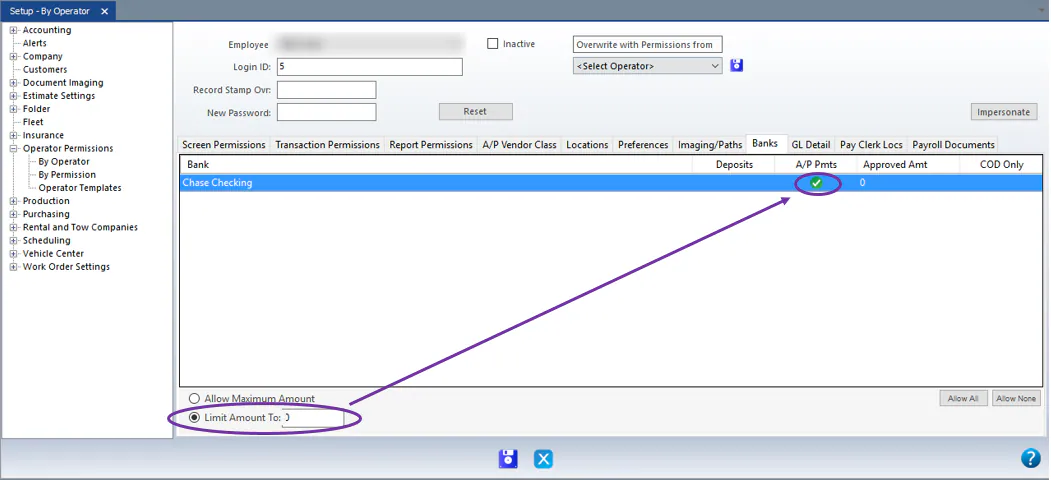
- Select the operator, then select the Banks tab.
- Turn on the green check under A/P Pmts for the bank.
Set how much an operator can approve
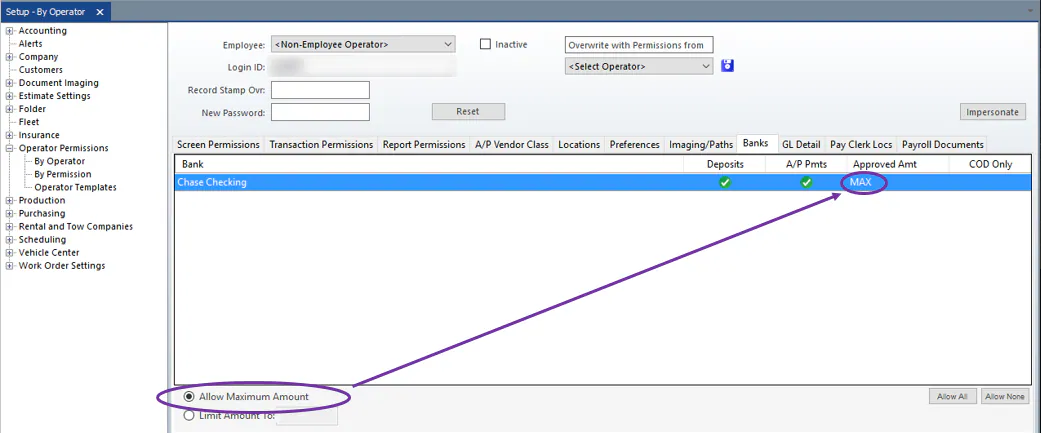
Section titled “Set how much an operator can approve”On the same Banks tab, choose one option for the bank:
- Create only (can’t print): select Limit Amount To and enter 0.
- Create and approve up to a limit: select Limit Amount To and enter a dollar amount, for example 500.00. The operator can approve and print checks up to that amount.
- Approve any amount: select Allow Maximum Amount. Approved Amt shows MAX.
Require two approvals
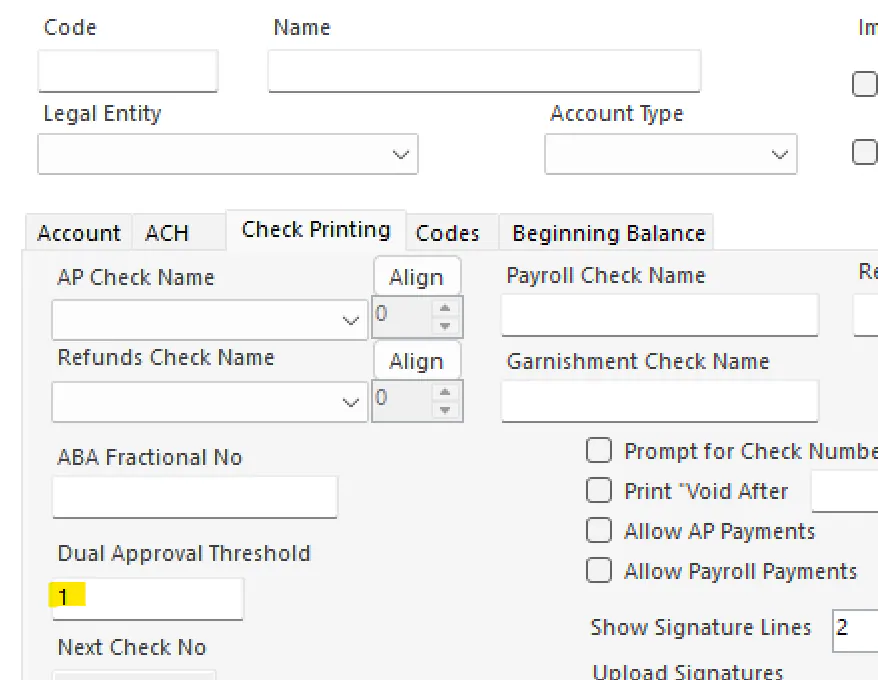
Section titled “Require two approvals”- Go to Setup › Accounting › Banking/Cash › Bank Accounts and select the bank.
- On the Check Printing tab, set Dual Approval Threshold to 1.
Queue checks for approval
Section titled “Queue checks for approval”Checks are queued for approval when you:
- Create an AP invoice with Pay it Now checked. See Pay checks on delivery (COD).
- Create AP invoices, then create a check batch. See Print a check batch.
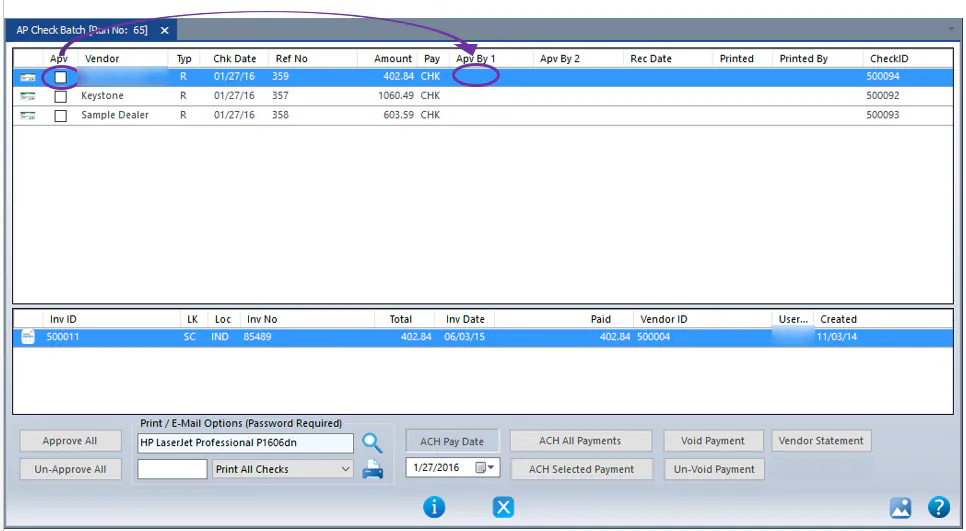
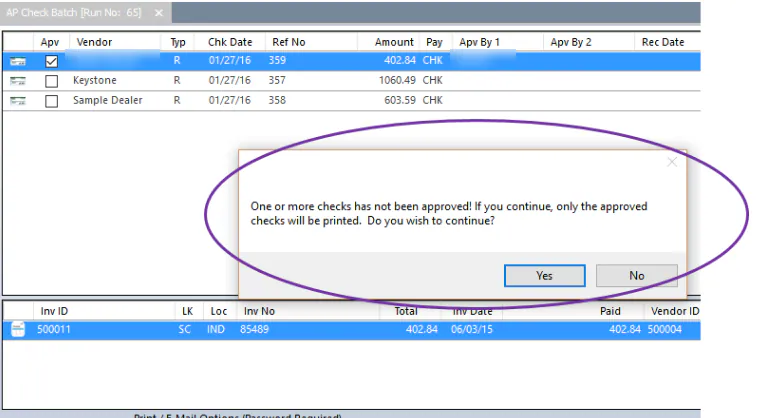
If the operator who created the check can’t approve it, the check isn’t approved: its Apv box is unchecked and Apv By 1 is blank. If you try to print unapproved checks, a warning appears.
Approve checks
Section titled “Approve checks”-
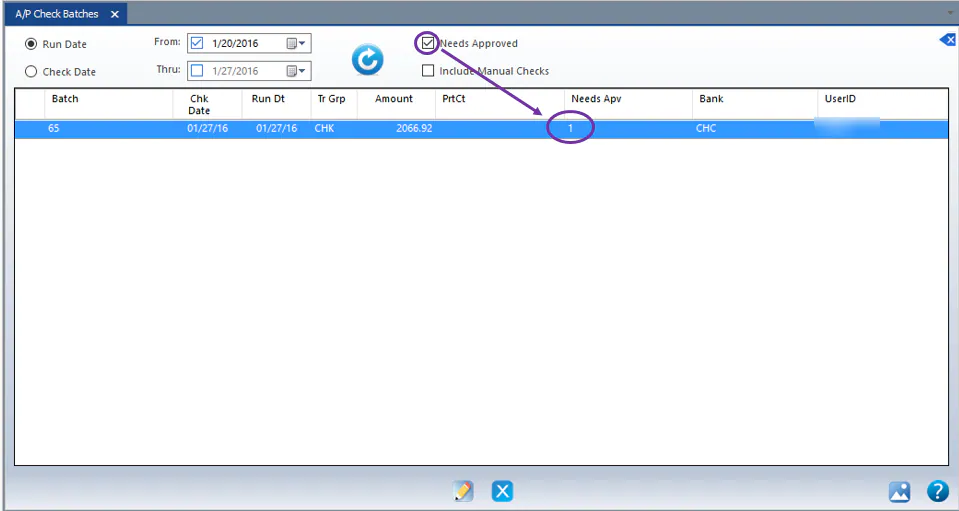
Go to Accounting › View AP Payments › AP Check Batches.
-
Check Needs Approved to show only batches with checks to approve.
-
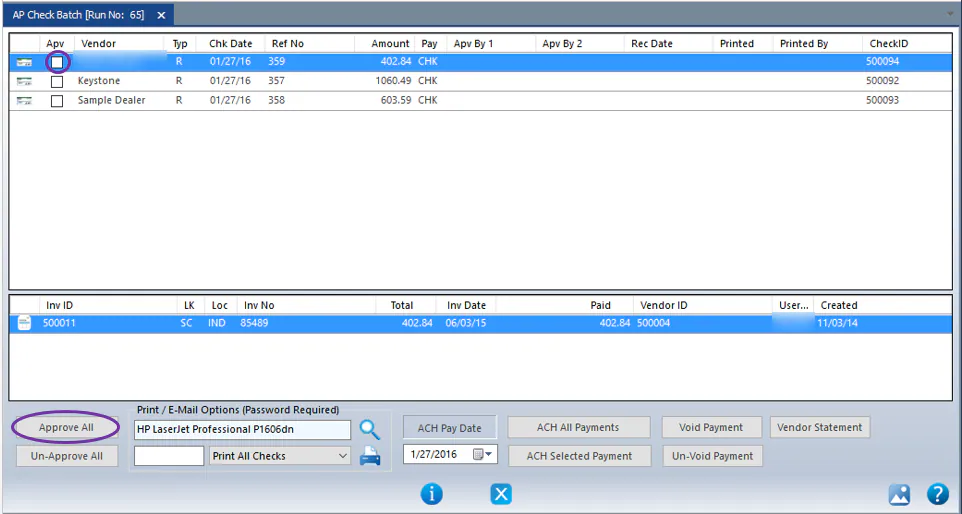
Double-click the batch.
-
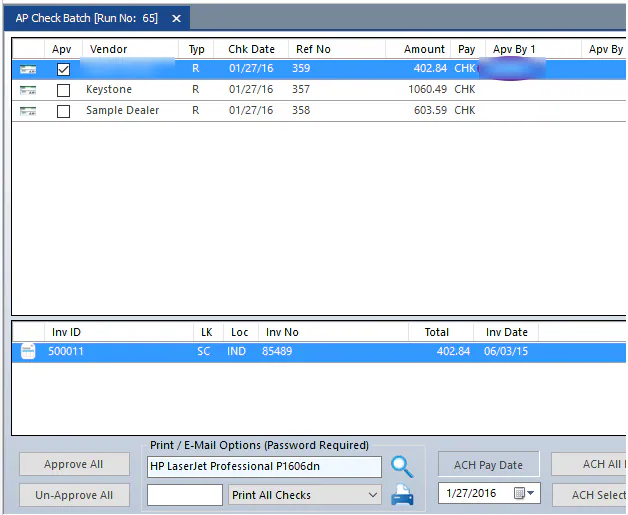
Select the box under Apv for each check you approve.
Your user name shows under Apv By 1 for each check you approve.
Print approved checks
Section titled “Print approved checks”-
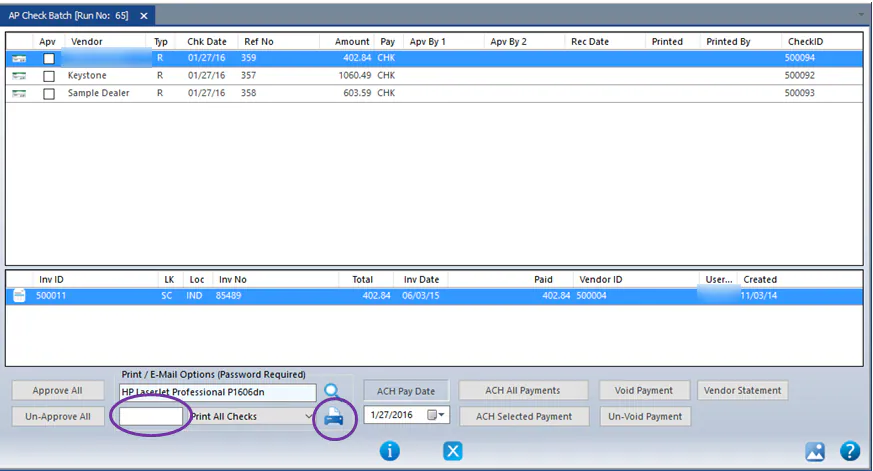
Enter your password in the box at the bottom of the screen.
-
Select the Print icon.
-
If some checks aren’t approved, a warning appears. Select Yes to continue. Only approved checks print.
-
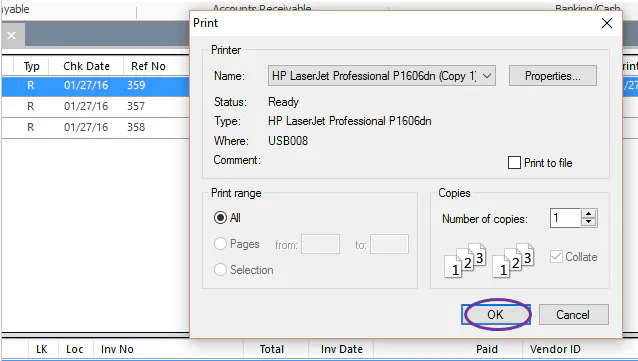
Select the check printer and select OK.
-
Check the printed checks. Look closely at the MICR line at the bottom: it must use the MICR font and sit evenly inside the white area.
-
If the checks printed correctly, select Yes to mark them as printed.
The print date and your user name show on each check line.
