
Take a card payment
Take a customer’s card payment through the Global Payments integration. The payment is posted to the folder’s A/R tab as soon as Global Payments approves it.
Before you begin
Section titled “Before you begin”- To run a card on the terminal (card present), use the computer the terminal is connected to. RCM must be running on it; see Card payments aren’t posting.
- For a card-not-present payment, you need the card number, expiration date, CVV and the customer’s billing ZIP code. You don’t need the terminal.
Take a card-present payment
Section titled “Take a card-present payment”-
Open a new AR payment, either from the folder’s A/R tab or from the Payments menu. If you start from the folder, the folder details are filled in for you.
-
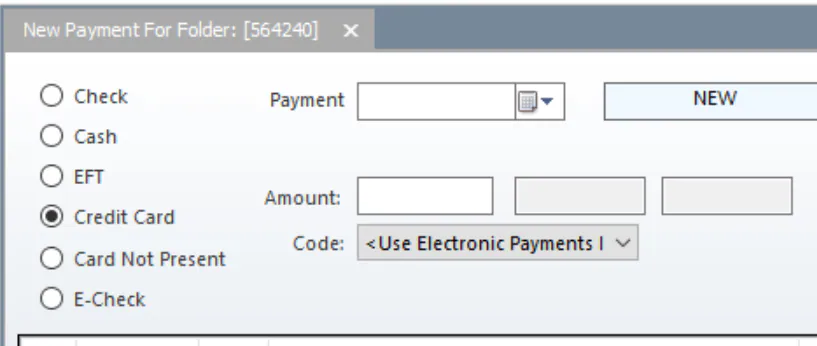
Select Credit Card.
-
Enter the payment date and the Amount.
-
If your company also uses another card processor, a Code drop-down shows. Choose <Use Electronic Payments Integration> to process the payment through Global Payments.
-
Select Save.
-
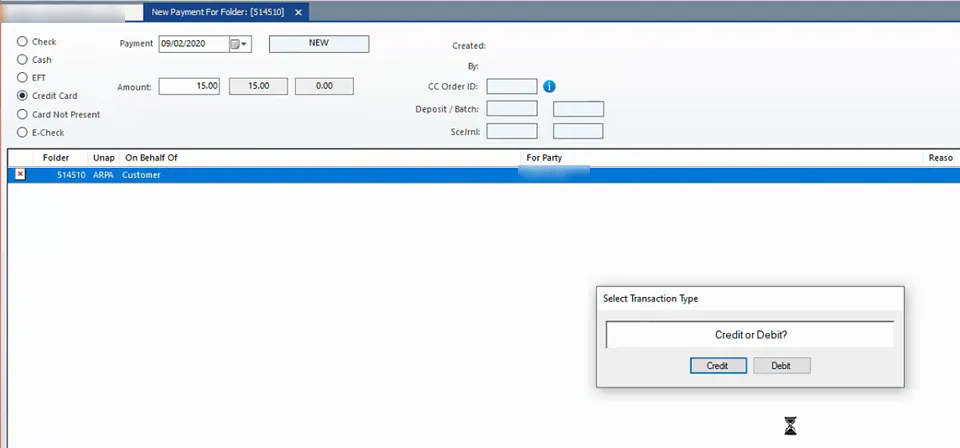
When asked whether the card is credit or debit, select Credit or Debit. The terminal also asks; either answer is accepted.
-
The customer inserts, swipes or taps the card on the terminal.
The terminal processes the card. If the transaction is approved, the payment is saved and its details are shown. If it fails, a message tells you what went wrong so you can correct it and try again.
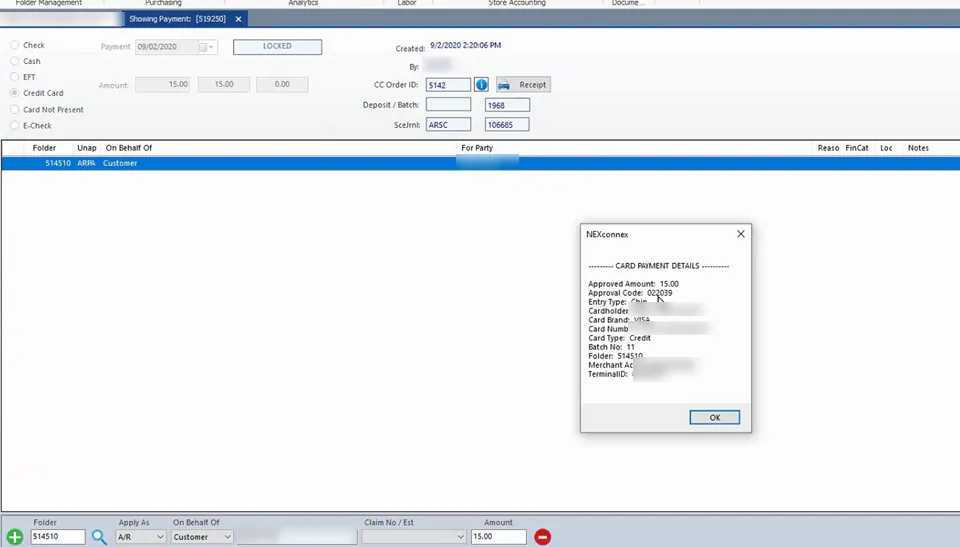
Open the payment to see its batch number and its unique CC Order ID.
Take a card-not-present payment
Section titled “Take a card-not-present payment”-
Open a new AR payment from the folder’s A/R tab or the Payments menu.
-
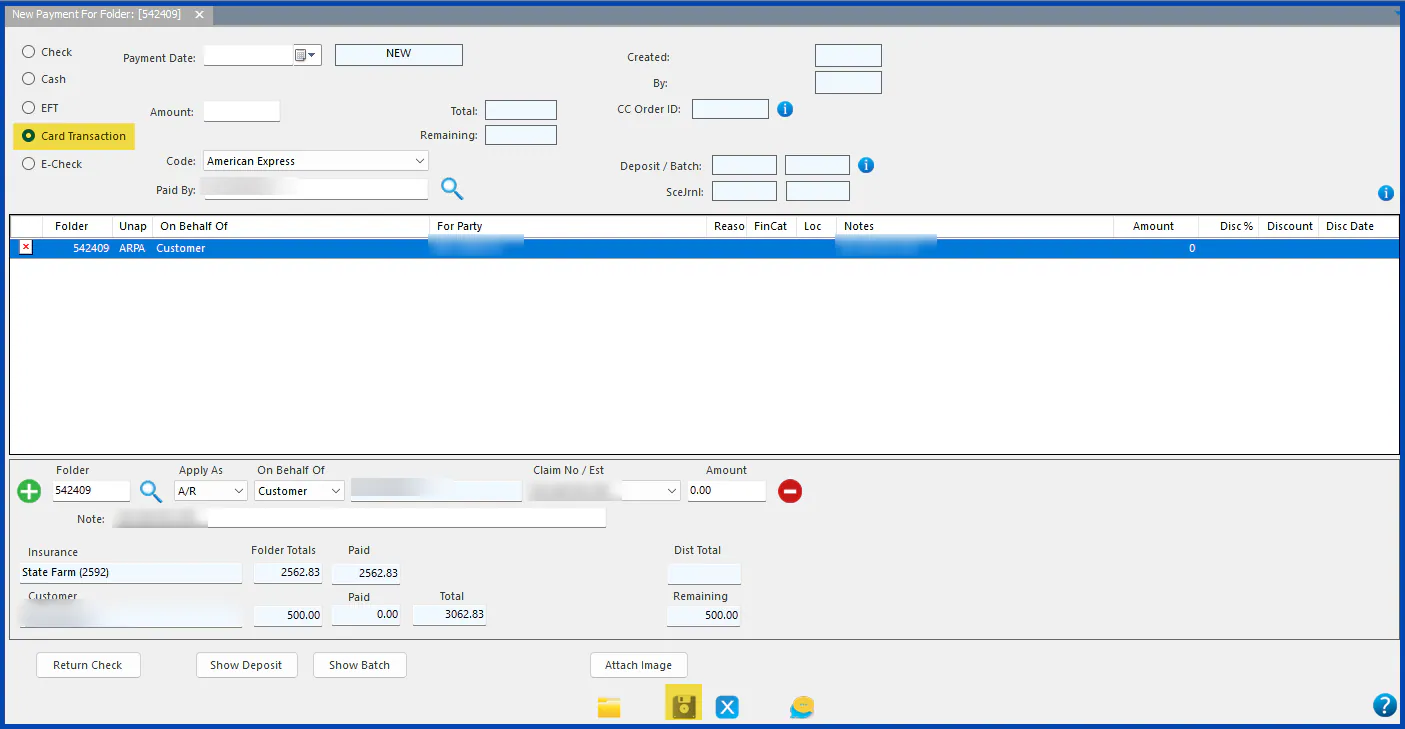
Select Card Transaction.
-
Enter the Payment Date and the Amount.
-
Select Save.
-
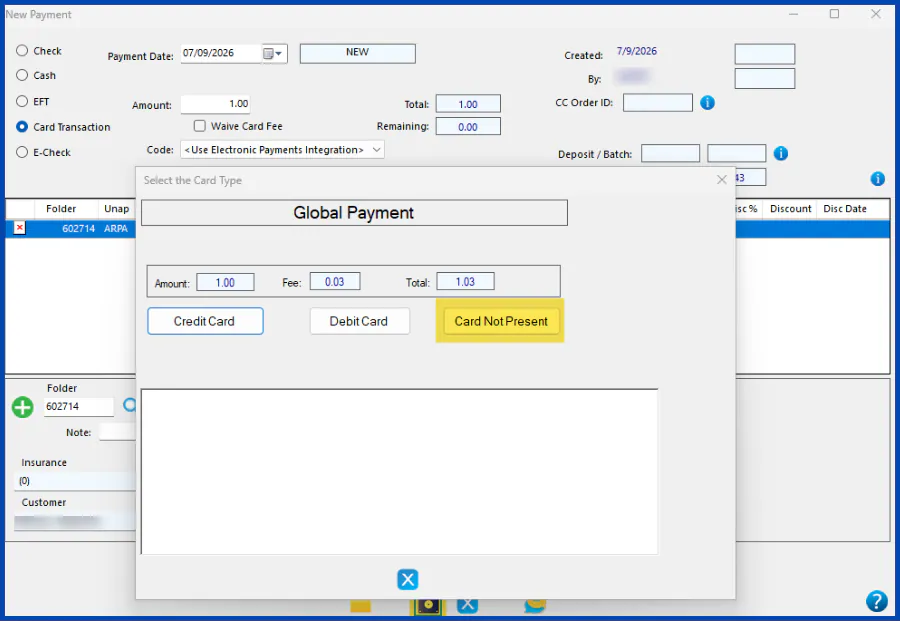
In the Global Payment window, select Card Not Present.
-
In the payment entry window, enter the card number, expiry, CVV and the customer’s billing information, then select Make Payment.
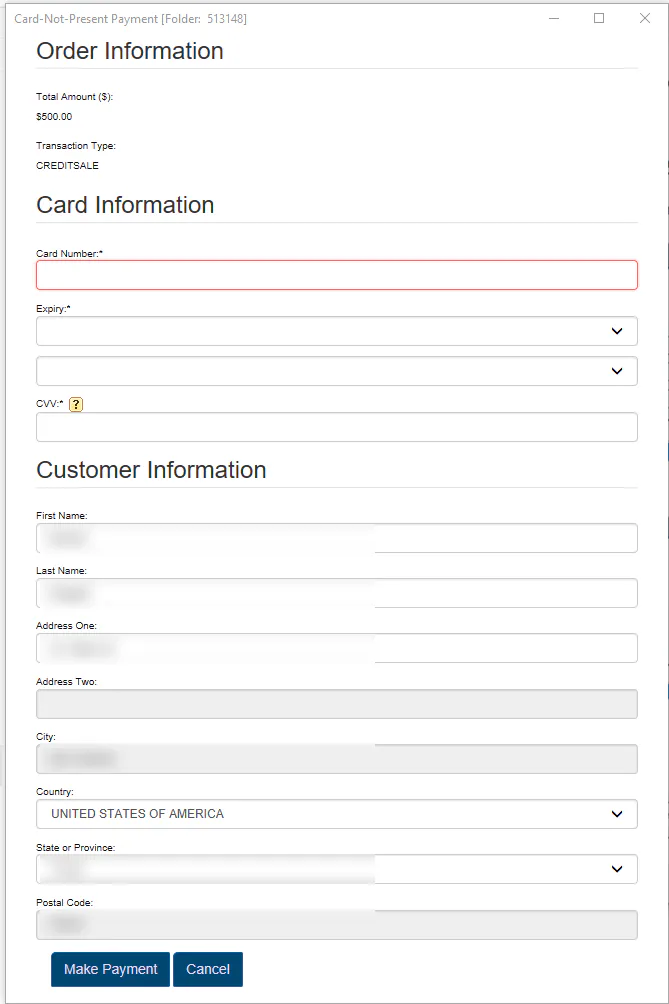
When the transaction is approved, the payment is saved. From then on it’s treated the same as a card-present payment.
Print a receipt
Section titled “Print a receipt”-
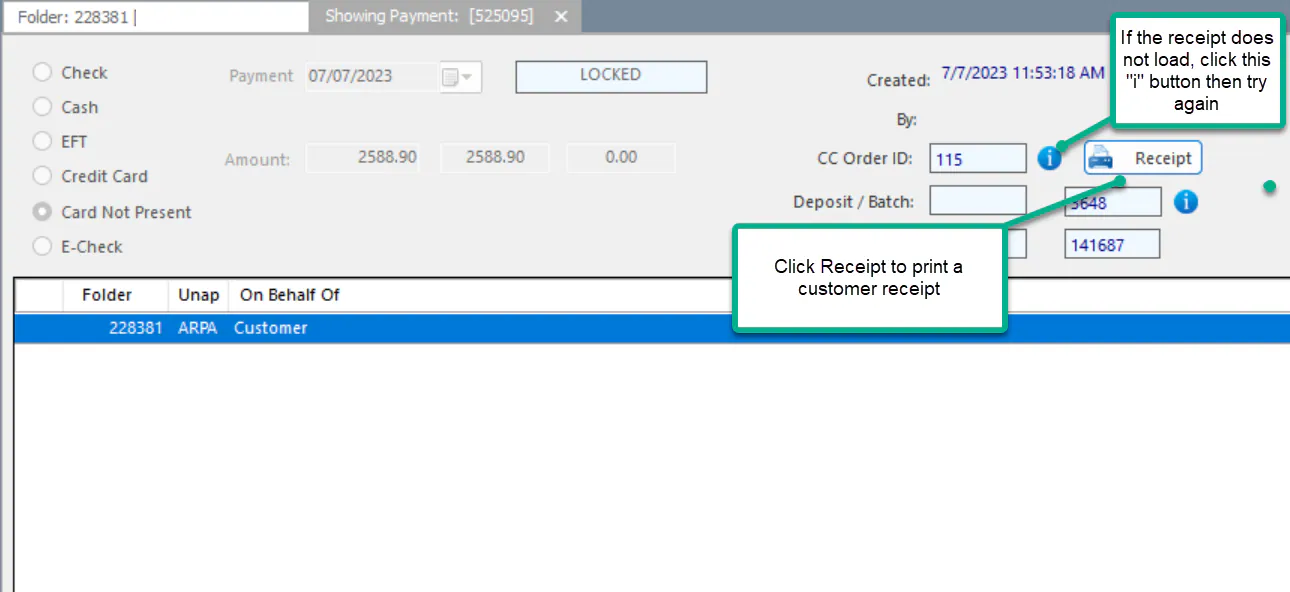
On the payment screen, select Receipt. If the receipt doesn’t load, select the i button next to CC Order ID, then try again.
-
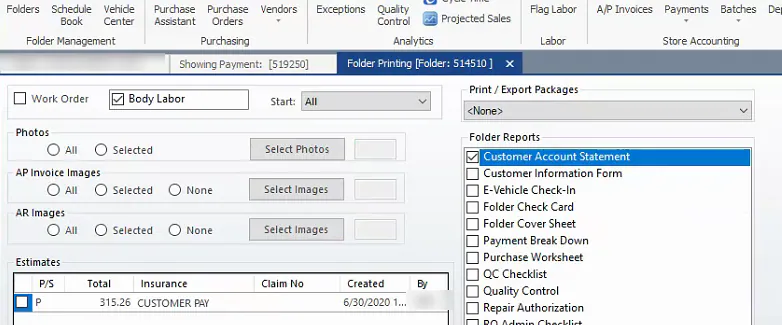
Or print the Customer Account Statement from the folder’s print screen.
View the receipt
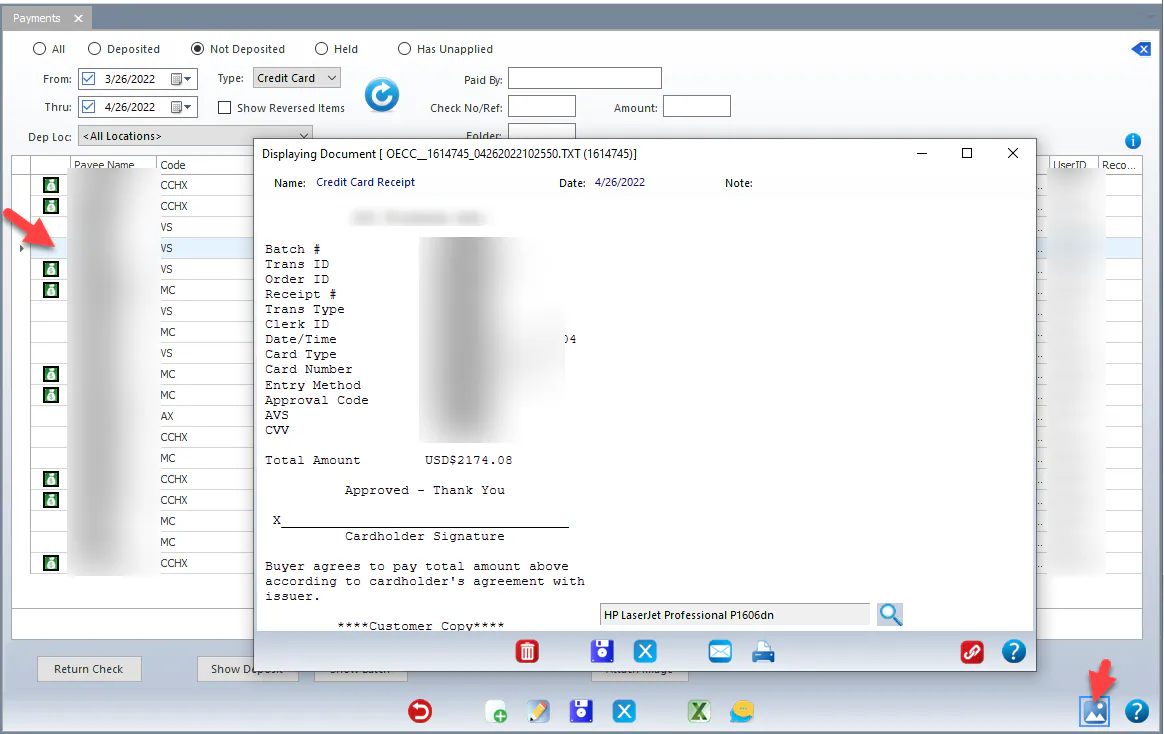
Section titled “View the receipt”Nexsyis attaches a transaction receipt to the payment automatically. On the Payments screen, select the payment line and select the View Images button.
Corrections
Section titled “Corrections”- Until the batch is finalized at midnight, you can void the payment.
- After the batch is finalized, refund the payment instead.