Receive parts
Receive parts when they arrive so they can be invoiced. Received lines turn green: Received (Not Invoiced).
Receive the parts
Section titled “Receive the parts”-
Open the Purchase Assistant from the Operations tab or from the folder.
-
Select the yellow line and select Receive.

-
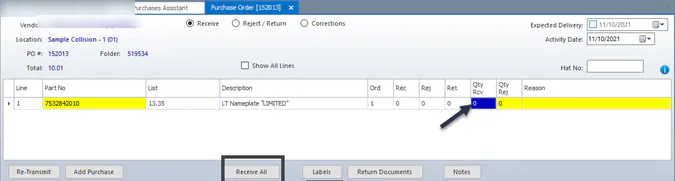
Enter the quantity received in Qty Rcv for each line. If everything arrived as ordered, select Receive All.
-
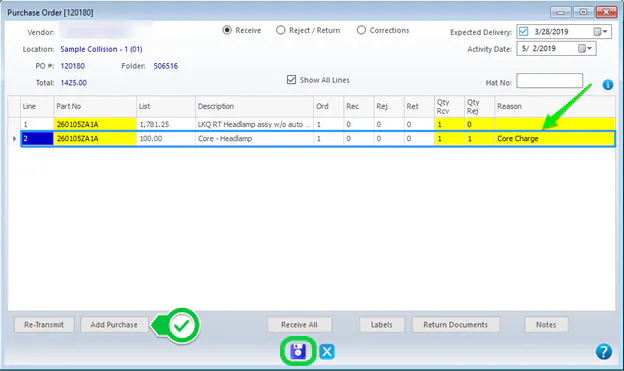
If the invoice includes a charge that isn’t on the purchase order, such as a core charge, add a purchase line for it. Then receive it as usual, or reject it at the same time by entering the quantity in Qty Rej and choosing a reason.
-
Select Save.
Receive and reject at the same time
Section titled “Receive and reject at the same time”If a part is wrong or no longer needed, enter quantities in both Qty Rcv and Qty Rej, and choose a Rejection Reason. See Reject a part.

Print labels as you receive
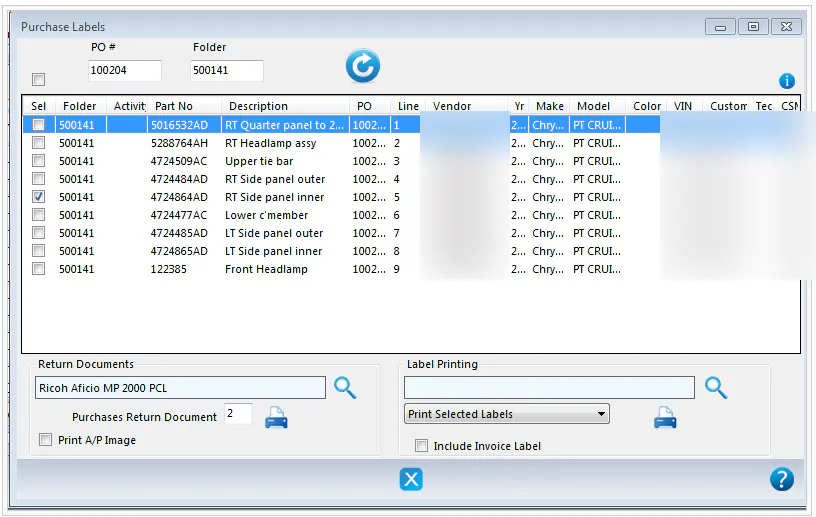
Section titled “Print labels as you receive”If you have a label printer, the Purchase Label screen opens with the part already selected. Select Print Selected Labels.
To also print a label for the paper invoice, select Include Invoice Label. The invoice label shows the PO number and the date received, while the invoice itself shows only the invoice date. If a part arrived late, having both dates on the invoice helps show the insurance company why the repair needs more time.
If you don’t print an invoice label, make sure the invoice shows the PO number and the folder number. Write them on by hand if needed before you scan the invoice.