Set up scheduling
Set up how many appointments each location can take and when they’re available. Do these four steps in order, and do them for each location.
Two terms are used throughout:
- Concurrent: how many appointments can be booked at the same time. For example, 2 puts two slots at 8:00, two at 8:30, and so on.
- Length: how long the appointment is, in minutes.
Step 1: Set daily limits
Section titled “Step 1: Set daily limits”Set the most appointments of each class (drop or estimate) a location can take per day.
-
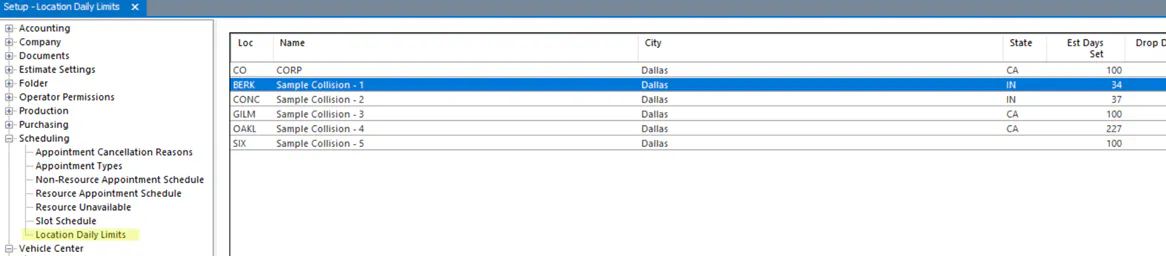
Open Setup › Scheduling › Location Daily Limits.
-
Choose a location.
-
Choose the Appt Class.
-
Under Maximum Appointments Per Day for the Selected Class, enter the limit for each day of the week. This is the total of all appointment types in that class.
-
Select Save.
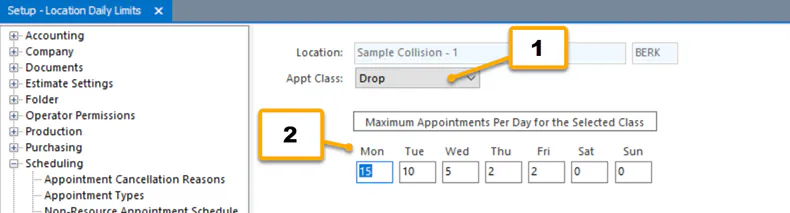
When a location reaches its limit for the day, the rest of that day’s slots for that class disappear. For example, a Monday limit of 5 for the Drop class allows five drop appointments of any type on Mondays. If you don’t want a limit, enter 100 for each day.
Step 2: Set up appointment types
Section titled “Step 2: Set up appointment types”Create an appointment type for each kind of appointment you book, such as Express Drop or Estimate. See Set up appointment types.
Step 3: Set up non-resource appointment schedules
Section titled “Step 3: Set up non-resource appointment schedules”Use this for appointment types that aren’t booked against a person’s calendar.
-
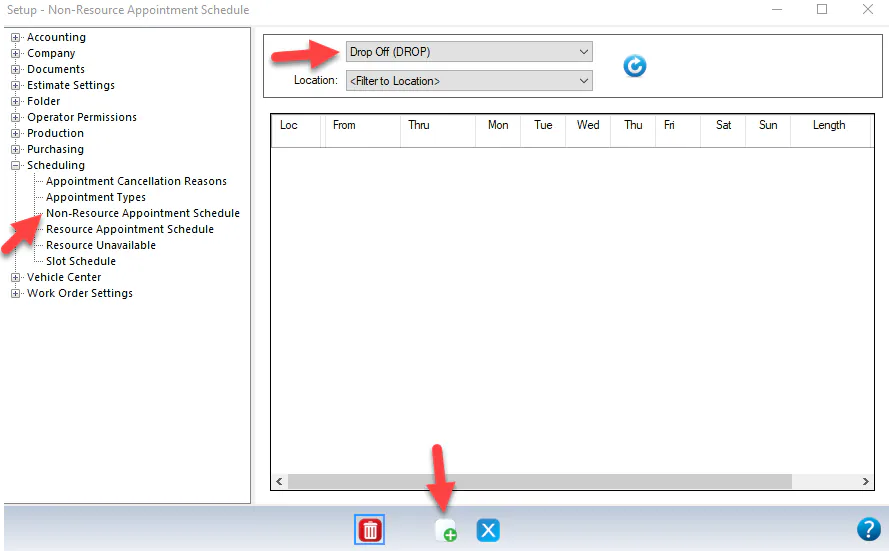
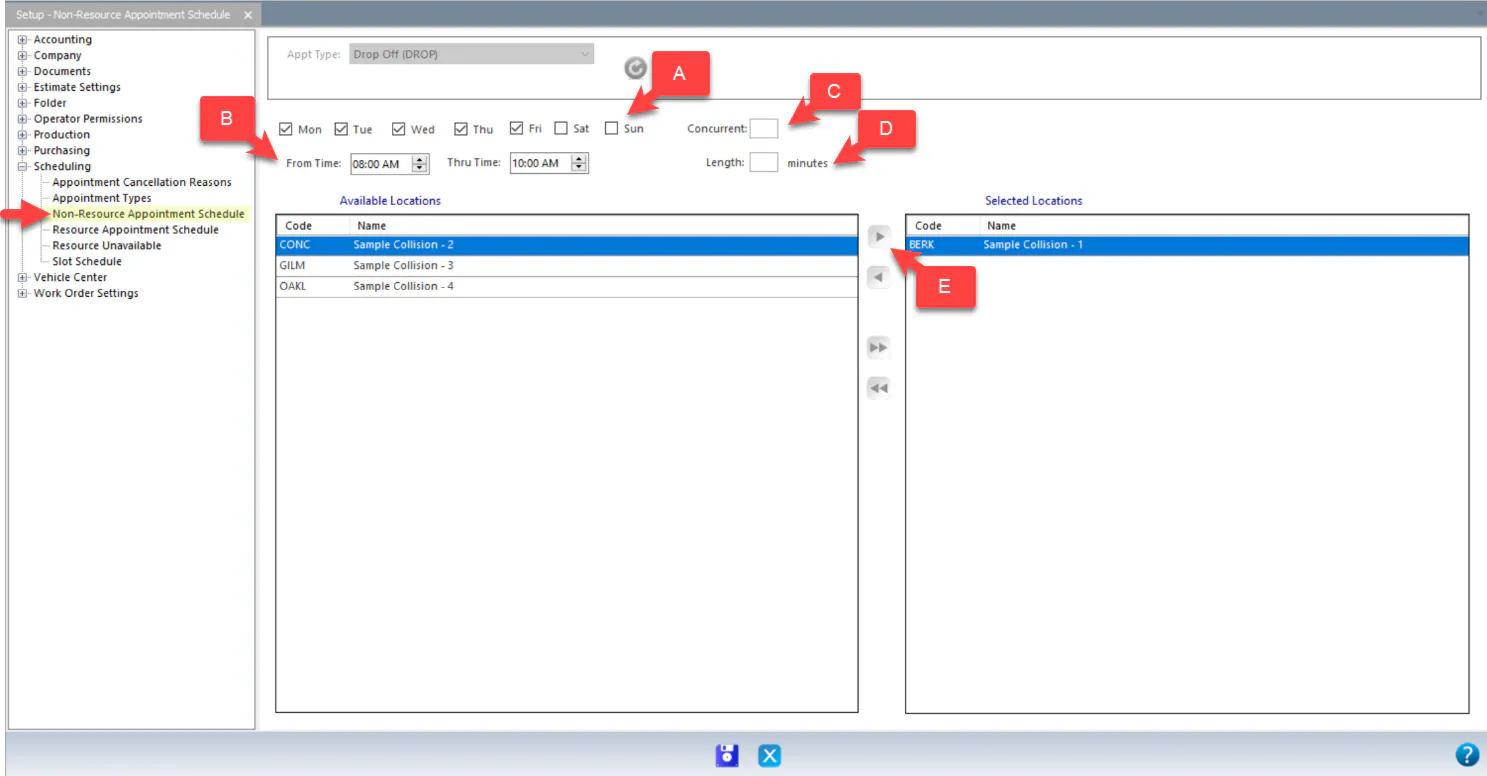
Open Setup › Scheduling › Non-Resource Appointment Schedule.
-
Choose the appointment type at the top of the screen, then select the new-record button.
-
Select the days this schedule applies to.
-
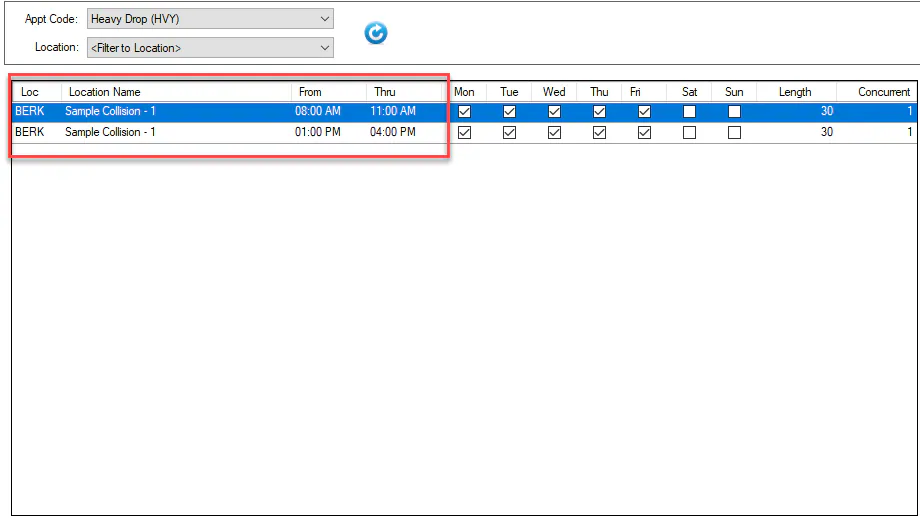
Enter the From Time and Thru Time.
-
Enter Concurrent, for example 1 so that only one appointment of this type can happen at once.
-
Enter the Length.
-
Move the locations this schedule applies to from Available Locations to Selected Locations.
-
Save the schedule.
Step 4: Set up resource appointment schedules
Section titled “Step 4: Set up resource appointment schedules”Use this for appointment types with Resource Based Appointment selected, which are booked against each resource’s own calendar.
For the full setup, including how to switch only some locations and how the Scheduling screen looks afterward, see Set up resource-based appointments.
-
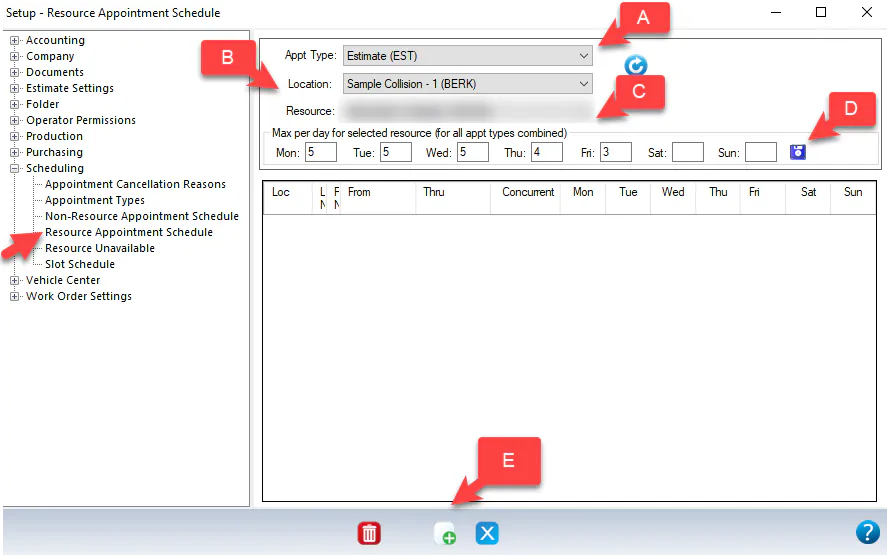
Open Setup › Scheduling › Resource Appointment Schedule.
-
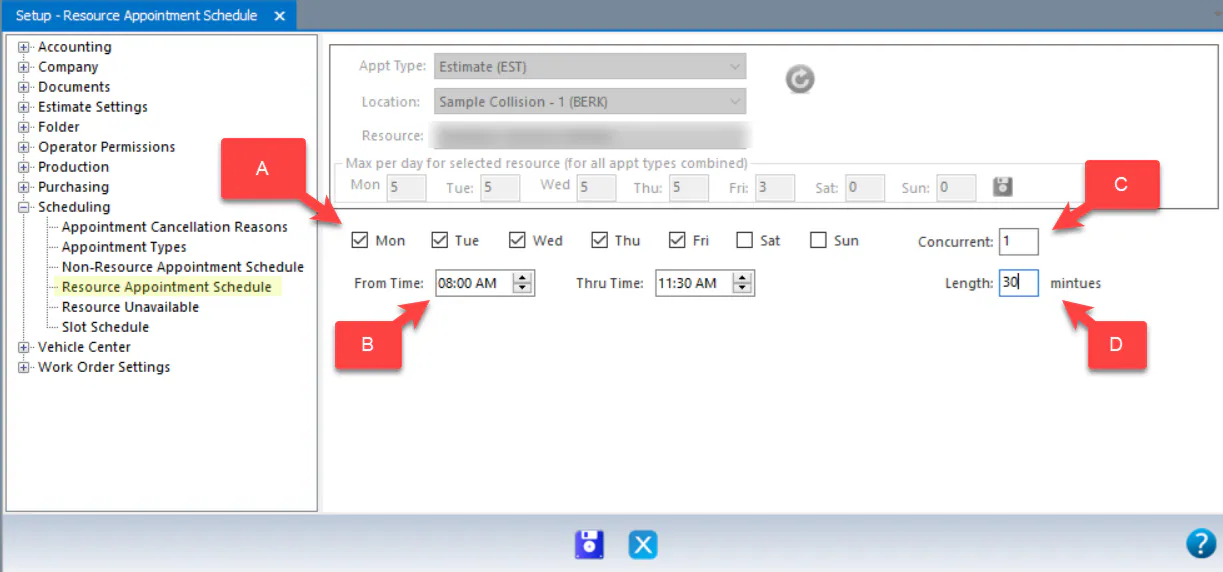
Choose the Appt Type, Location and Resource.
-
Under Max per day for selected resource (for all appt types combined), enter the limit for each day, then select the save icon next to it.
-
Select the new-record button to create a schedule for this resource.
-
Select the days this schedule applies to.
-
Enter the From Time and Thru Time.
-
Enter Concurrent and Length.
-
Select the save icon.