
Repair plan overview
A repair plan is the list of production stages a vehicle goes through, in order. On the Advanced Repair Plan screen you start and complete each stage, see expected end dates, and assign stages to resources.
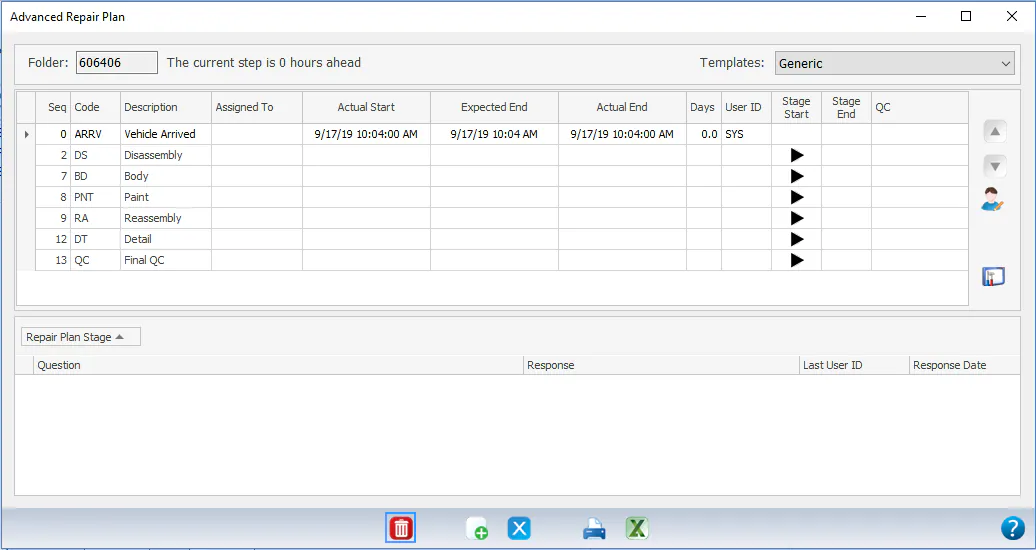
Open the repair plan
Section titled “Open the repair plan”- In the Vehicle Center, select the In Process tab.
- Double-click the vehicle’s Stage cell.
How the Advanced Repair Plan works
Section titled “How the Advanced Repair Plan works”- Each stage must be marked started and completed.
- Every stage must be completed before the folder can be marked Repairs are Complete.
- Stages can be reordered, added or removed.
- Expected end dates are calculated for each stage, and the screen shows how far ahead or behind the repair is.
- Stages can be assigned to resources (tied to labor allocation).
The template that sets a new folder’s stages is covered in Set up repair plan templates. Your company can also change how stages start and stop; see Repair plan behavior settings.
Icon key
Section titled “Icon key”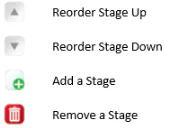
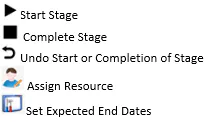
Start and complete a stage
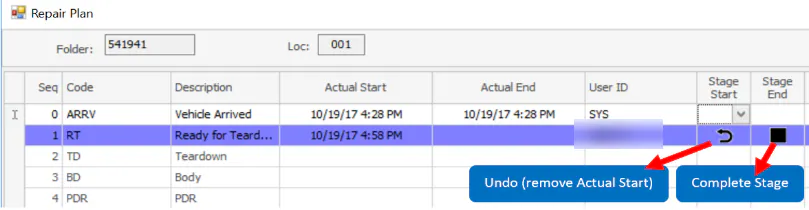
Section titled “Start and complete a stage”Once the folder is marked as arrived, a play button shows in the Stage Start column for each stage. This means the stage can be started.
-
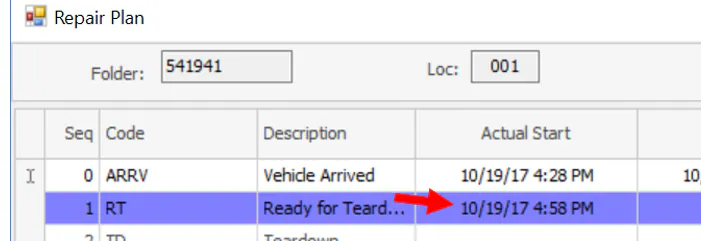
Select the play button on the stage’s line. The Actual Start date and time fill in.
-
You now have two choices:
-
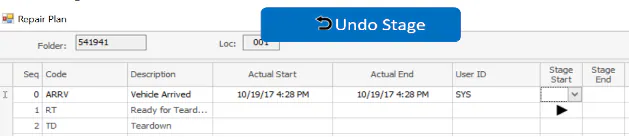
Undo the stage start: select the undo button. The date and time in Actual Start are removed.
-
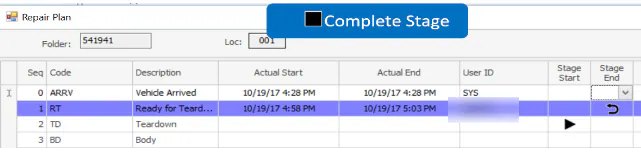
Complete the stage: select the stop button. The date and time fill in the Actual End column.
-
-
Start and complete each stage in turn until the last stage is completed.
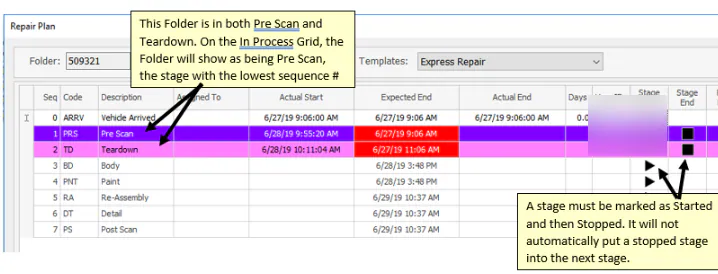
A stage must be started and then stopped. Stopping a stage doesn’t start the next one for you, unless your company uses the Auto-Start setting.
If more than one stage is started at the same time, the In Process grid shows the folder in the stage with the lowest sequence number.
Stage status
Section titled “Stage status”The Status column on the In Process grid shows where each stage stands:
- Started: the stage has been started.
- Completed: the stage has been completed.
- Suspended: a production hold with Suspend Repair Plan is active on the folder. The stage start and stop buttons are hidden on the repair plan, and the stage can’t be changed until the hold is removed.
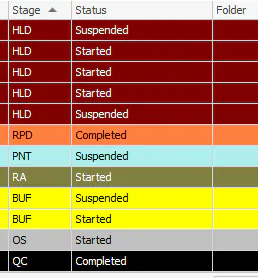
See Put a vehicle on hold for production holds.
Quality control
Section titled “Quality control”If quality control items are set up, they’re listed for each stage at the bottom of the repair plan screen. See Complete a quality control check.
Change an actual start or end date
Section titled “Change an actual start or end date”If someone forgot to start or end a stage when it happened, a user can change the date and time.
- Select the date in the Actual Start or Actual End column.
- Replace it with the correct date and time.
