Invoice purchases
When a vendor’s invoice arrives, enter it as an AP invoice against the purchase order (PO). The invoiced lines turn navy (Invoiced) in the Purchase Assistant.
Ways to open the AP invoice screen
Section titled “Ways to open the AP invoice screen”-
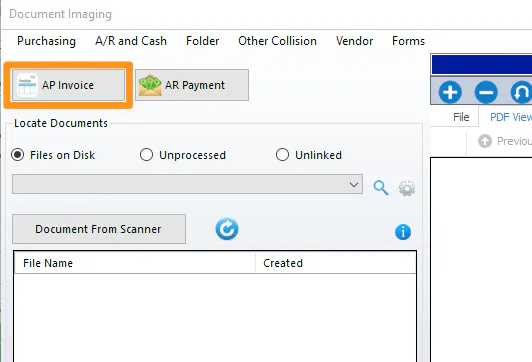
From Document Imaging (recommended; see the steps below): select AP Invoice.
-
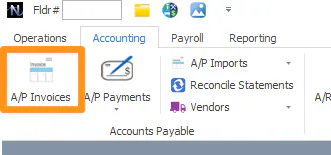
From the A/P Invoices button on the Operations or Accounting tab.
-
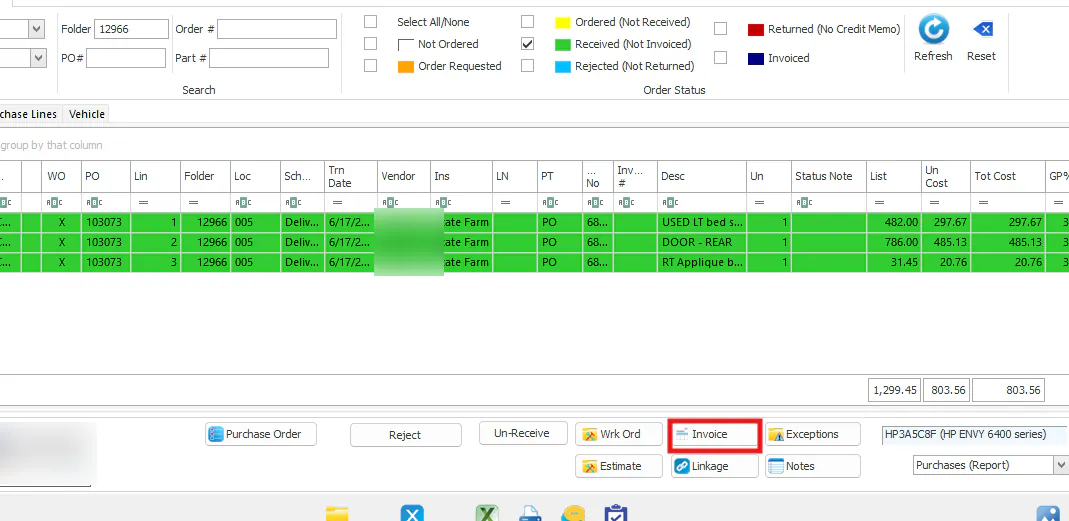
From the Purchase Assistant: select the lines and then Invoice. See Invoice from the Purchase Assistant.
-
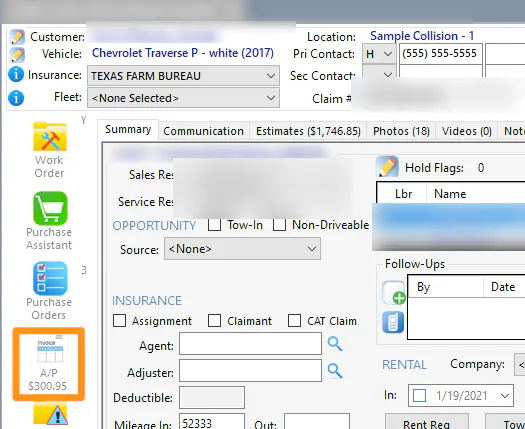
From the folder: select A/P on the left.
Invoice from Document Imaging
Section titled “Invoice from Document Imaging”-
Scan the invoices into Nexsyis.
-
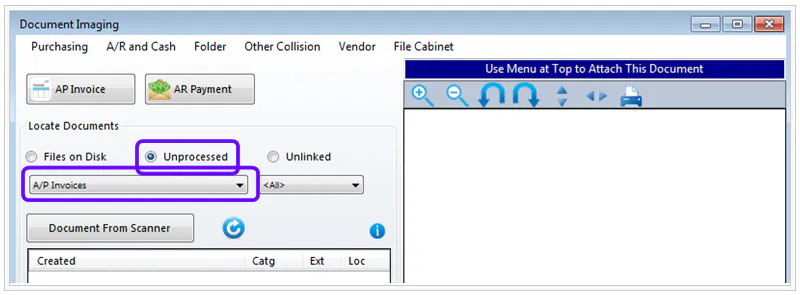
Select Imaging to open Document Imaging. Select Unprocessed to see new invoices, and choose A/P Invoices in the drop-down to show only parts invoices (not overhead).
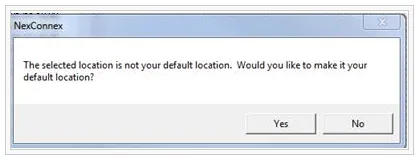
If you’re linking several invoices, it can help to filter by location in the next drop-down. If the location you choose isn’t your default location, Nexsyis asks whether to make it your default. Select Yes to change your default location; the AP invoice screen then uses it as the invoice location.
-
Select the invoice image, then select AP Invoice.
-
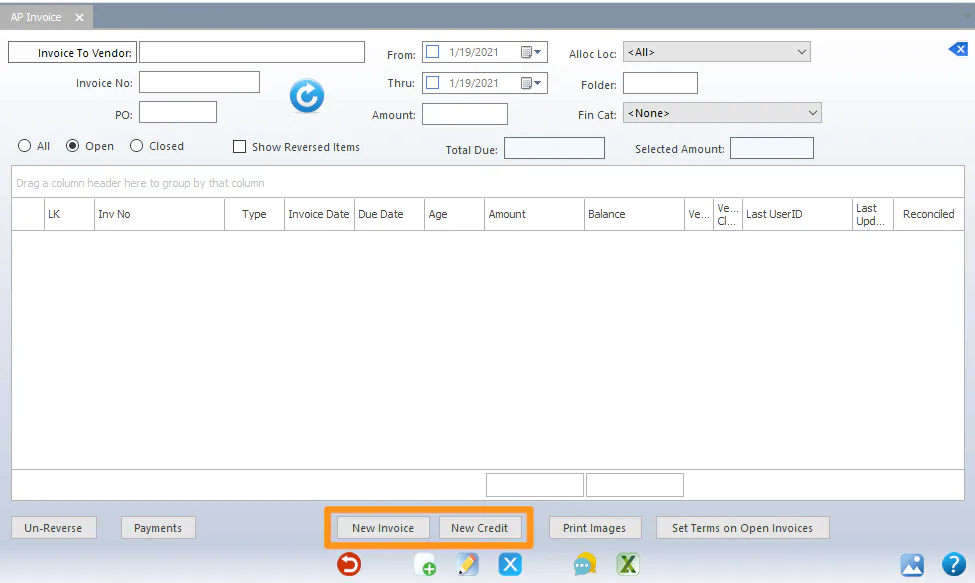
In PO, enter the PO number from the parts sticker and select Refresh, to check whether the invoice has already been entered.
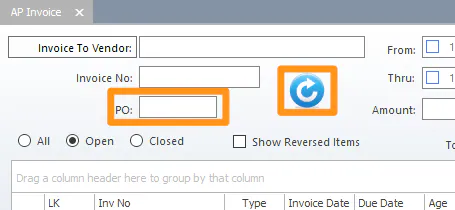
An earlier invoice for the PO may be listed. If its total doesn’t match, this invoice hasn’t been entered yet. If you’re still not sure, select the listed invoice and view its image to compare.
-
Select New Invoice or New Credit, depending on the document.
-
At the top, enter:
- Invoice No
- Date: the invoice date, as mmddyyyy. Don’t use the postmark or today’s date.
- Inv Cost: the invoice total. The amount already shown is calculated from the estimate list price, less any vendor discount.
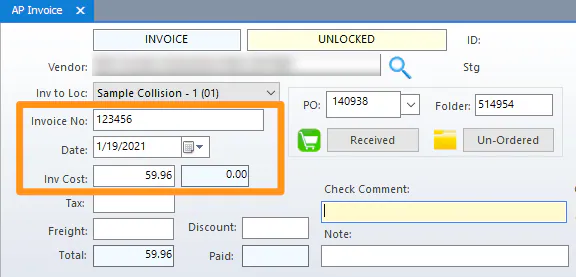
Anything you type in Check Comment prints on the check stub next to this invoice. It’s optional, but useful, for example, for a utility vendor with several meters.
-
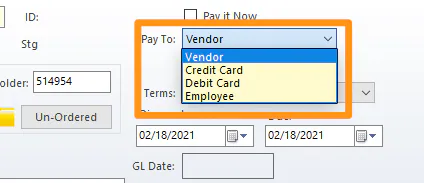
Check the Pay To drop-down at the top right:
- Vendor: pay the vendor.
- Credit Card: the part was paid at delivery with the company credit card, and the cost needs to go to that card.
- Employee: an employee paid and needs to be reimbursed.
-
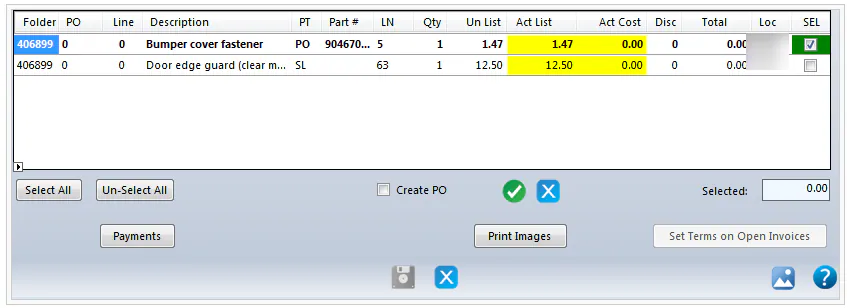
On the lower half of the screen, enter the Act List and Act Cost from the invoice. They may differ from what’s in Nexsyis. Select the yellow box and type the new amount. If the invoice doesn’t show the list price, multiply the cost by the vendor’s known discount.

If the PO has lines that aren’t on this invoice, double-click their box in the SEL column to clear them. Selected lines are green.
-
When the totals match, select the green check mark below the lines.
-
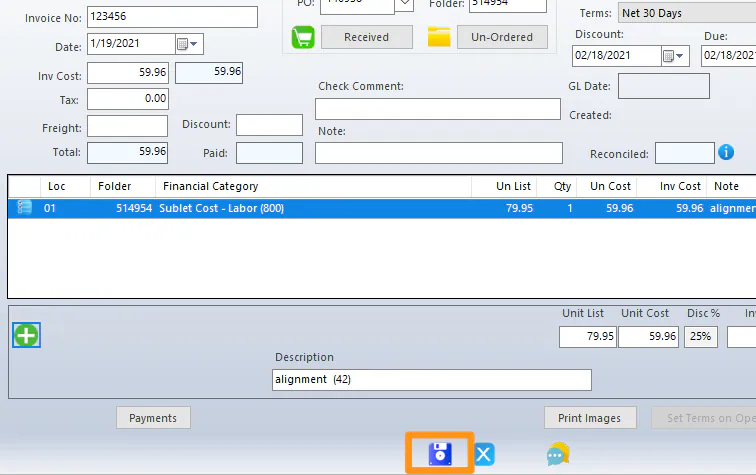
When the selected total matches the Inv Cost you entered, Save becomes available. Select Save.
Add a line that isn’t on the PO
Section titled “Add a line that isn’t on the PO”If the invoice has a line that isn’t on the PO, such as a core charge, add it before you save.
- Select the green plus button.
- Choose the Financial Category and the Financial Location the line is billed to, then enter the Qty, Unit List, Unit Cost and Description.
- Enter the Folder. This is the most important field.

Invoice from the Purchase Assistant
Section titled “Invoice from the Purchase Assistant”Lines not ordered or ordered (white or yellow)
Section titled “Lines not ordered or ordered (white or yellow)”-
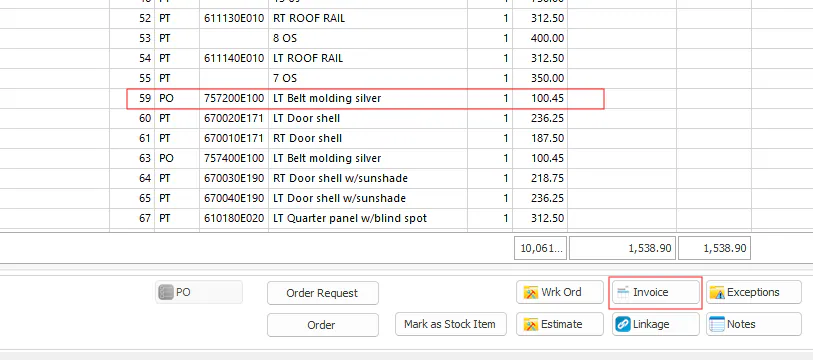
Open the Purchase Assistant and select a white or yellow line to invoice.
-
Select Invoice.
-
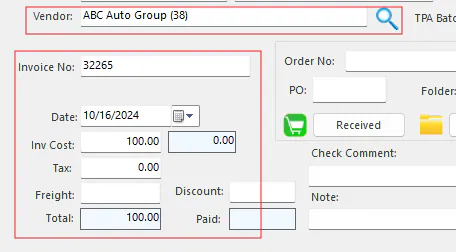
Find the vendor with the search button, and fill in Invoice No, Date and Inv Cost.
-
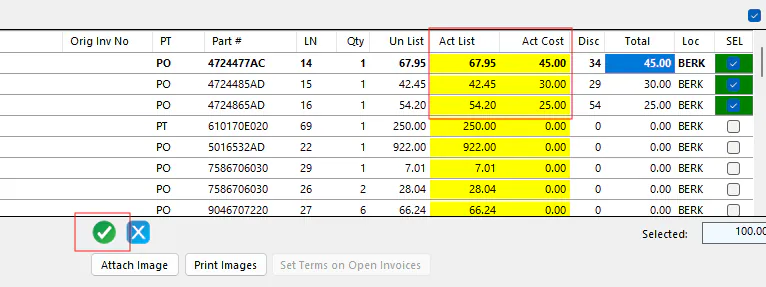
Enter the correct Act List and Act Cost for each part on the invoice, then select the green check mark to review your work.
-
Select Save. Save isn’t available until the amounts balance.
To add a core charge when invoicing white lines:
- Select the green plus button.
- Complete Financial Category, Financial Location, Qty, Unit List, Unit Cost, Description and Folder.
- Select Save.
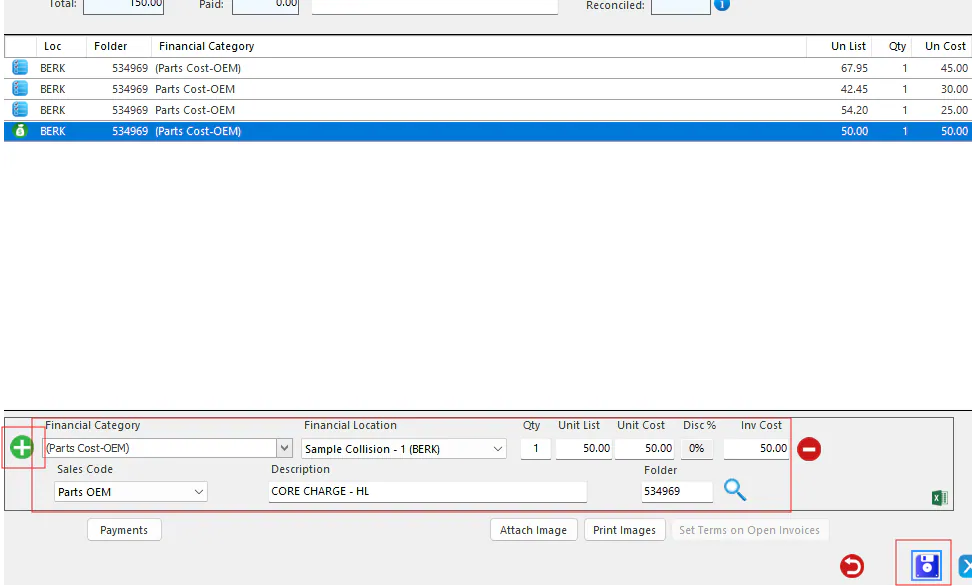
See also Add a core charge.
Received lines (green)
Section titled “Received lines (green)”-
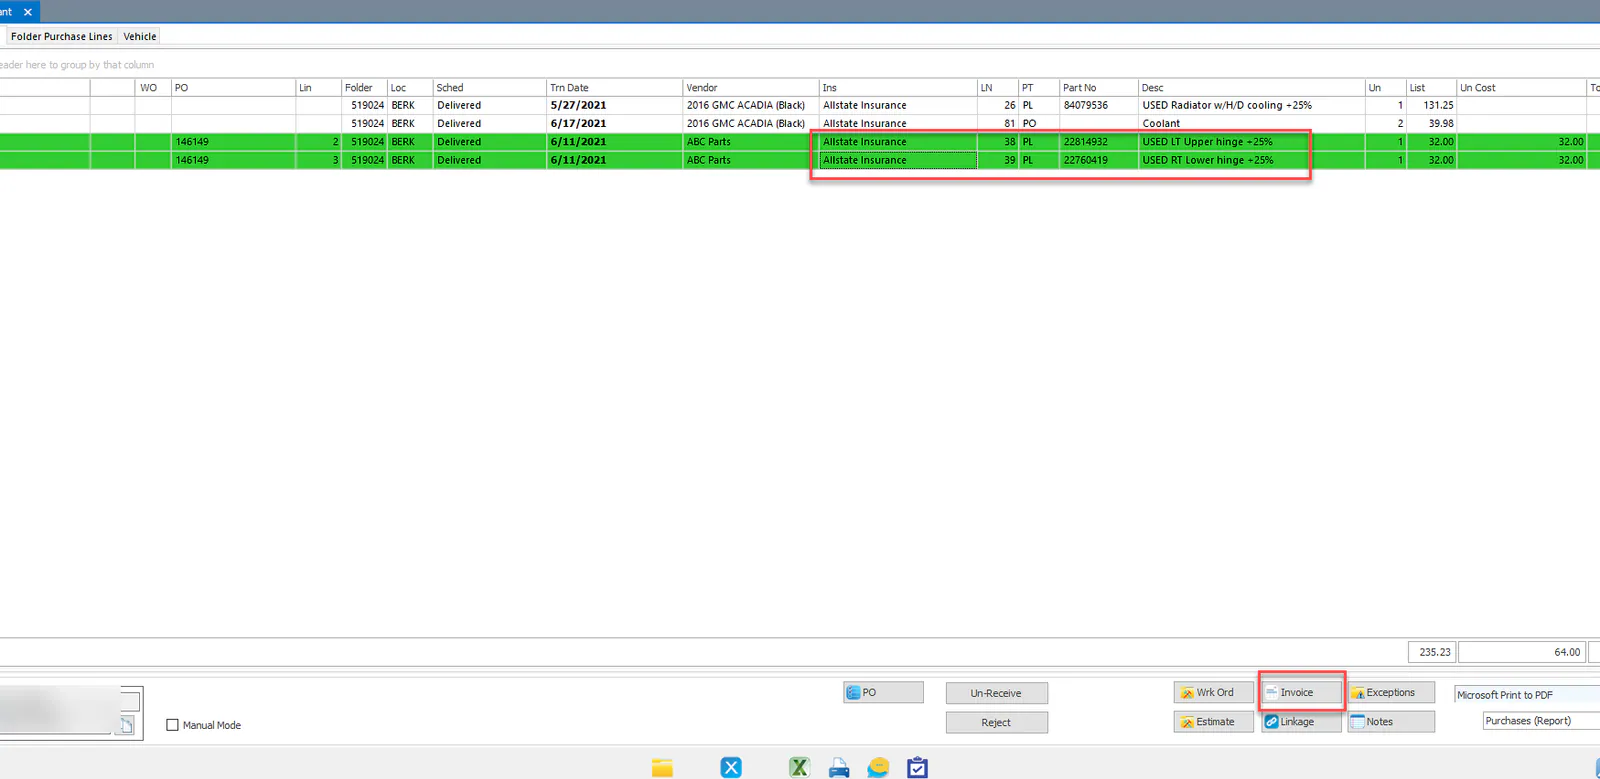
Open the Purchase Assistant from the folder the invoice is for.
-
Select the parts you’ve already received, then select Invoice at the bottom of the screen.
-
Fill in the Invoice No, Date, Inv Cost, and each line’s Act List and Act Cost.
-
Select the green check mark to review your work, then select Save.
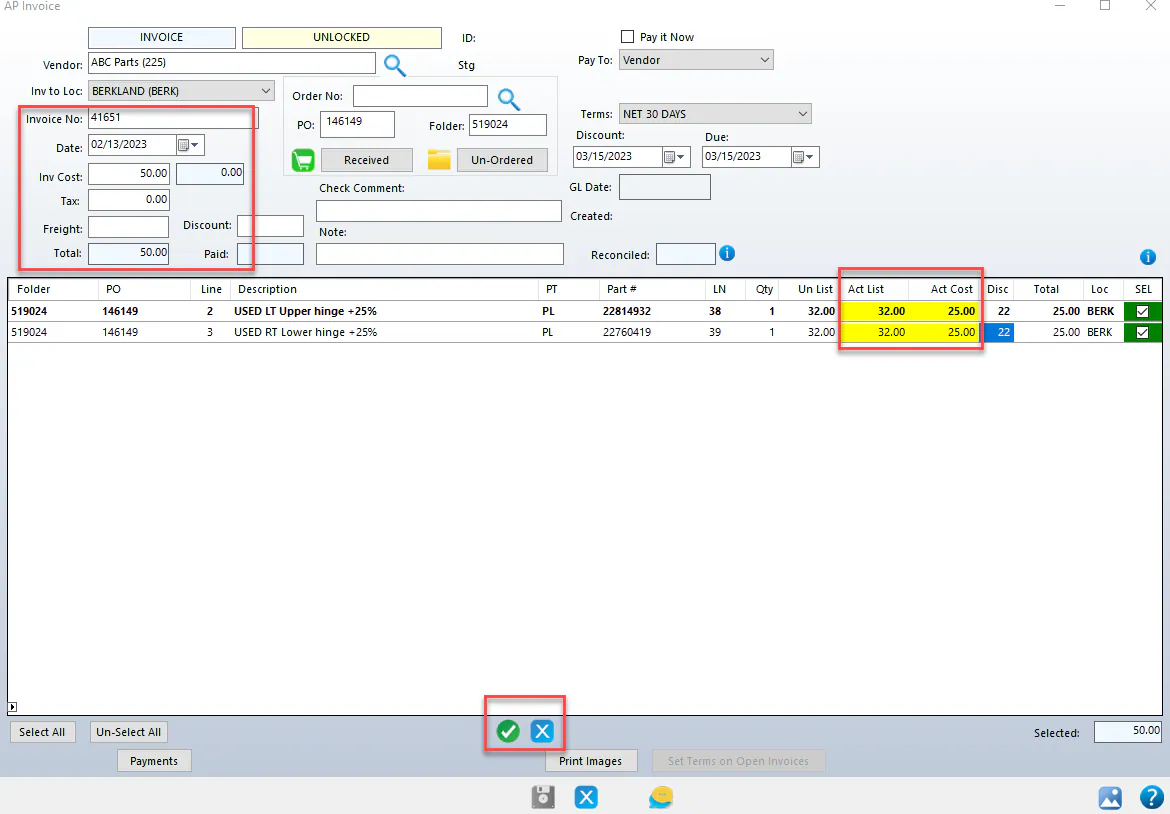
If the invoice won’t save, check your numbers until it balances.
Duplicate invoice checks
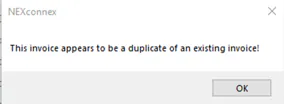
Section titled “Duplicate invoice checks”After you enter the Invoice No, Nexsyis checks whether the vendor already has an invoice with that number. It doesn’t consider the location. If it finds one, A Similar Invoice Exists shows; select the details button to see that invoice.
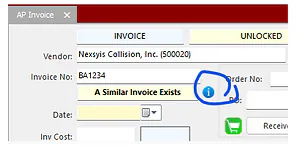
If the vendor, location and invoice number all match but the date is different, Nexsyis shows a warning only.