Approve time
Each week, managers review employees’ time, fix any problems, and approve each employee’s time on the Manage Time screen.
Before you begin
Section titled “Before you begin”- You need permission to approve the employees’ time. See Set time and absence approval permissions.
- If employees request absences on paper forms, scan each form and link it to the employee first. Find the scanned form under Imaging › Unprocessed › Payroll Documents, and choose Absence Form from the Payroll Docs menu as the document type.
Review time
Section titled “Review time”- On the Payroll tab, select Approve Time. The Manage Time screen opens.
- Use the arrow buttons next to Period From and Thru to move back or forward a week.
- To narrow the list, select the checkboxes under Restrict Display to Show Only, such as Employees Missing Punches.
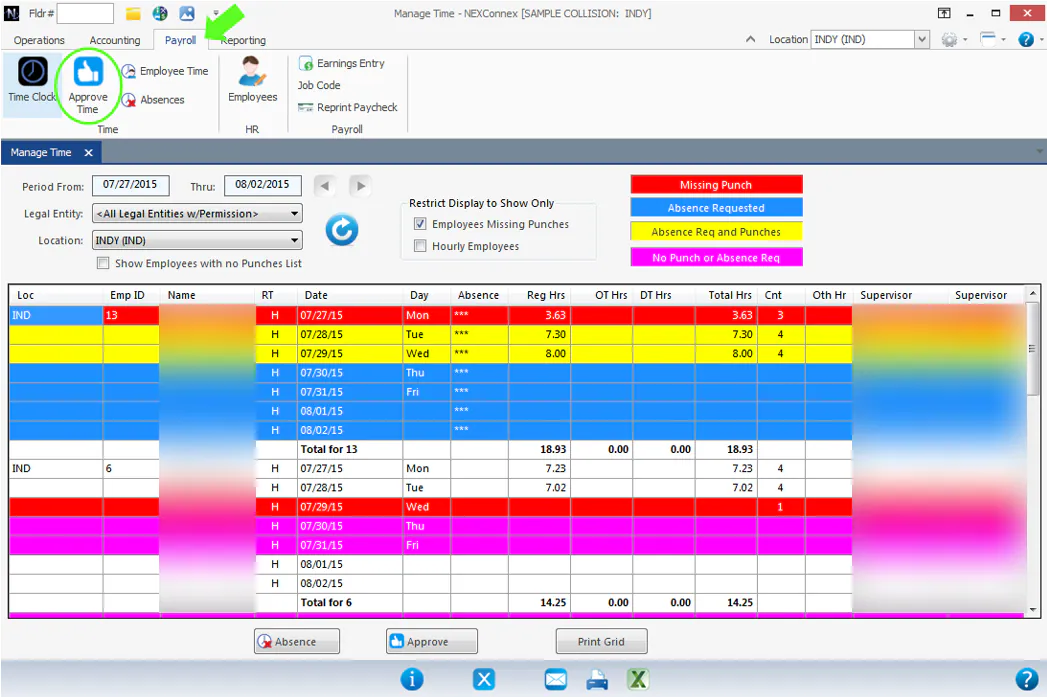
Each day is color-coded:
| Color | Label | Meaning |
|---|---|---|
| Red | Missing Punch | The employee didn’t clock out. |
| Blue | Absence Requested | The employee requested an absence and didn’t clock in. |
| Yellow | Absence Req and Punches | The employee requested an absence but clocked in anyway. |
| Pink | No Punch or Absence Req | The employee didn’t clock in or out and didn’t request an absence. |
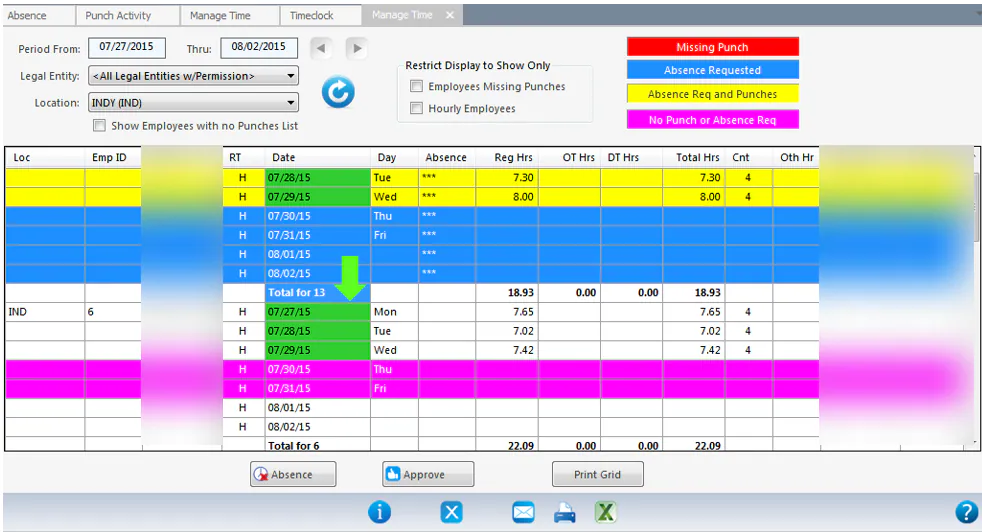
| Green | The day is approved. |
To enter an absence, see Record an absence.
Correct a missing punch
Section titled “Correct a missing punch”-
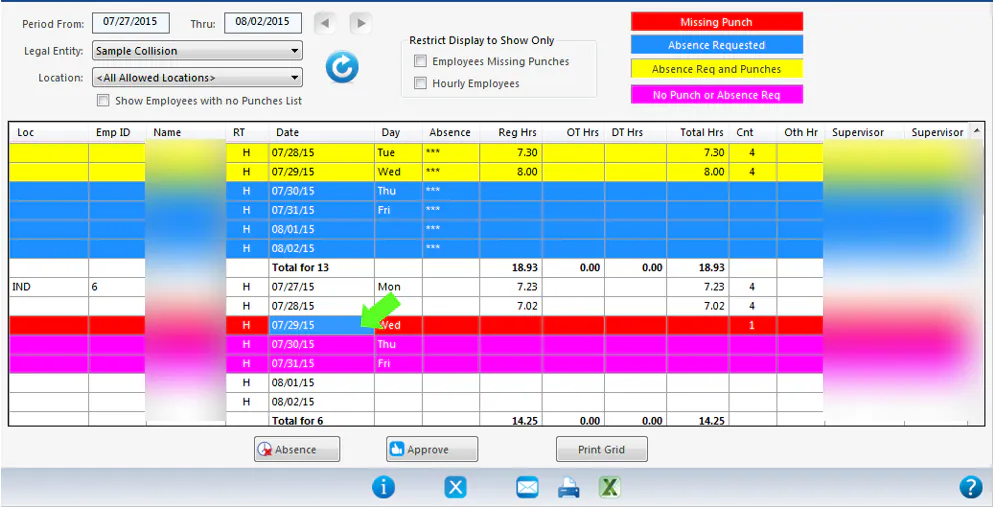
Double-click the red line. The Punch Activity screen opens for that employee.
-
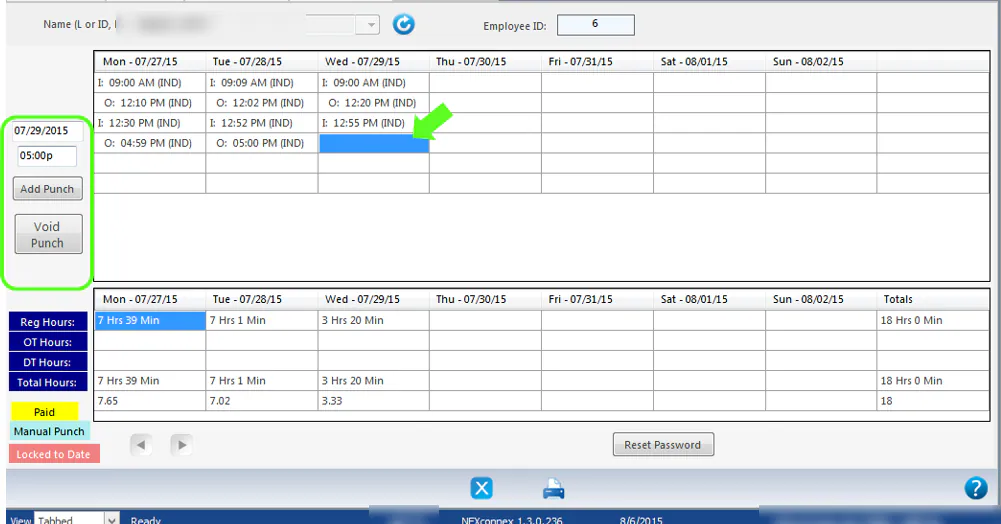
Select New Punch.
-
Enter the clock-in time as 00:00 followed by a for AM or p for PM, for example 05:00p. If your system uses 24-hour time, enter just 00:00.
-
Select Add Punch.
-
Repeat for the clock-out time.
-
Return to the Manage Time screen and select the refresh button to see your changes.
You can also correct punches from Employee Time. See View and edit employee time.
Approve time
Section titled “Approve time”After you resolve every absence and punch problem, approve each employee’s time:
- To approve one day, double-click the date.
- To approve the whole week, select the employee’s bold total line, then select Approve.
Approved dates turn green. You need to approve each employee on the list.