Technician time overview
Technician time lets technicians clock their time to specific folders and repair stages. This page explains how it works, how to prepare a folder, and how the Technician Time screen lists work.
To turn technician time on, see Set up technician time and Technician Clock. For the technician’s steps, see Clock in and out of repairs.
How technician time works
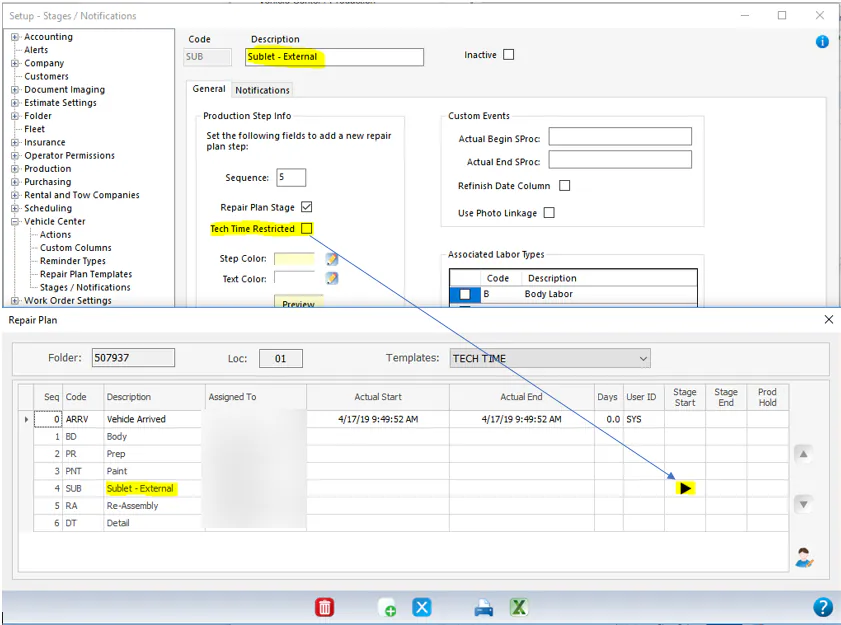
Section titled “How technician time works”- If a stage is Tech Time Restricted, only the technician assigned to that stage can start and stop it, from the Technician Time screen.
- If a stage isn’t Tech Time Restricted, any user with permission can start and stop it with the Stage Start and Stage End buttons on the repair plan.
- If you use the Nexsyis time clock, starting a stage on the Technician Time screen clocks the technician in. Stopping a stage clocks them out if the stop reason is set to do that. Stop reasons are set up under Stage Stop Reasons. This doesn’t apply to technician teams: team members use the regular Nexsyis time clock for their punches.
- A technician can be clocked in to only one stage at a time. A team can be clocked in to several jobs at once.
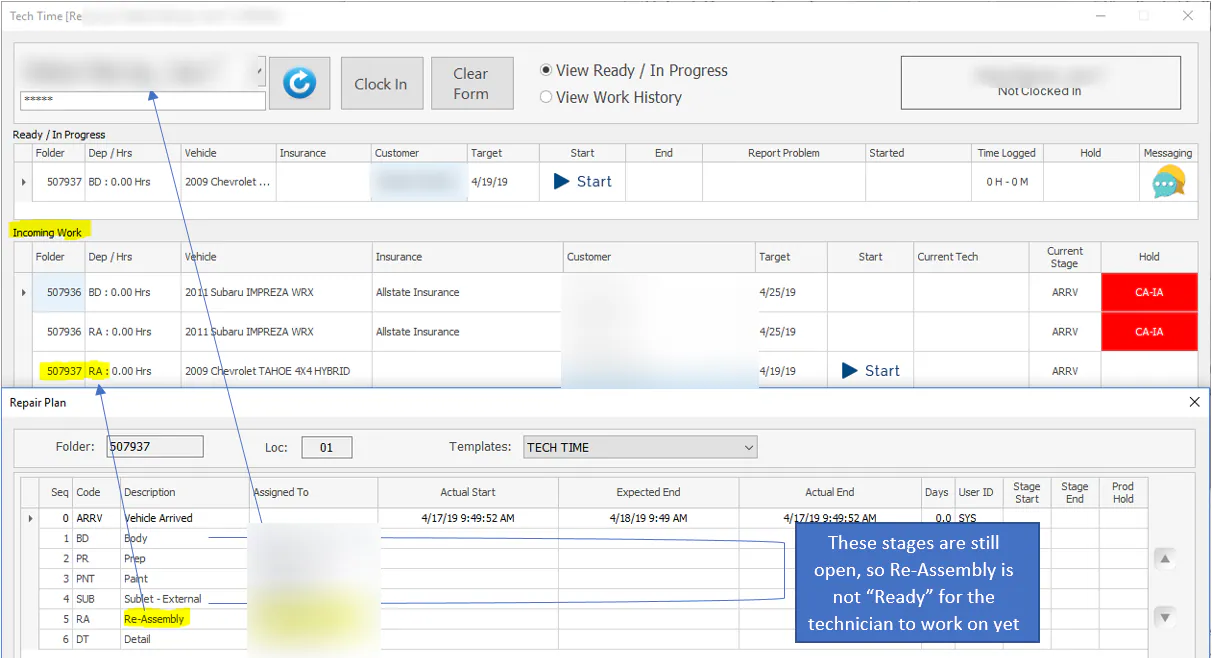
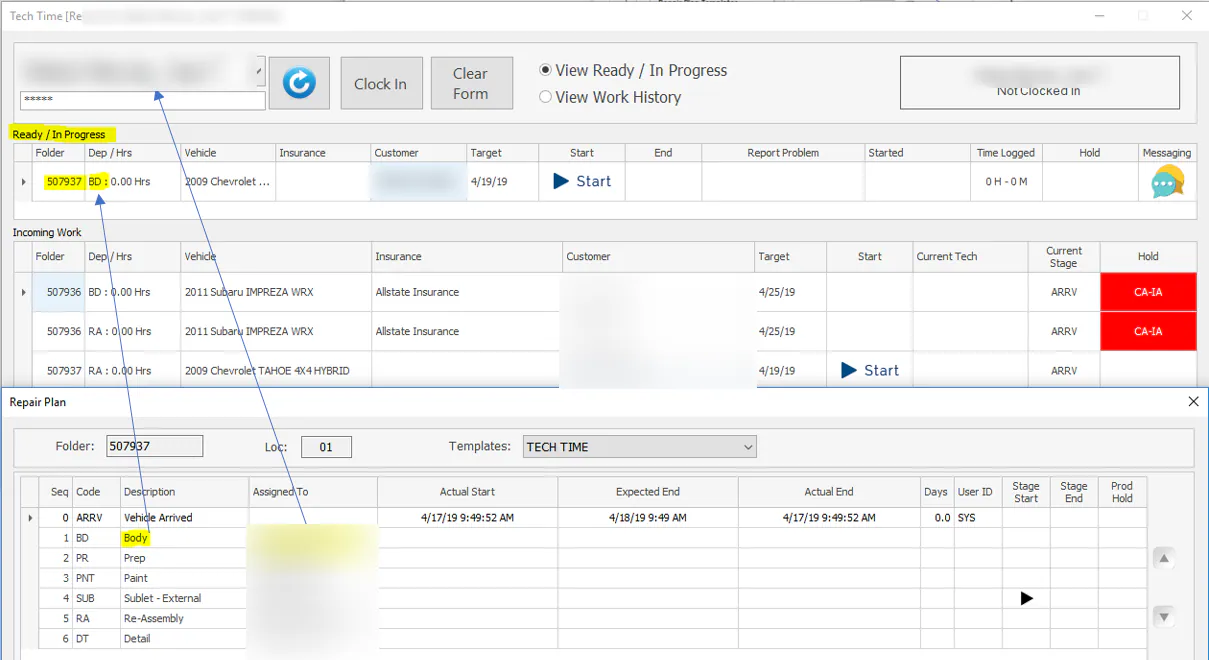
- A stage shows in the technician’s Ready / In Progress list once all the stages before it are complete. Until then, it shows in the Incoming Work list.
- Stages can be started and stopped out of order, and several stages on a folder can be in progress at the same time. The folder shows the stage with the lowest sequence number as its current stage.
- If a folder is on a hold with Suspend Repair Plan turned on, its stages can’t be started from the Technician Time screen until the hold is removed. See Put a vehicle on hold.
- The Expected End date for each stage is calculated backward from the folder’s Target Date. To change how it’s calculated, contact Nexsyis support.
- A technician can’t complete a stage while it has open quality control (QC) items.
Prepare the folder
Section titled “Prepare the folder”-
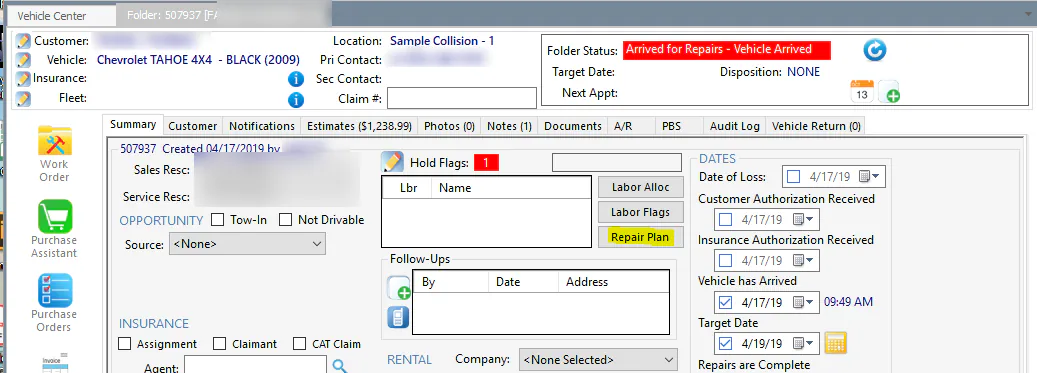
On the folder’s Summary tab, select Vehicle has Arrived.
-
Set the Target Date.
-
Check that Customer Authorization Received and Insurance Authorization Received are filled in, so there are no holds on the folder.
-
Select Repair Plan to review the repair plan.
-
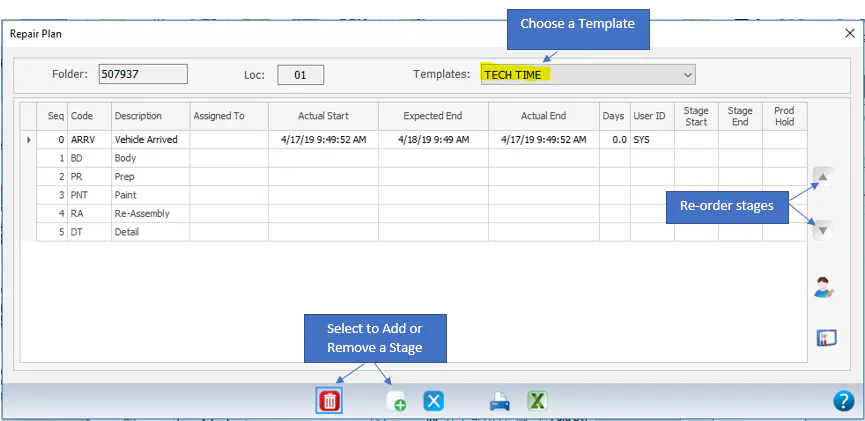
Choose the right template from Templates, then add, remove or reorder stages as needed. See Edit a vehicle’s repair plan.
-
Assign a resource (a technician, a team or another resource) to each stage, as described below.
Assign stages from Labor Allocation
Section titled “Assign stages from Labor Allocation”For stages that have labor hours, assign the technician while you allocate labor.
-
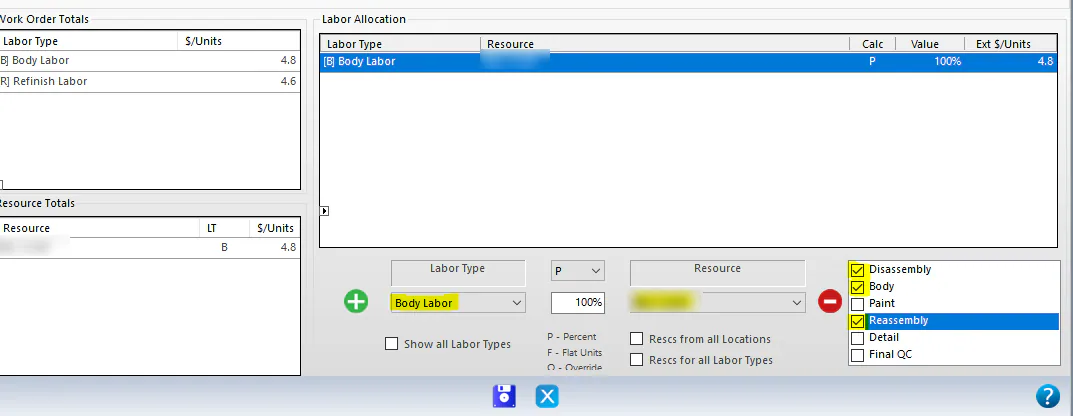
On the folder’s Summary tab, select Labor Alloc.
-
Allocate labor as usual. See Allocate labor.
-
In the list of repair stages on the right, check each stage this technician or team will complete. This assigns them to those stages.
Assign the remaining stages from the repair plan
Section titled “Assign the remaining stages from the repair plan”-
On the repair plan, select the Assign Resource button.
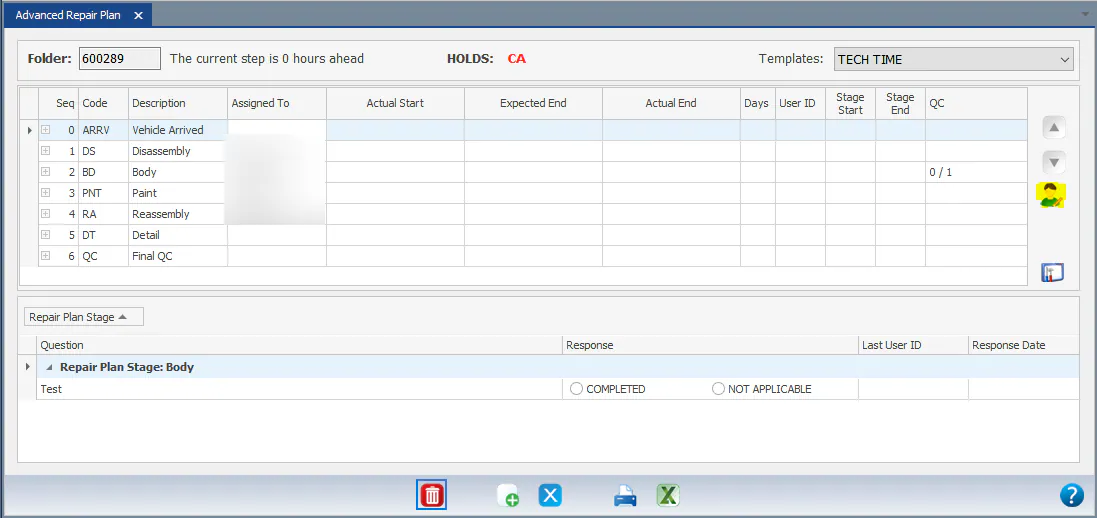
-
For each resource, check the stages on the left, select the resource on the right, and then select Save.
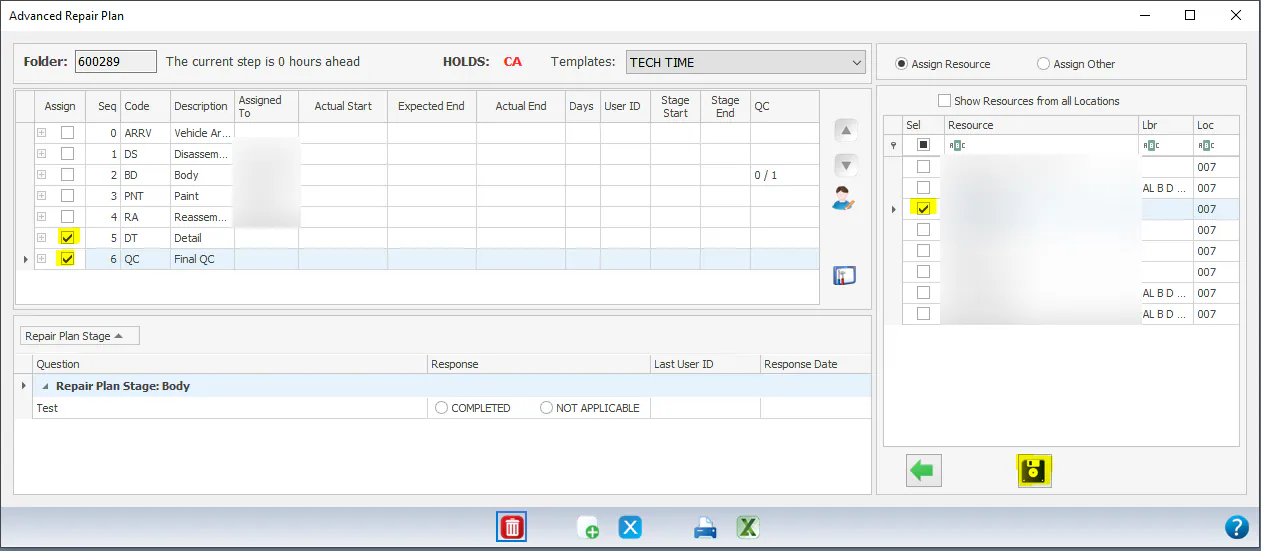
-
If a vendor or insurance company does the stage, select Assign Other, search for and select them, and then select Assign.
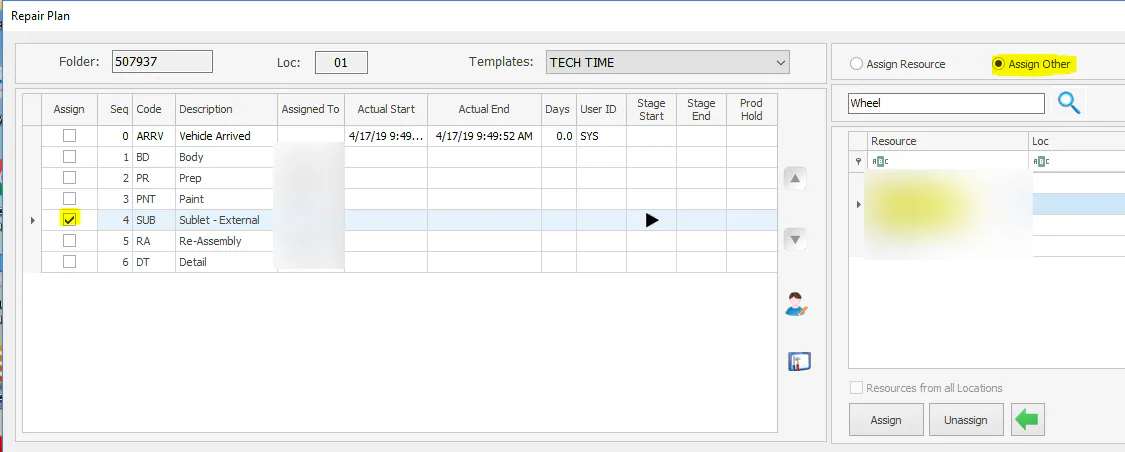
How vehicles move through stages
Section titled “How vehicles move through stages”-
Tech Time Restricted stages: the technician in the stage’s Assigned To column starts and stops the stage from the Technician Time screen. No start or stop buttons show on the repair plan.
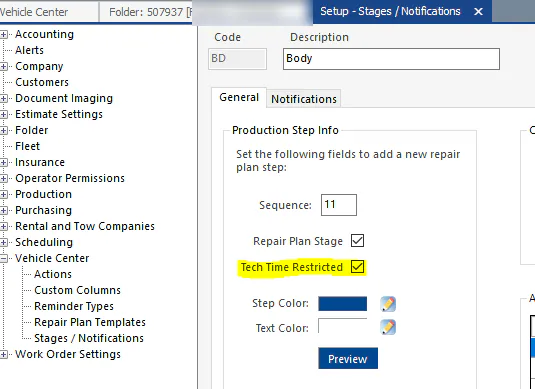
-
Other stages: any user with permission starts and stops the stage from the repair plan.
The Technician Time screen
Section titled “The Technician Time screen”Technicians and teams use the Technician Time screen to see their assigned work and to start and stop repair stages.
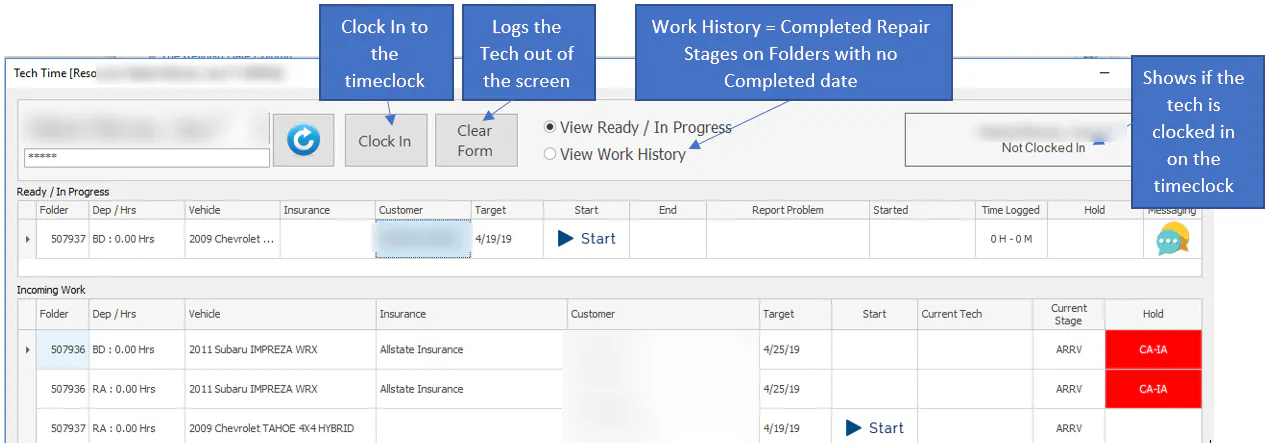
- Clock In clocks the technician in to the time clock.
- Clear Form logs the technician out of the screen.
- View Work History lists completed stages on folders that don’t have a completed date yet.
- The box at the top right shows whether the technician is clocked in to the time clock.
Ready / In Progress list
Section titled “Ready / In Progress list”This list shows the technician’s assigned stages where every earlier stage on the folder is complete, and any stages they’ve already clocked time to.
A line with an orange background is on hold.

Incoming Work list
Section titled “Incoming Work list”This list shows the technician’s assigned stages that still have open stages before them on the folder.