Correct technician punches
Use the Technician Time Punch Corrections screen to fix a technician’s repair punches: add a missing punch, change an in or out time, move a punch to a different folder or stage, or delete it.
Open a technician’s punches
Section titled “Open a technician’s punches”-
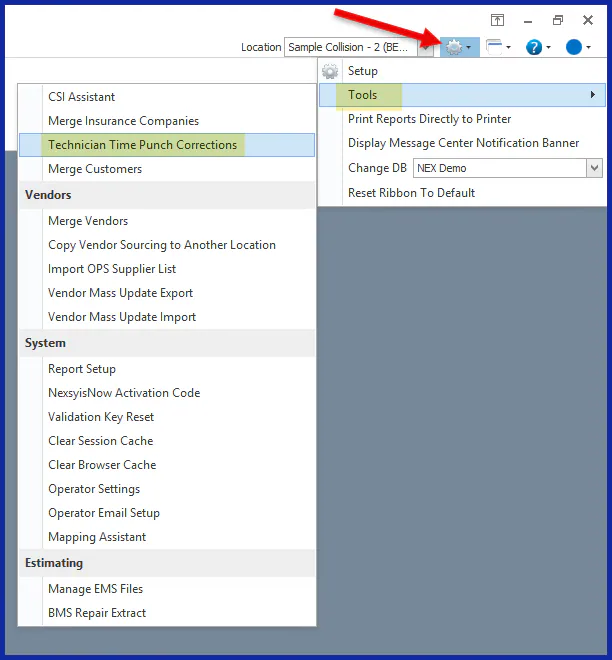
Open System › Tools › Technician Time Punch Corrections.
-
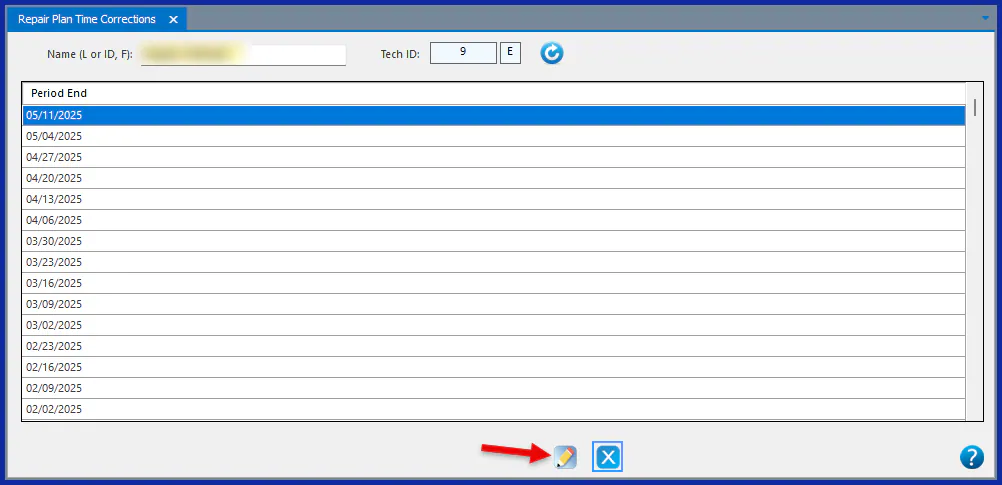
In Name (L or ID, F), type the technician’s last name or ID and press Enter.
-
Double-click the Period End date for the week you want, or select it and then select the pencil button.
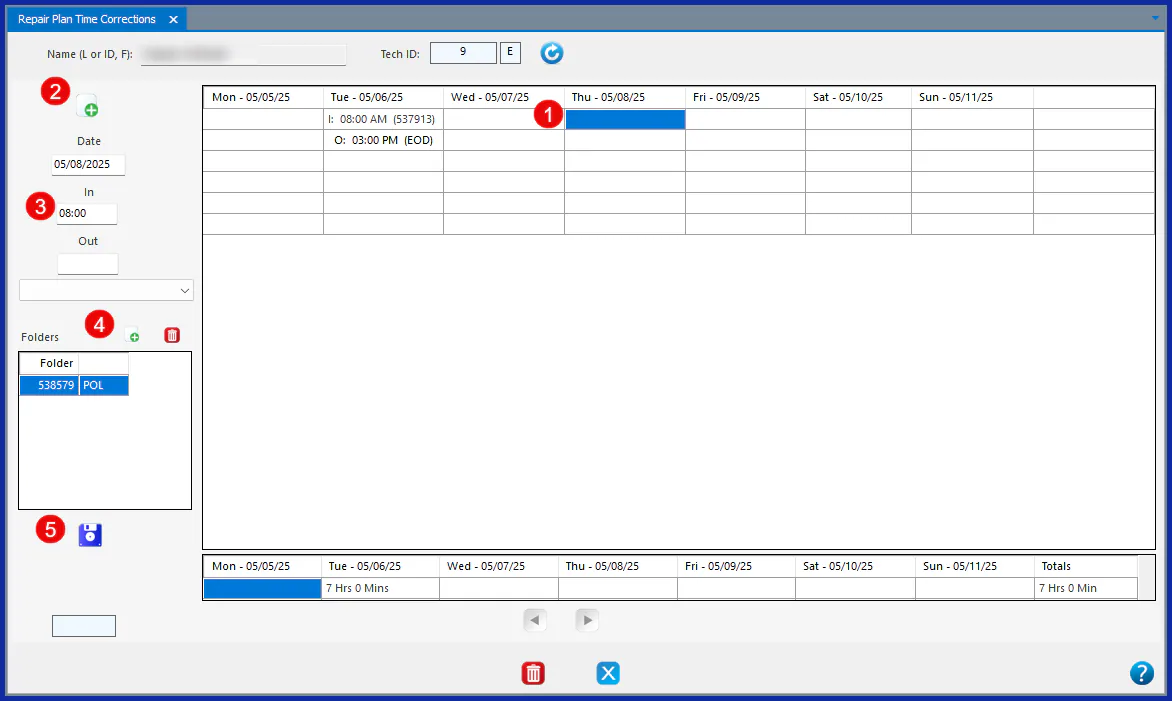
The week opens with each day’s punches in its own column.
Add a punch
Section titled “Add a punch”-
In the grid, select an empty line under the day.
-
Select the New button on the left.
-
Check the Date, and then type the In time. You can type the Out time and select the reason now, or add them later.
-
Next to Folders, select the New button.
-
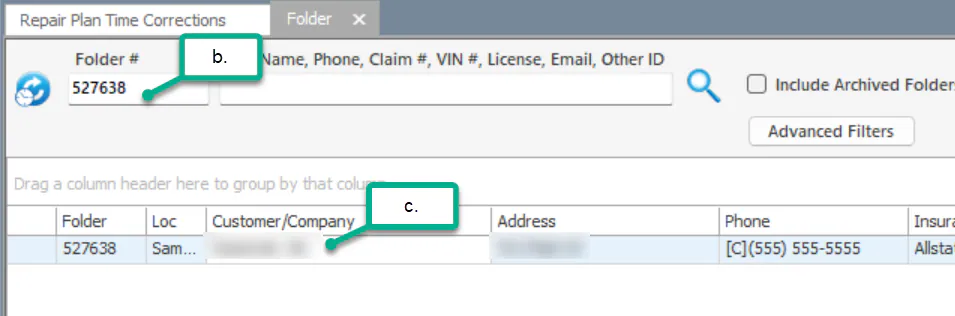
In the folder search, search for the folder number, and then double-click the folder.
-
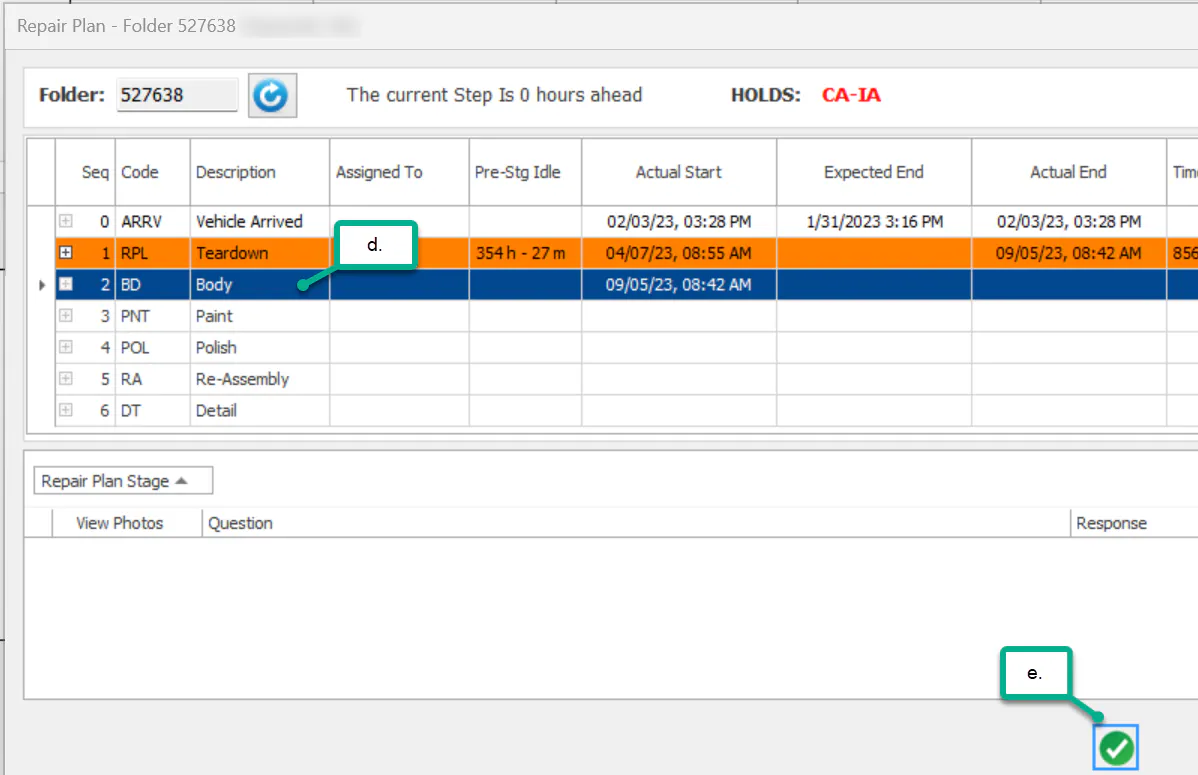
The folder’s repair plan opens. Select the stage the time applies to, and then select the green check mark.
-
To apply the punch to more folders, repeat steps 4 to 6.
-
Review the folder list, and then select Save.
Add or change the out time
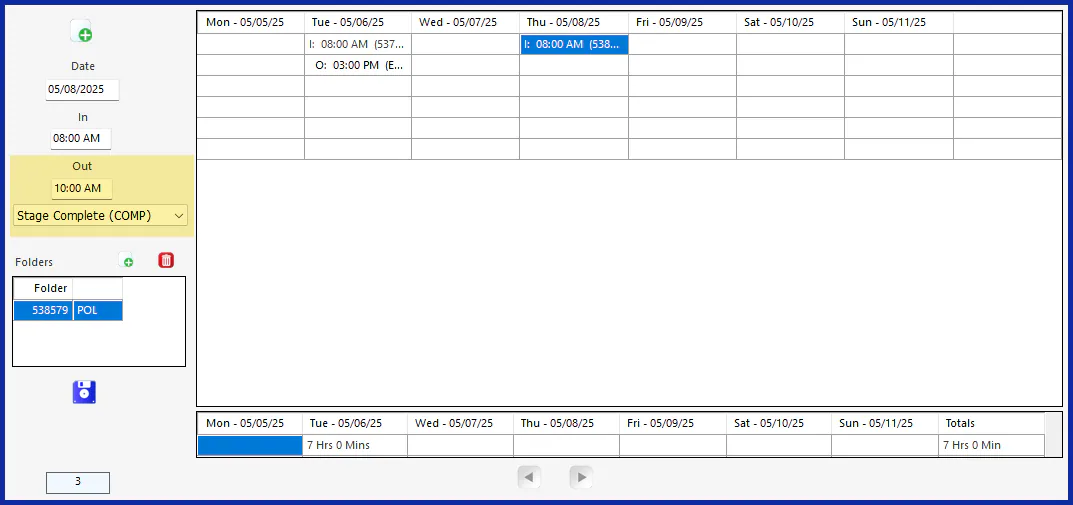
Section titled “Add or change the out time”- Select the punch in the grid.
- Type or correct the In or Out time.
- If you’re adding the out time, select the reason the technician clocked out.
- Select Save.
Change the folder a punch applies to
Section titled “Change the folder a punch applies to”-
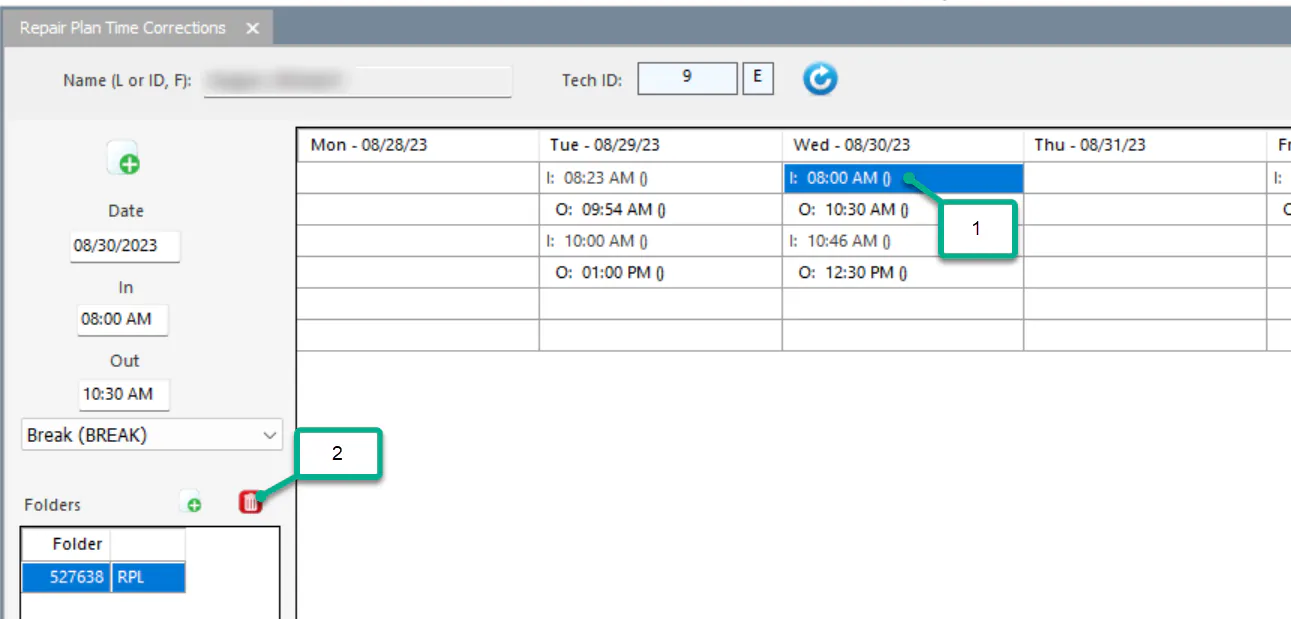
Select the punch in the grid.
-
Next to Folders, select the folder and then the delete button to remove it.
-
Attach the correct folder or folders, as in steps 4 to 6 of Add a punch.
-
Select Save.
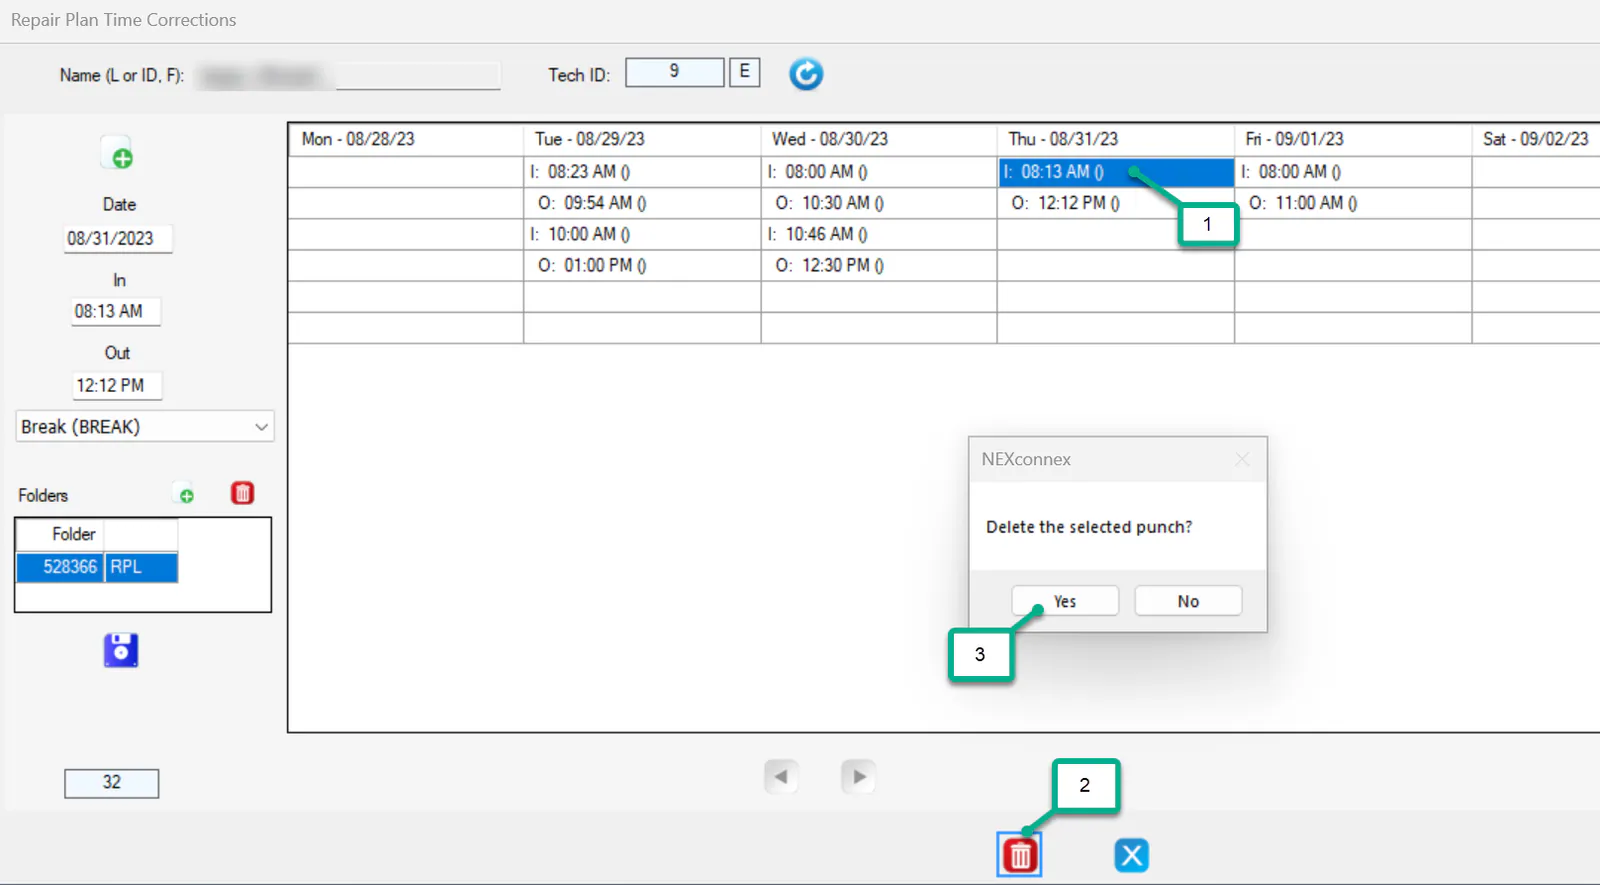
Delete a punch
Section titled “Delete a punch”- Select the punch.
- Select the red delete button on the bottom button bar.
- Select Yes.
Both the in and the out punch are deleted.