
Map a bank file
When you import a bank file that isn’t in .bai format, you map its columns once and save the layout as an import template. Next time, select the template and the file is read the same way.
In a CSV file, each field is separated by a comma, and text fields are wrapped in double quotes (“).
Open the mapping screen
Section titled “Open the mapping screen”- On the Accounting tab, select Account Reconciliation, then Import Bank File.
- Select the search button and open the non-BAI file. The mapping screen opens.
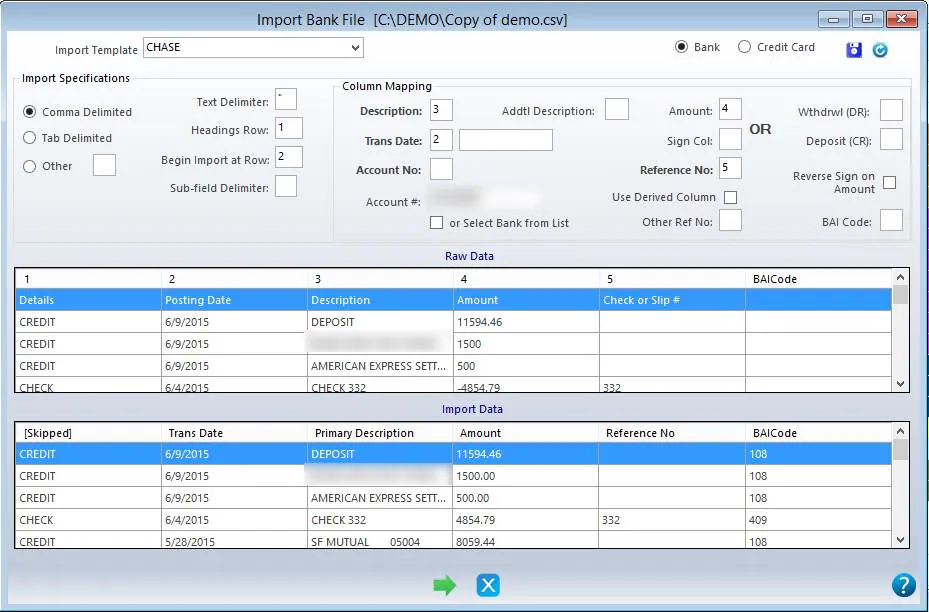
The Raw Data grid shows the file split into numbered columns. Use the fields at the top to tell Nexsyis which columns it needs.
Set the import specifications
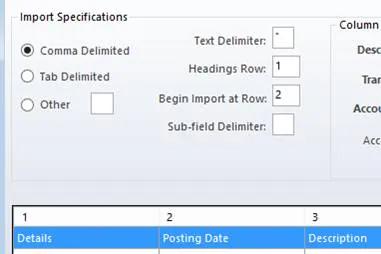
Section titled “Set the import specifications”- Select how the fields are separated: Comma Delimited, Tab Delimited or Other (enter the character).
- In Text Delimiter, enter the character used to wrap text fields, usually a double quote (“).
- If the file has a heading row, enter its row number (from the leftmost column of Raw Data) in Headings Row.
- In Begin Import at Row, enter the row number of the first transaction. Rows above it are ignored.

Map the columns
Section titled “Map the columns”Enter the column number from the top of Raw Data for each field:
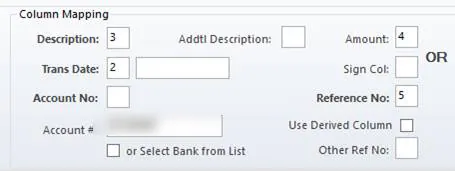
- Account No: the column holding the bank account number, if the file has one. If not, enter the bank account number in Account #. Because the account number is then fixed, save the template under a name specific to that account.
- BAI Code: the column holding a BAI code, if there is one. If not, Nexsyis assigns a generic debit or credit BAI code.
- Trans Date: the date column.
- Description: the column with the transaction’s description.
- Addtl Description: optional, if the file has a second description column.
- Reference No: the column with the check or reference number.
- Other Ref No: optional, if the file has a second reference number.
Amounts
Section titled “Amounts”How you map amounts depends on how the file shows debits and credits:
- One amount column, with a minus sign for withdrawals: enter the column in Amount.
- An unsigned amount column plus a column with words such as DR, DEBIT, CR or CREDIT: enter the amount column in Amount and the words column in Sign Col.
- Separate columns for debits and credits: enter them in Wthdrwl (DR) and Deposit (CR).
Check and save the template
Section titled “Check and save the template”-
Select Apply to redisplay the file with your settings.
-
Check the Import Data grid. The format is right when it has a date column, an amount column with positive values, a reference number column, a description column and a BAI code column.
-
Select or name a template in Import Template, then select Save.

Import a file with a saved template
Section titled “Import a file with a saved template”When you open a non-BAI file, select your saved template from the Import Template list and select Apply. Then select Process File. The file opens in the normal import screen; continue as in Import bank and credit card transactions.