Order and invoice through OPS Trax
Nexsyis works with OPS Trax for ordering, receiving, returning and invoicing parts. To turn on the integration, contact Nexsyis Support.
Set up OPS Trax
Section titled “Set up OPS Trax”Location setup
Section titled “Location setup”OPS Trax gives Nexsyis a unique identifier, which Nexsyis Support enters on your Location Setup screen.
Vendor mapping
Section titled “Vendor mapping”OPS Trax and Nexsyis keep separate vendor lists, and each OPS Trax vendor must be mapped to its Nexsyis vendor. You’re responsible for mapping any vendors you add in OPS Trax. See Map third-party vendors.
User credentials
Section titled “User credentials”Each user who orders through OPS Trax needs their OPS Trax credentials in Nexsyis.
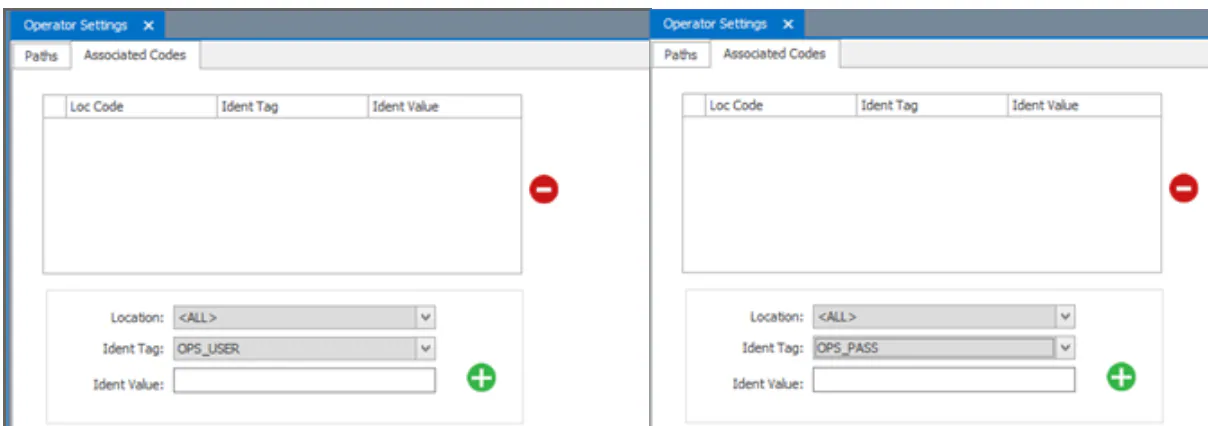
- Open System › Tools › Operator Settings, then the Associated Codes tab.
- Choose the Location.
- Add the user ID: choose the Ident Tag OPS_USER, enter the user’s OPS Trax user ID as the Ident Value, and select the green plus button.
- Add the password: choose OPS_PASS, enter the user’s OPS Trax password, and select the green plus button.
Order through OPS Trax
Section titled “Order through OPS Trax”-
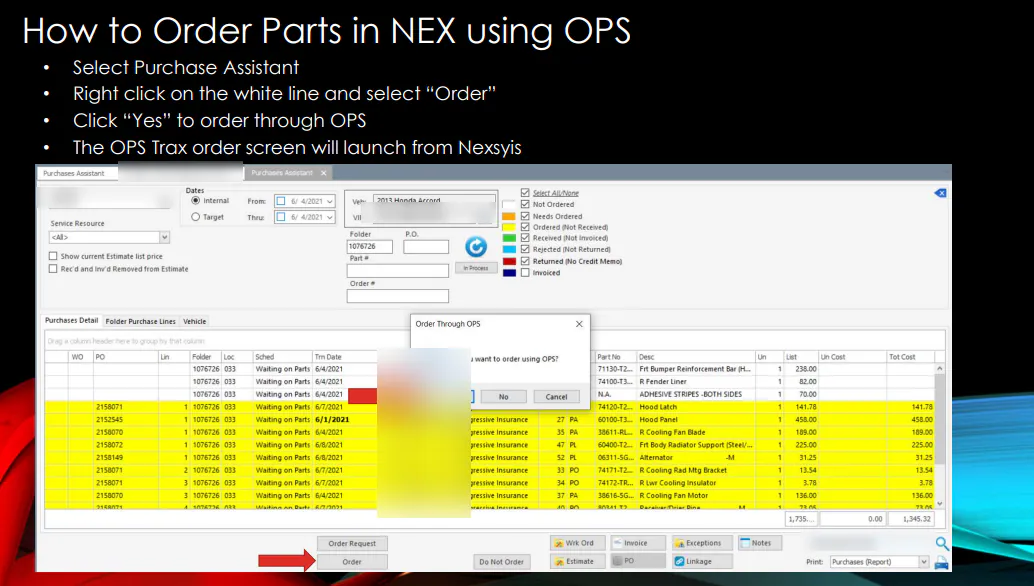
Select the white line and select Order, or double-click the OPS Trax icon.
-
Select Yes to order through OPS Trax.
-
Place the order on the OPS Trax order screen that opens in Nexsyis.
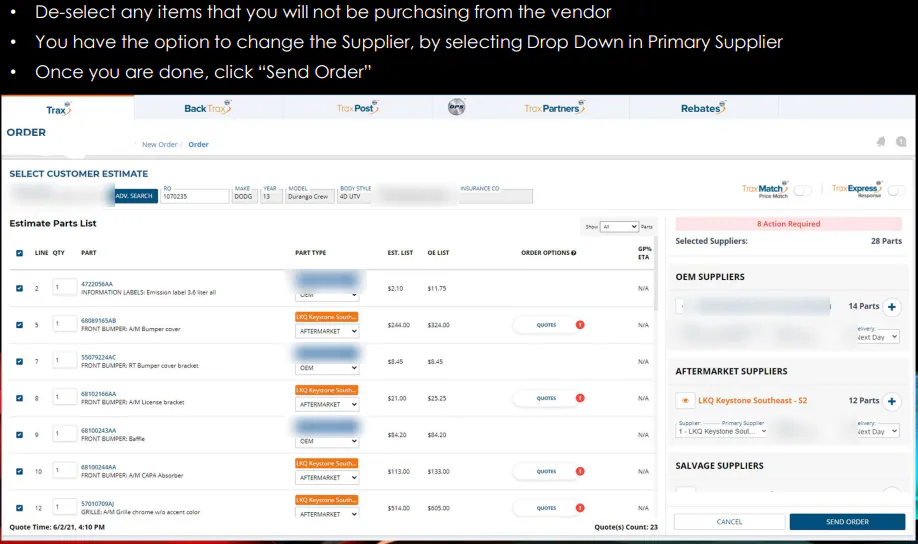
The line then shows the status CON and the source OPS Trax.

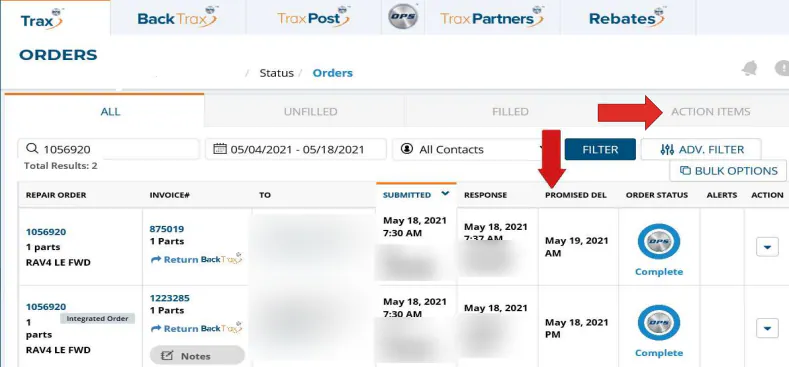
When the vendor confirms the order, the expected delivery date updates automatically in Nexsyis. The Promised Del field in OPS Trax shows the same date.
Reject and reorder a part
Section titled “Reject and reorder a part”-
Select the green received line and select Reject.
-
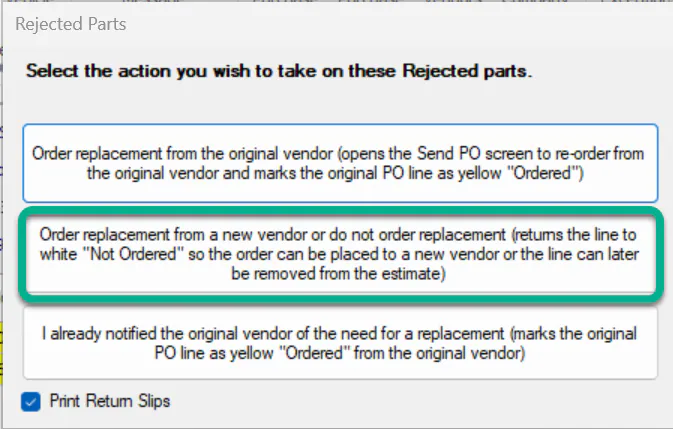
When asked what to do with the rejected line, choose the second option, which turns the line back to white (not ordered).
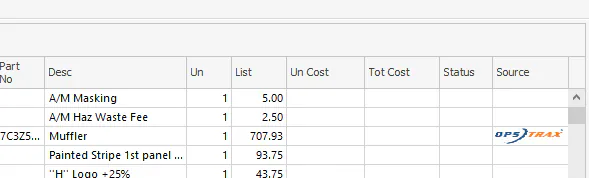
The line is white again, but its source still shows OPS Trax until you act on it.
-
Select the white line and select Order. Select Yes to reorder through OPS Trax.
-
On the OPS Trax order screen, on the right part type tab:
- Choose the vendor.
- Select Order Part.
- Select Confirm.
The line is gray because it was ordered before, but you can still reorder it.
-
When all the parts are selected, select Send Order.
-
For the rejected line, process the return and post the credit as usual. See Return a part.
Post and link OPS Trax invoices
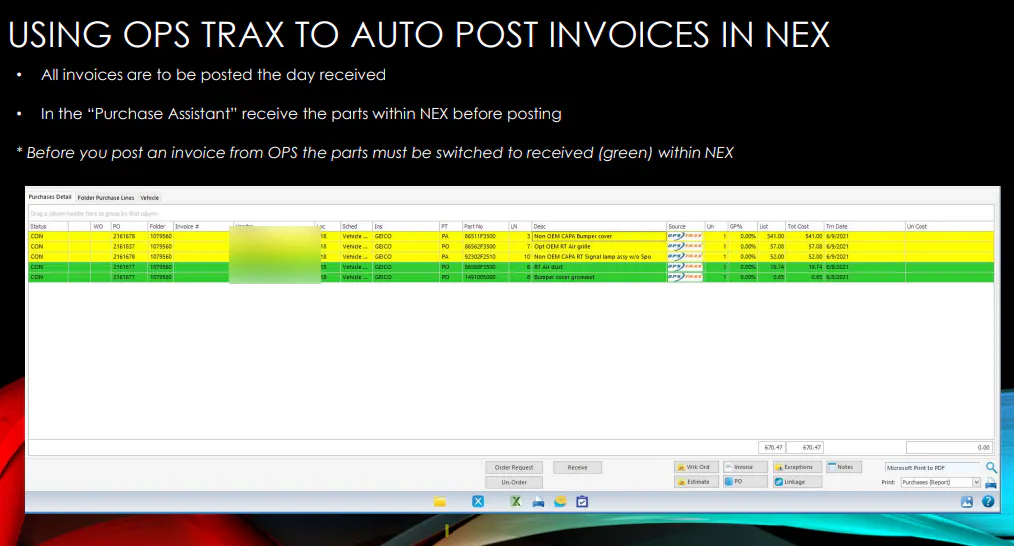
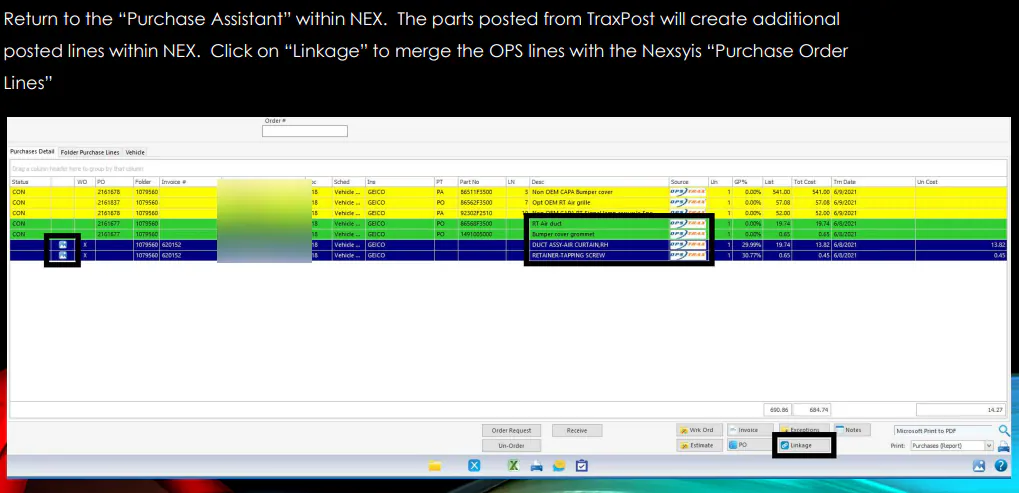
Section titled “Post and link OPS Trax invoices”Vendor invoices are posted in TraxPost and then linked to the purchase order lines in Nexsyis.
-
In OPS Trax, open the TraxPost tab.
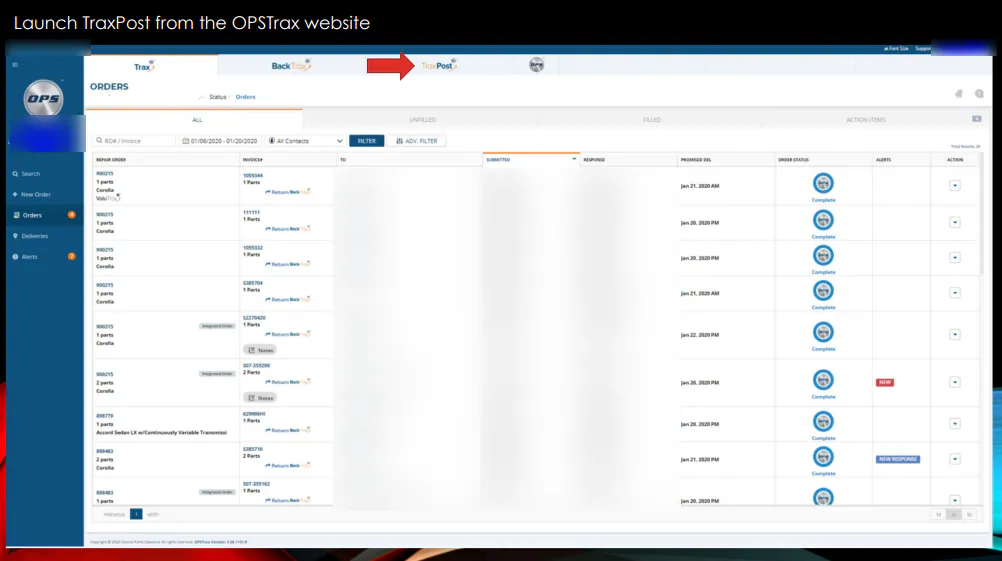
-
On the TraxPost dashboard, select the UNPOSTED count.
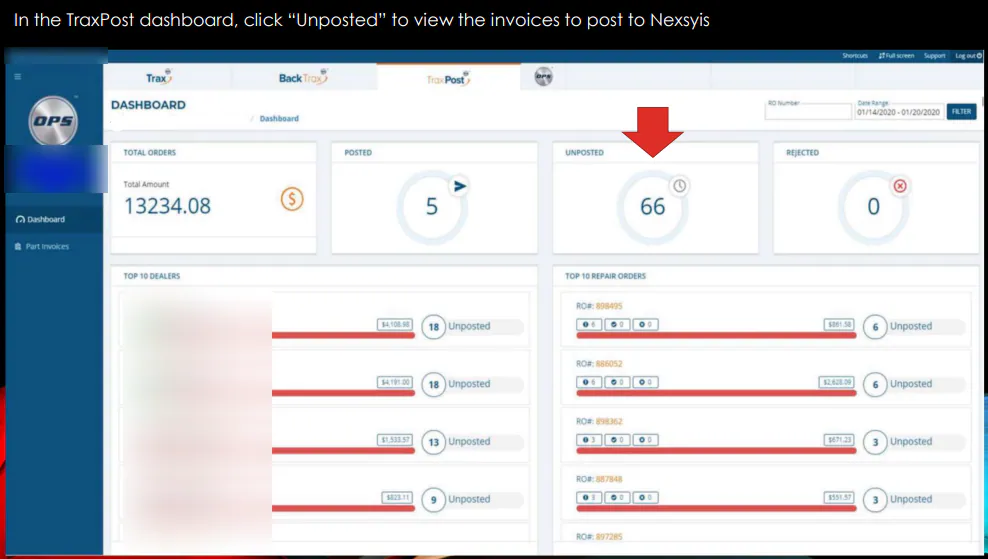
-
On the Unposted tab, filter by RO Number or date range, then select FILTER.
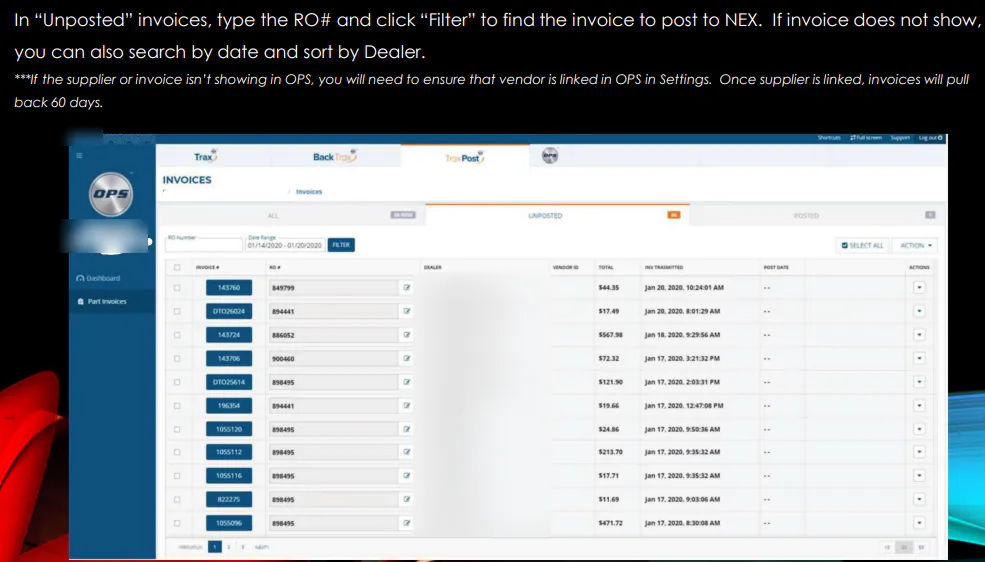
-
Select the invoice, then select ACTION › BULK POST.
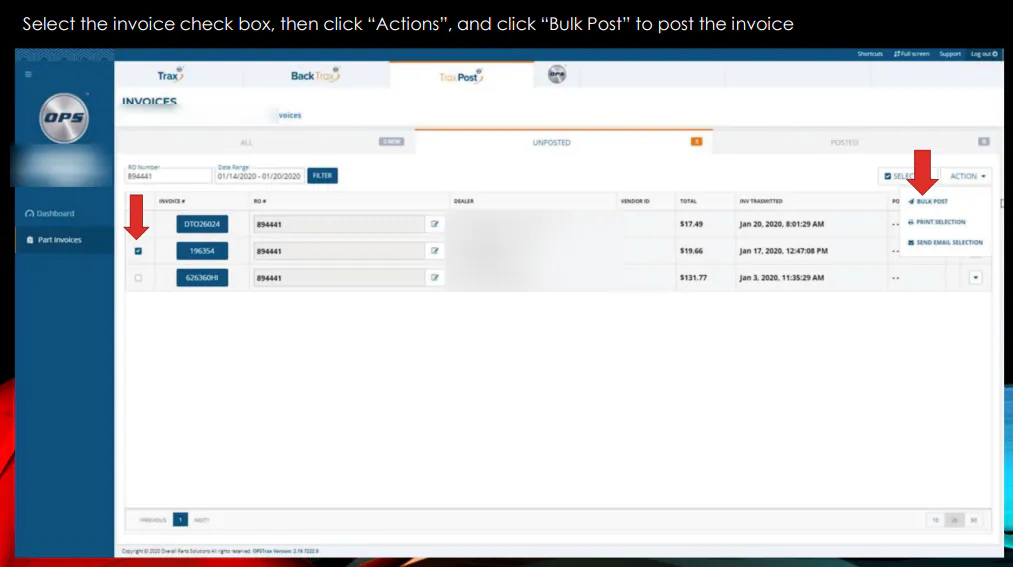
-
Select POST to confirm.
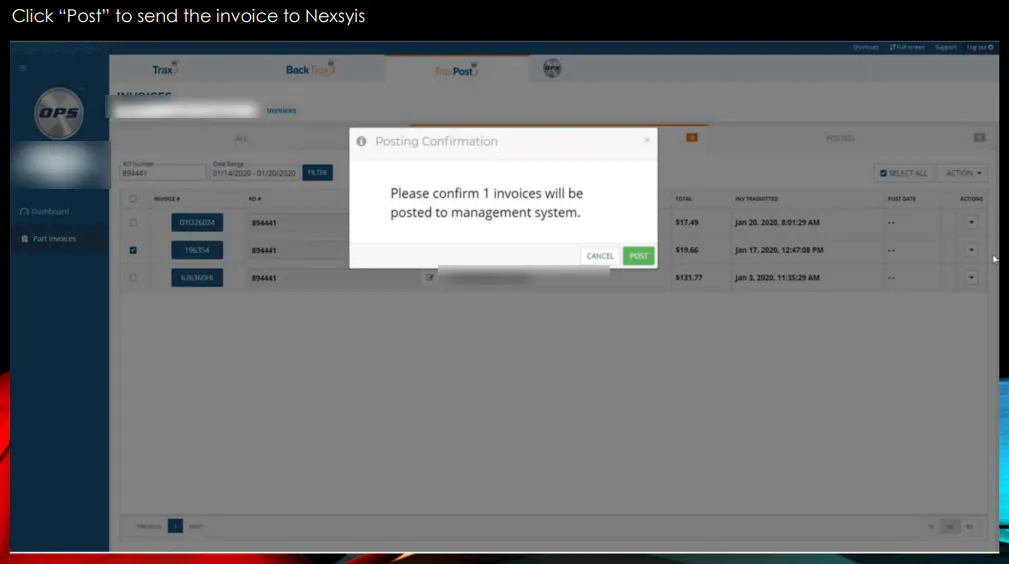
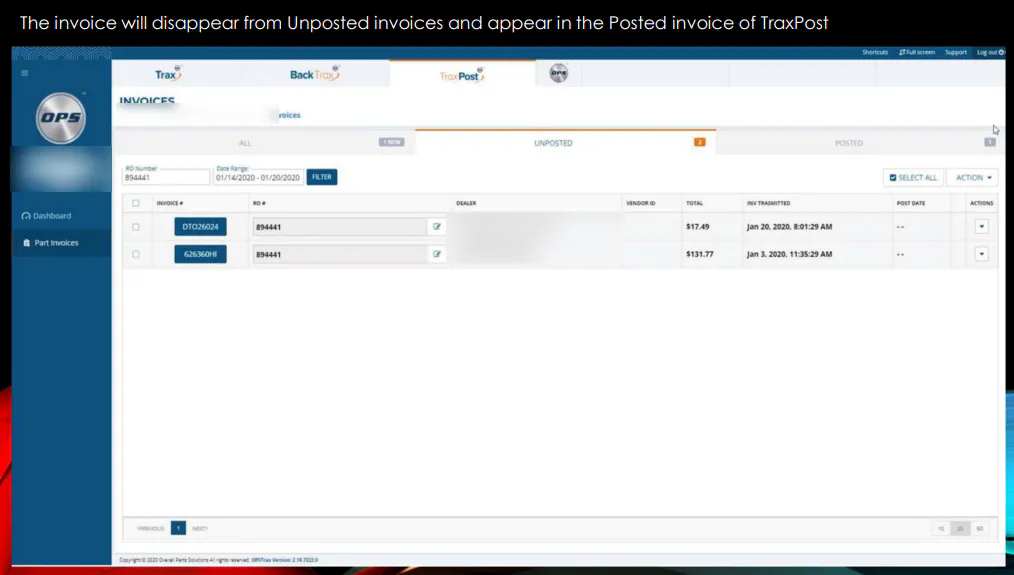
The invoice leaves the Unposted list.
-
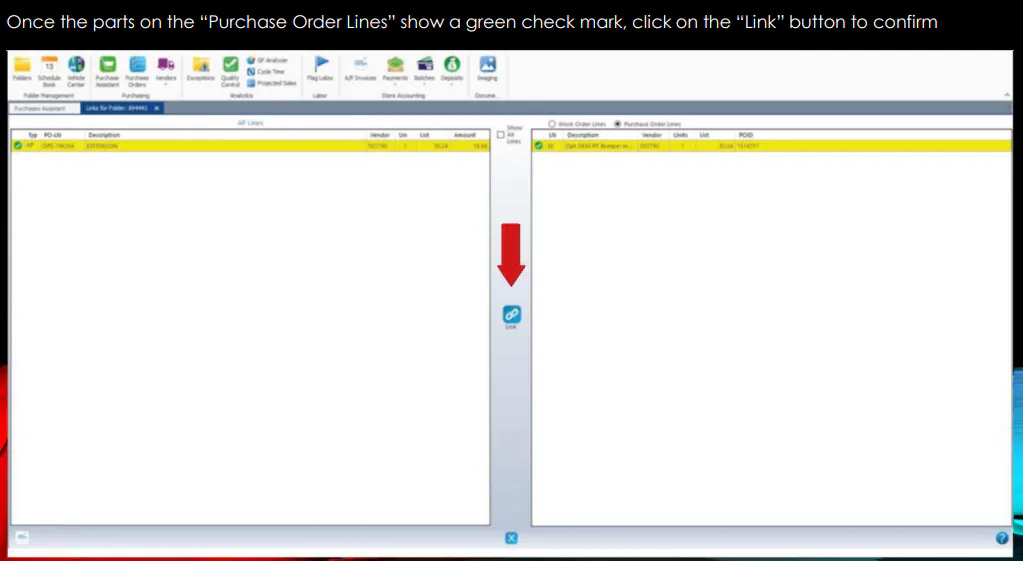
In Nexsyis, open the Purchase Assistant and select Linkage.
-
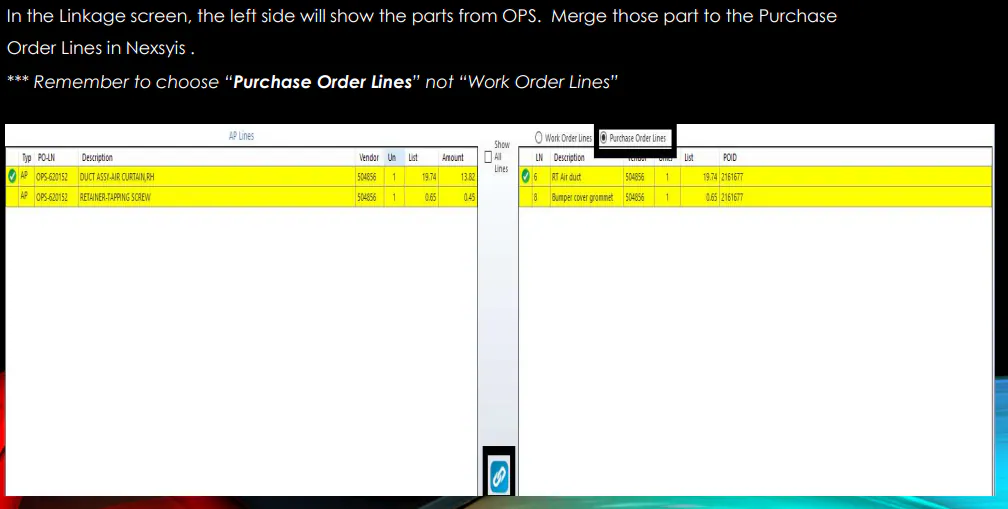
Select the AP lines on the left and the matching purchase order lines on the right, then select Link.
-
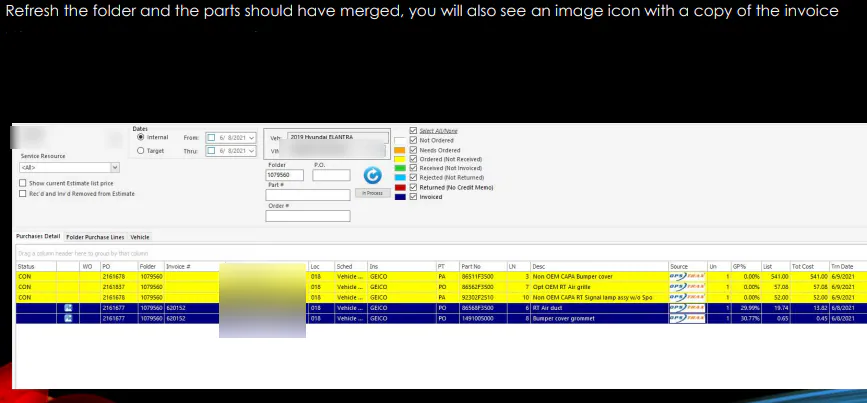
Refresh the Purchase Assistant. The lines are combined and show the invoice image icon.