Set up and use CSI surveys
If your shop uses a customer satisfaction (CSI) provider, Nexsyis sends it batches of delivered folders on a schedule you choose. Nexsyis works with Birdeye, Podium, Phoenix Solutions and SureCritic.
Set the default CSI provider
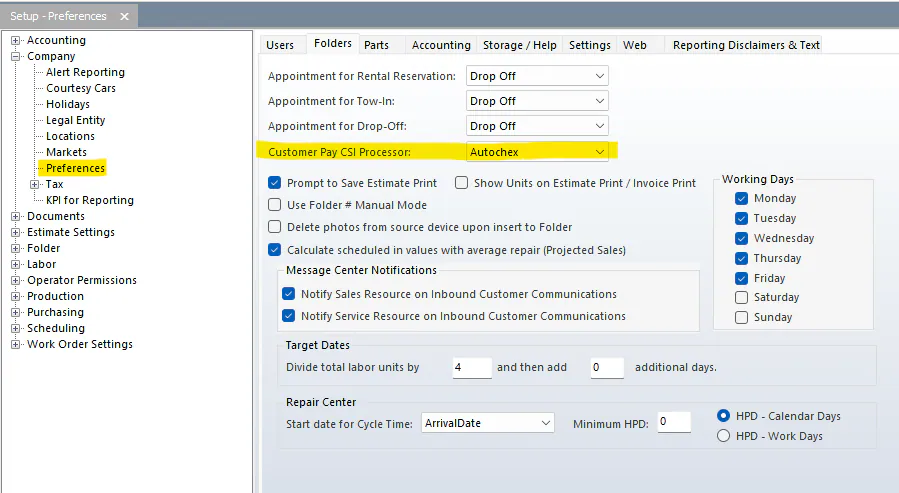
Section titled “Set the default CSI provider”Go to Setup › Company › Preferences, then the Folders tab, and choose the Customer Pay CSI Processor.
Which folders are sent
Section titled “Which folders are sent”Batches leave out:
-
folders with a $0 estimate total, or no estimate
-
total losses
-
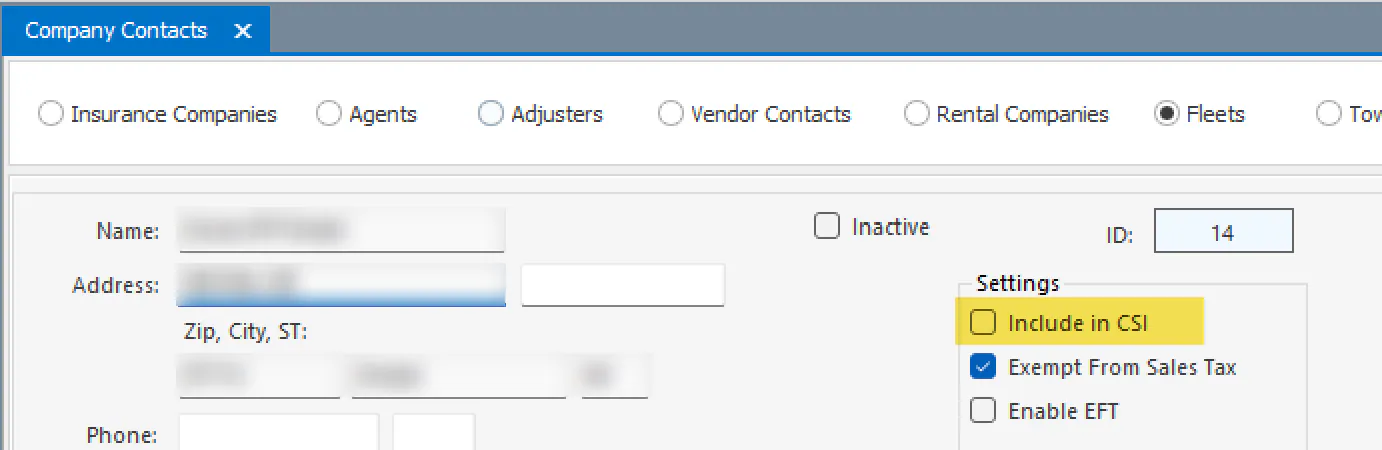
folders for a fleet with Include in CSI cleared
-
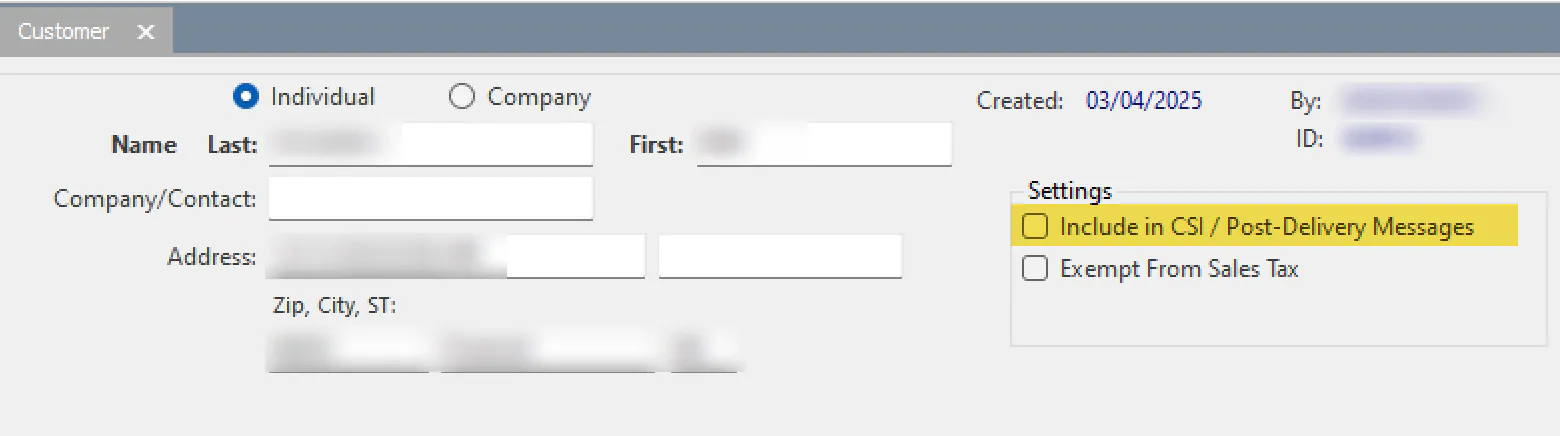
folders for a customer with Include in CSI / Post-Delivery Messages cleared
-
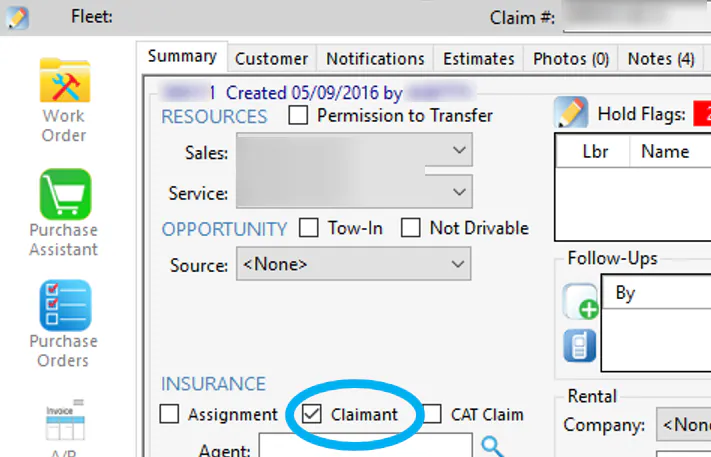
folders with Claimant selected on the Summary tab. This can be changed company-wide.
Use the CSI Assistant
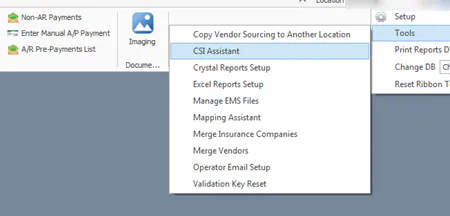
Section titled “Use the CSI Assistant”Go to Setup › Tools › CSI Assistant. Use it to:
- create a CSV file of delivered vehicles for a date range, to send to your provider yourself
- review the batches Nexsyis created and sent automatically
- email a batch file to someone
- check which delivered folders were included in batches, and why others weren’t
Create a batch
Section titled “Create a batch”-
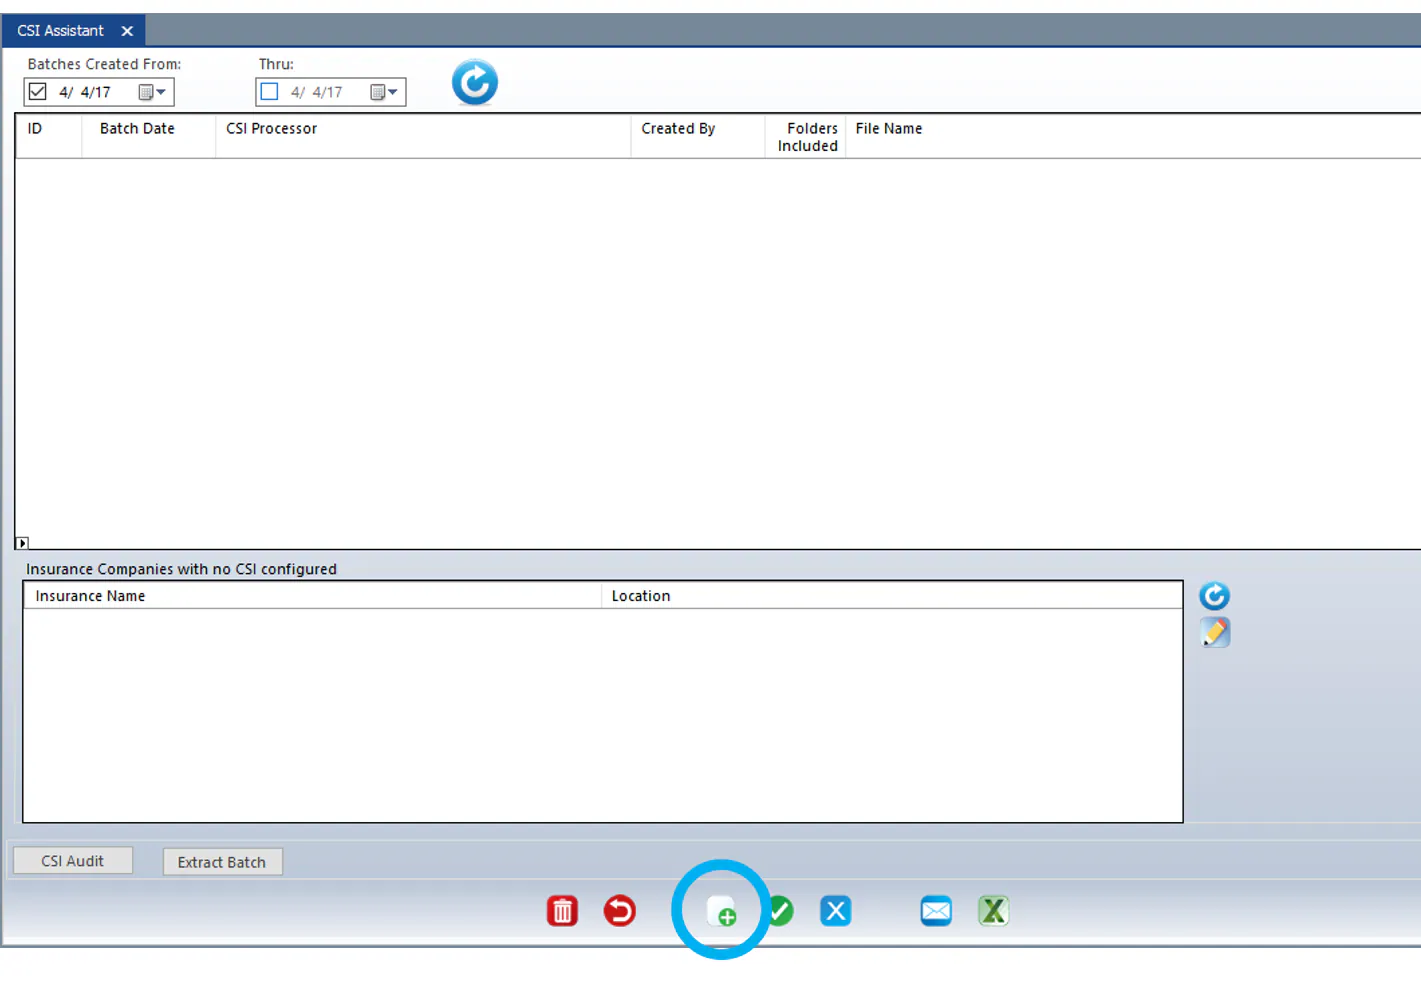
Select New at the bottom of the CSI Assistant.
-
Choose the Folders Delivered From and Thru dates and the CSI Processor, then select Refresh.

-
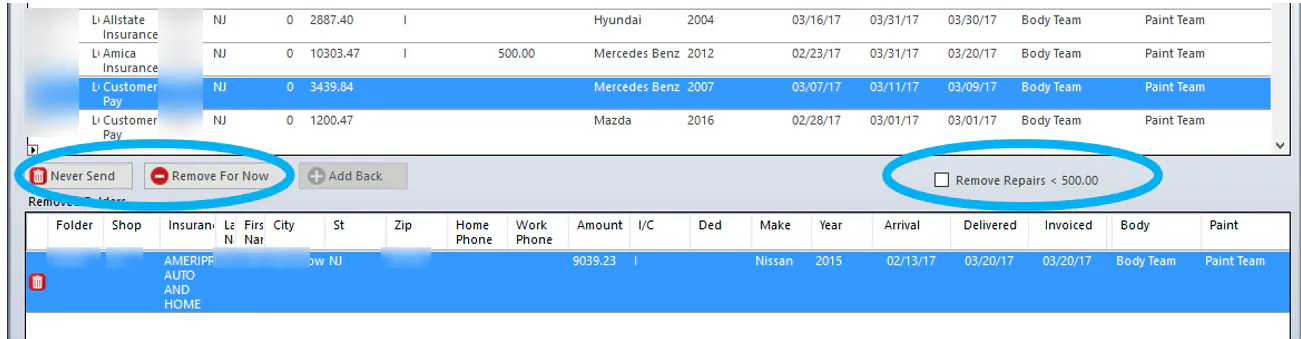
The folders that qualify are listed at the top. To leave folders out, select them and choose:
- Never Send: leaves the folder out for good.
- Remove For Now: leaves it out of this batch, but includes it in the next one.
- Remove Repairs < 500.00: leaves out folders with a repair total under $500.
-
Select Save. When asked whether to email the batch, select Yes to open an email with the batch attached.
Check which folders were included
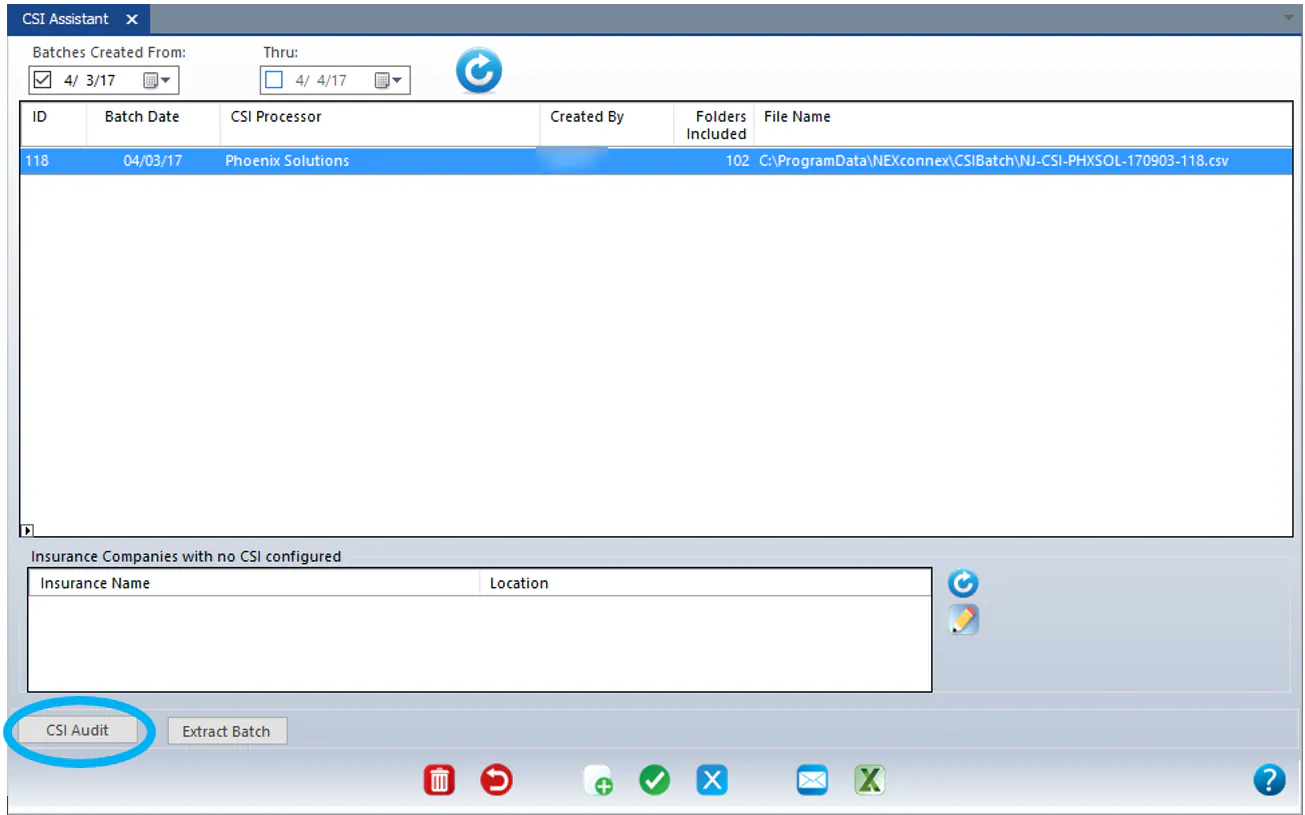
Section titled “Check which folders were included”Select CSI Audit at the bottom of the CSI Assistant. It lists every delivered folder in a date range.
To match a batch for the same date range, select all the filters at the top, such as Un-Batched Only, Repair Disposition Only, Exclude Fleets and Exclude Claimants.
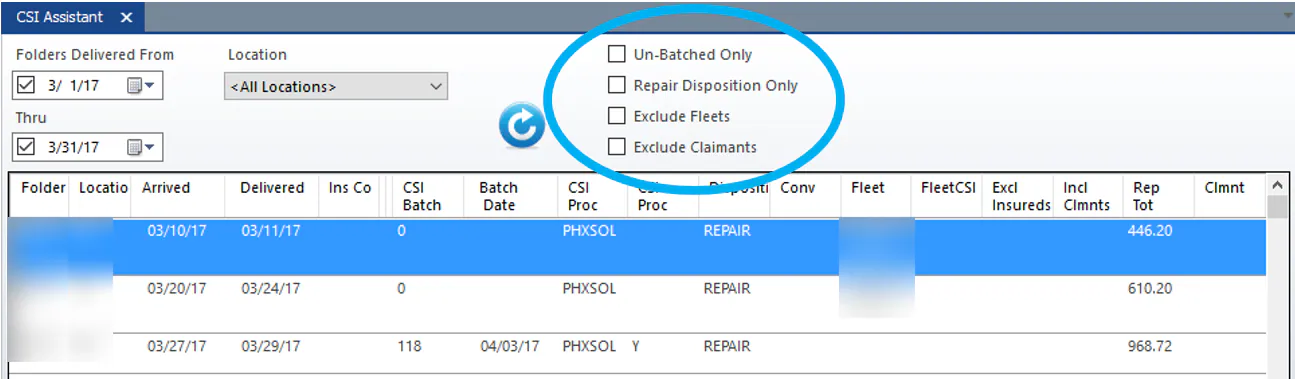
| Column | Meaning |
|---|---|
| CSI Batch | A number other than zero means the folder was in a batch. |
| Batch Date | The date the batch was created. |
| CSI Proc | The CSI processor. |
| CustCSI | Y means the customer can be included. Blank means they’re left out. |
| Disposition | Only folders with the REPAIR disposition are included. |
| Conv | Y means the folder was converted from another system and isn’t included. |
| Fleet | Whether it’s a fleet folder. The fleet’s settings decide whether it’s included. |
| FleetCSI | Y means the fleet can be included. |
| Excl Insureds | The insurance company setting that leaves out insured folders. |
| Incl Clmnts | The insurance company setting that includes claimant folders. |
| Clmnt | Y means it’s a claimant folder. |
Find the batch a folder was in
Section titled “Find the batch a folder was in”-
On the folder’s Notes tab, find the CSI batch ID.

-
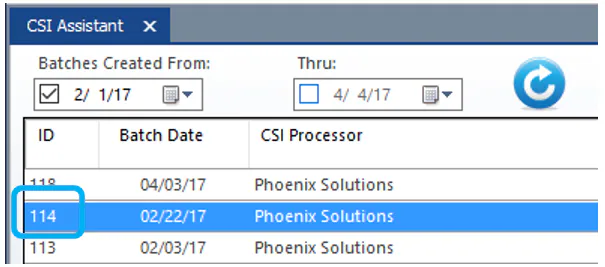
In the CSI Assistant, filter for a date range just after the delivered date, and find the batch with that number in the ID column.