
Enter work-in-progress AP
For every work-in-progress (WIP) folder, the AP invoices in Nexsyis must match exactly what was in your prior management or accounting system. If Nexsyis imported your open AP invoices, you attach the purchase order (PO) lines to each one. If an invoice wasn’t imported, you enter it.
Before you begin
Section titled “Before you begin”- Create the folder and its work order, and make sure the parts show as received (green) in the Purchase Assistant.
- Have the invoices from your prior system to hand. You enter the vendor, invoice number, date and total exactly as they were entered there.
Find out whether an invoice was imported
Section titled “Find out whether an invoice was imported”Do this for each invoice on each folder.
-
Select A/P Invoices on the Operations tab.

-
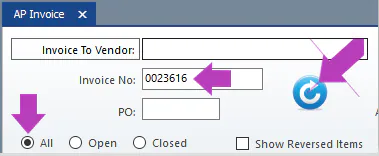
In Invoice No, type the invoice number, then select the refresh button or press Enter.
-
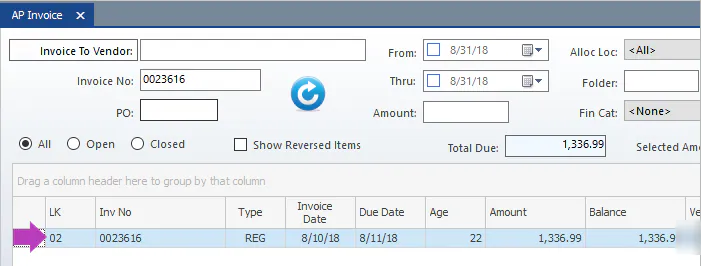
Check the grid:
-
If the invoice is listed, it was imported. Follow Attach PO lines to an imported invoice.
-
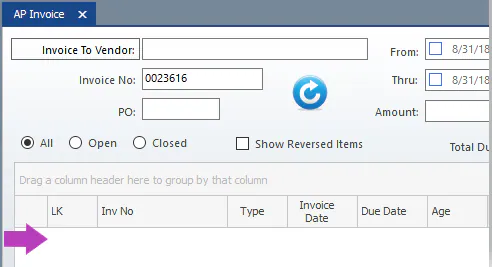
If nothing is listed, check that you typed the invoice number exactly as it was entered in your prior system. If you still can’t find it, it wasn’t imported. Follow Enter an invoice that wasn’t imported.
-
Attach PO lines to an imported invoice
Section titled “Attach PO lines to an imported invoice”-
In the search grid, double-click the invoice to open it.
-
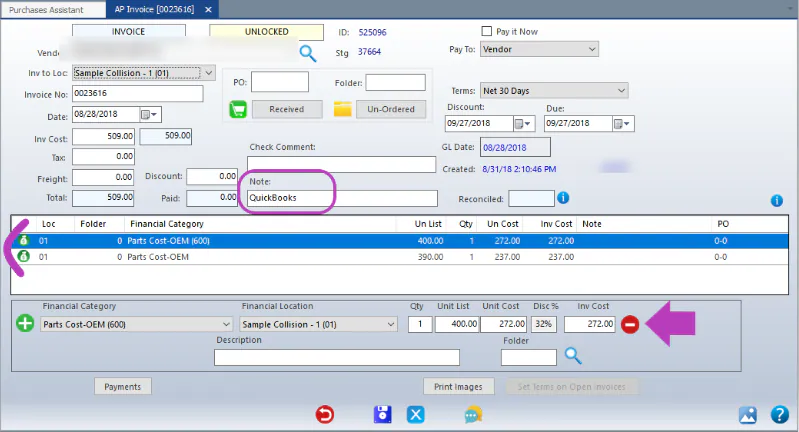
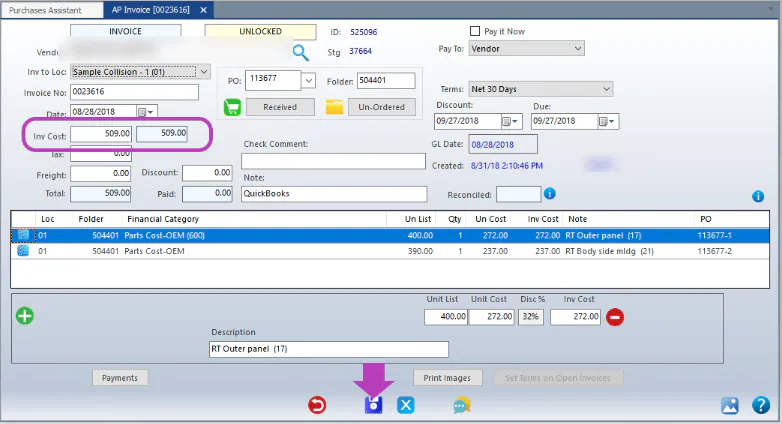
The Note field shows QuickBooks, and the lines in the grid show the green accounting icon instead of the blue PO icon. Remove each line: select it, then select the red remove button.
-
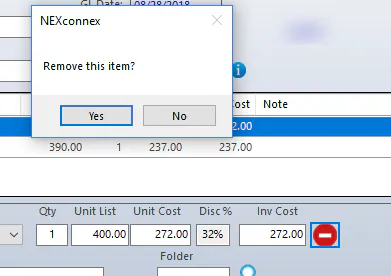
Select Yes. When you’ve removed every line, the grid is empty.
-
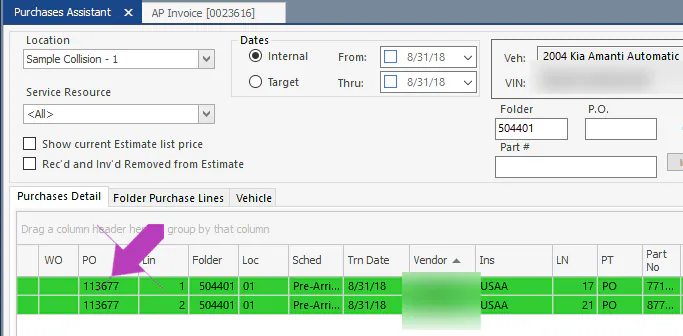
Open the Purchase Assistant for the folder, and find the green received lines for this invoice. Note their PO number.
-
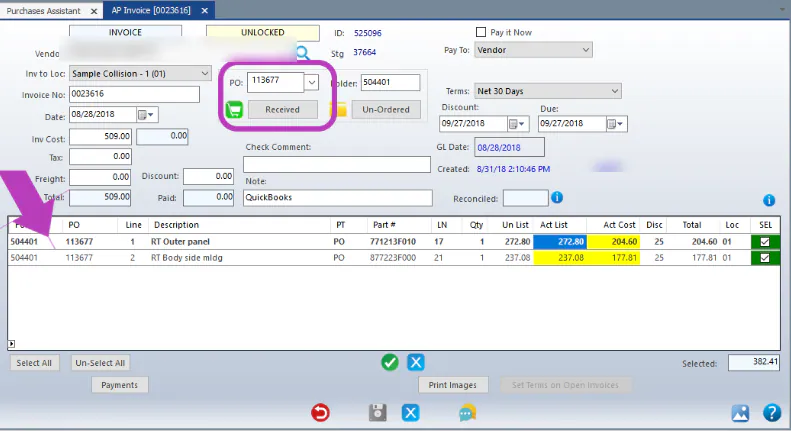
On the invoice, type the PO number in PO, then select Received. The grid shows the received lines for that PO.
-
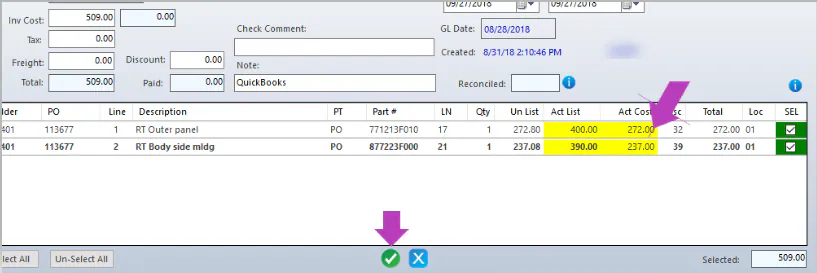
Select the yellow cells to change Act List and Act Cost so they match the invoice from your prior system. When the lines are correct, select the green check mark at the bottom.
-
When the total of the lines matches the total at the top of the invoice, select Save.
Enter an invoice that wasn’t imported
Section titled “Enter an invoice that wasn’t imported”-
At the bottom of the AP Invoice screen, select New Invoice, or New Credit for a credit memo. You can also select New on the button bar.
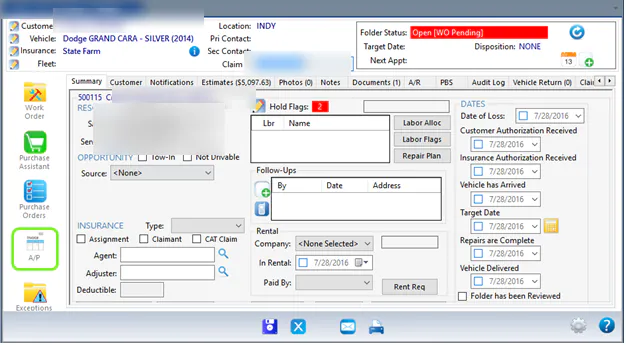
You can also start from the folder: select A/P on the left of the folder, then select New.
-
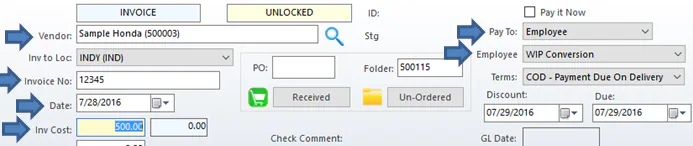
At the top of the screen, enter these fields exactly as they were entered in your prior system:
- Vendor: type the first three letters and press Enter to search. If the vendor isn’t in Nexsyis yet, add it first. See Set up an AP vendor.
- Invoice No
- Date
- Inv Cost: the invoice total.
-
On the right, set Pay To to Employee, and set Employee to WIP Conversion.
-
Attach the PO lines and save the invoice, following steps 4 to 7 of Attach PO lines to an imported invoice.