Create and complete follow-ups
A follow-up reminds you to contact a customer by text, email or phone on a schedule. Create follow-ups on the folder, then work them from the folder or the Vehicle Center.
Create a follow-up
Section titled “Create a follow-up”-
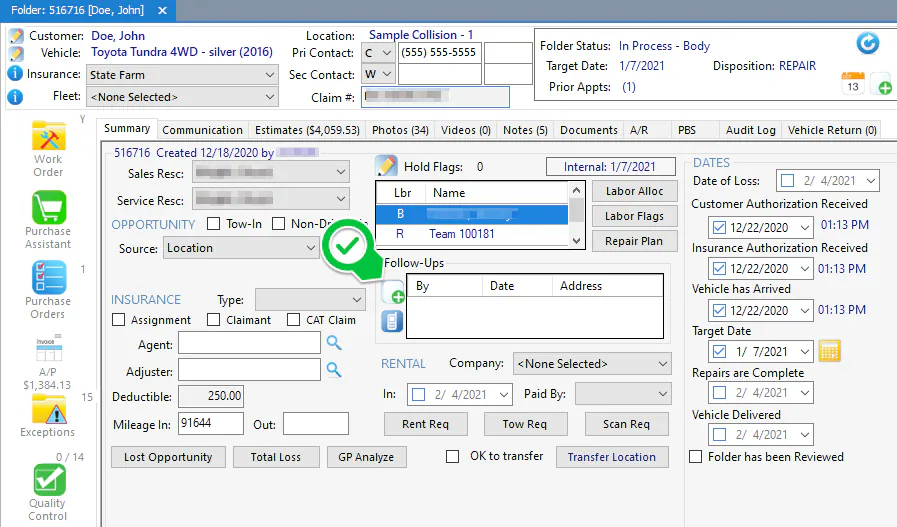
On the folder’s Summary tab, select the add button under Follow-Ups.
-
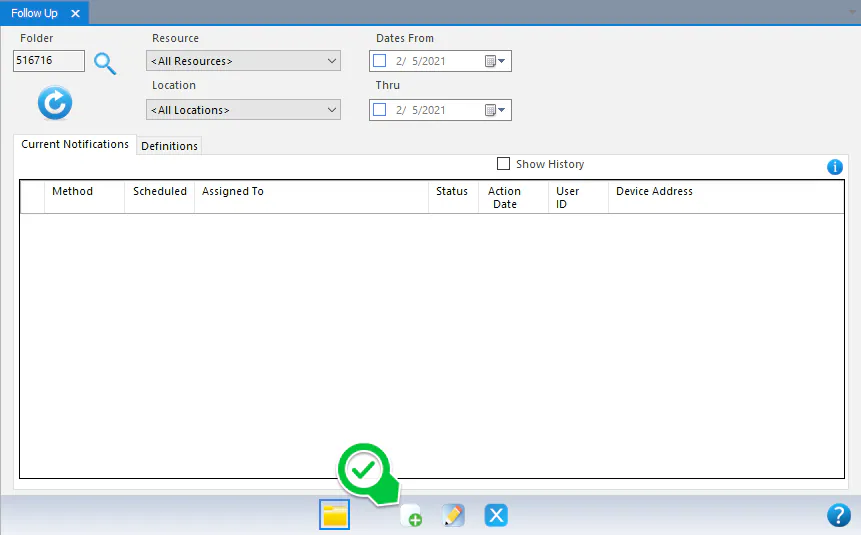
In the Follow Up window, select New at the bottom.
-
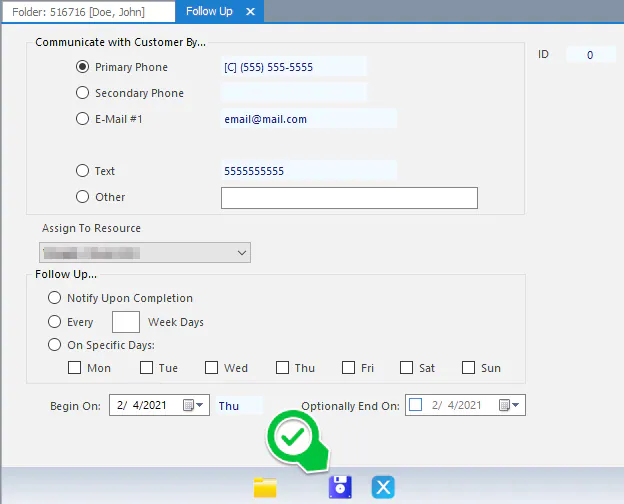
The customer’s contact details from the folder’s Customer tab are filled in, in blue. Choose how to contact the customer, who to assign the follow-up to, and how often to contact them.
-
Select Save.
The next follow-up shows in the Follow-Ups box on the folder.
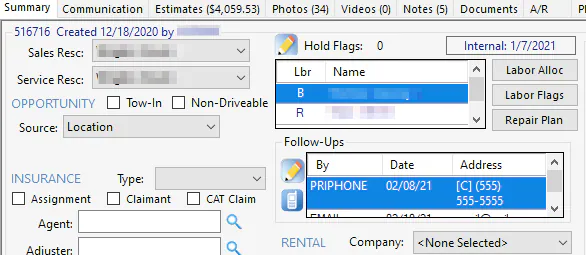
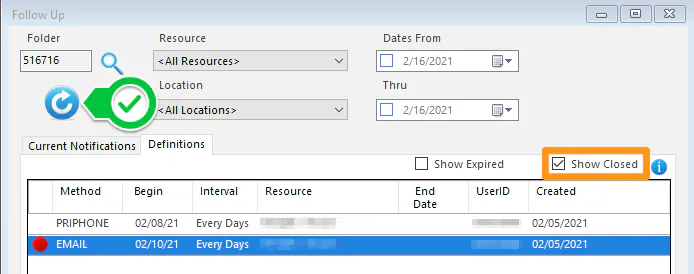
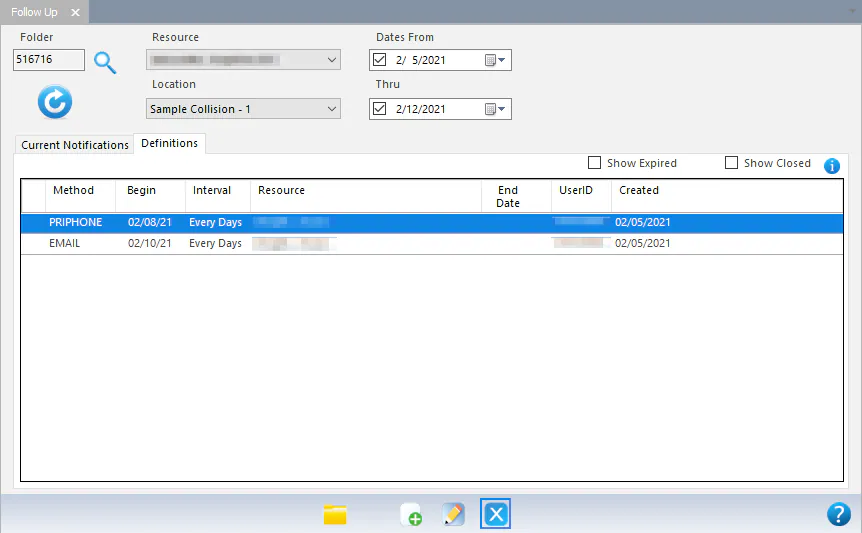
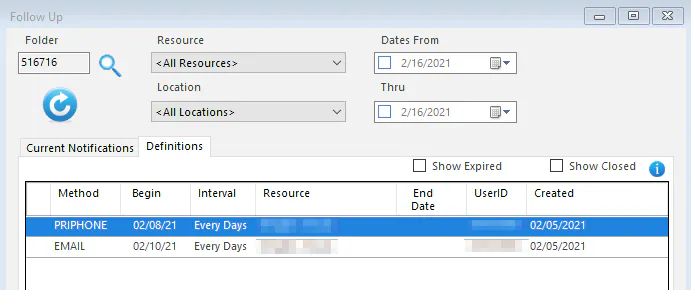
To contact the customer another way as well, select the edit button under Follow-Ups, then select New again and repeat the steps. All the follow-ups for the folder are listed on the Definitions tab.
Find follow-ups that are due
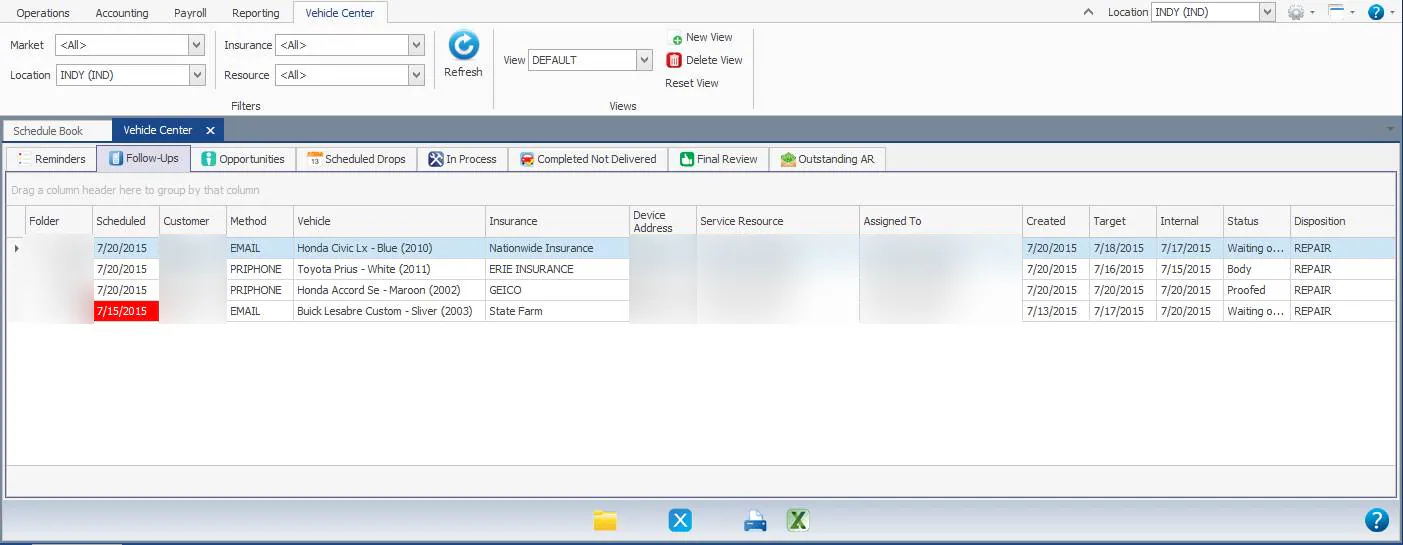
Section titled “Find follow-ups that are due”The Follow-Ups tab of the Vehicle Center lists every follow-up due today or earlier that hasn’t been processed. Late follow-ups show their Scheduled date in red.
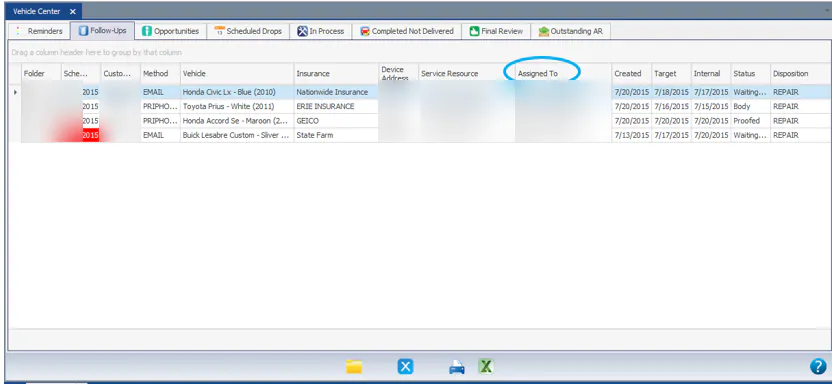
To see only your follow-ups, filter the Assigned To column. To keep that filter, right-click the grid and select Save My Grid Layout.
A follow-up stays on the list until you process it.
Process a follow-up
Section titled “Process a follow-up”-
Open the follow-up:
-
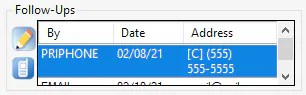
On the folder, select the blue phone icon.
-
Or, on the Vehicle Center Follow-Ups tab, double-click the follow-up.
-
-
Complete it the way you contacted the customer:
-
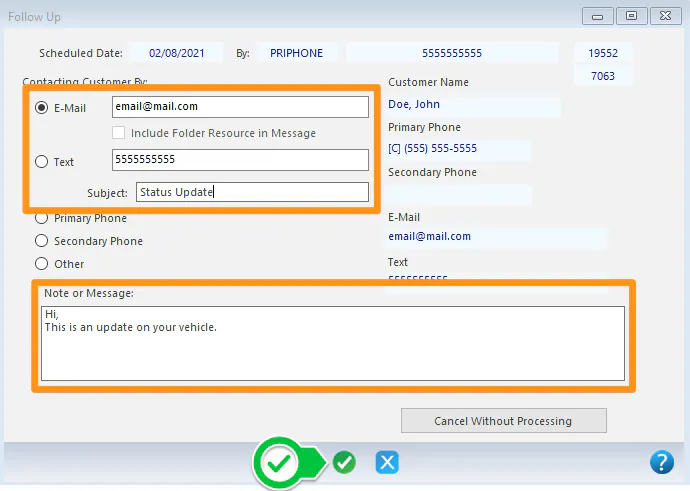
Email or text: type your message, then select Process (the green check mark) at the bottom. The message is sent automatically.
-
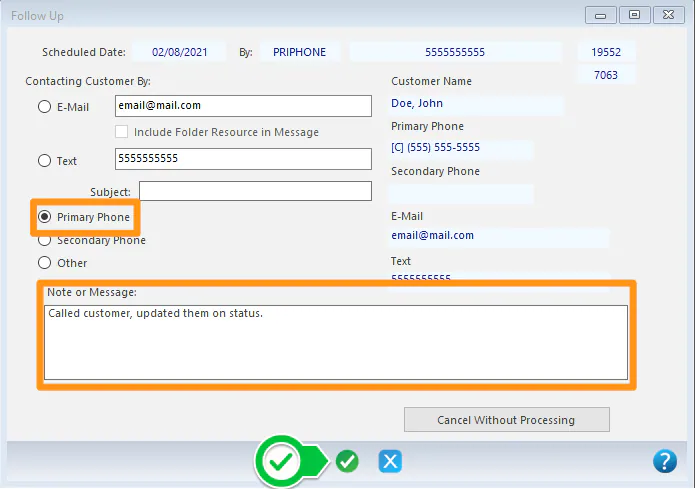
Phone: after you call the customer, type a note about what you discussed, then select Save.
-
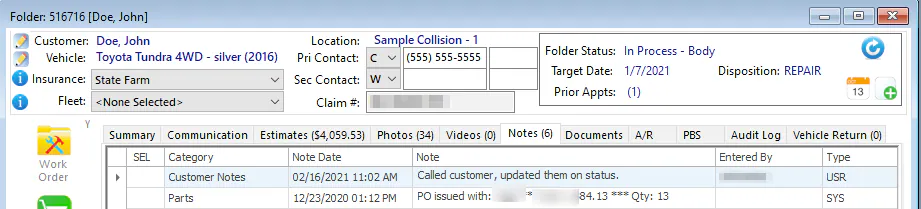
Processed follow-ups are recorded on the folder’s Notes tab.
Edit a follow-up
Section titled “Edit a follow-up”-
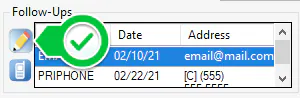
On the folder, select the edit button under Follow-Ups.
-
On the Definitions tab, double-click the follow-up.
-
Make your changes, then select Save.
Cancel a follow-up without contacting the customer
Section titled “Cancel a follow-up without contacting the customer”If you’ve already spoken with the customer, cancel the follow-up so nothing is sent.
-
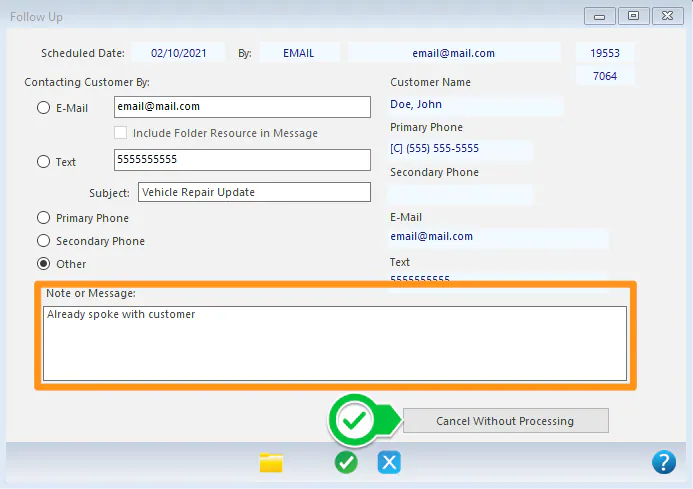
Open the follow-up as if you were processing it.
-
Type a note with the reason you’re cancelling.
-
Select Cancel Without Processing.
-
Select Yes.
Delete a follow-up
Section titled “Delete a follow-up”-
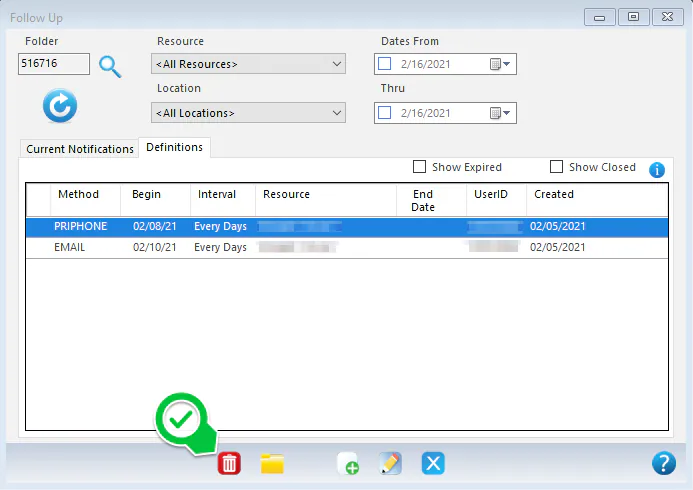
On the Definitions tab, select the follow-up, then select Delete at the bottom.
-
Select Yes.
To see deleted follow-ups, select Show Closed and then Refresh.