
Add a new employee
Add each employee on the Employee Master screen. After you save the employee, set up their job and pay rate, make them a resource if they work on repairs, and give them a login if they use Nexsyis.
Add the employee
Section titled “Add the employee”-
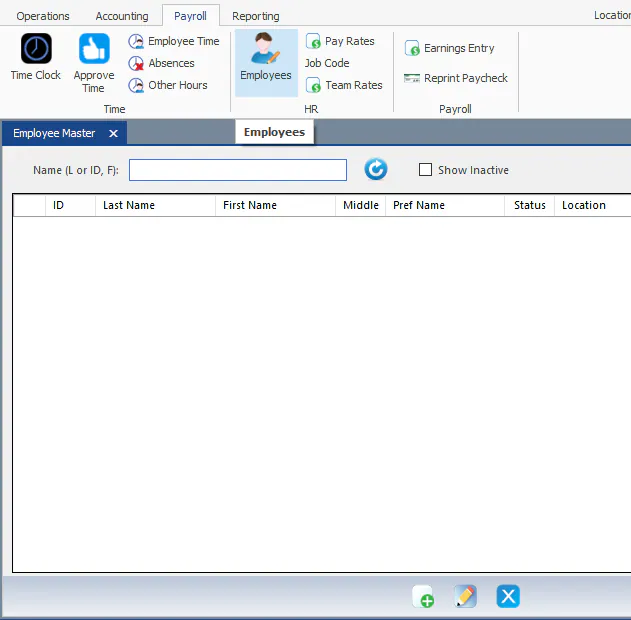
On the Payroll tab, select Employees.
-
At the bottom of the Employee Master screen, select New.
-
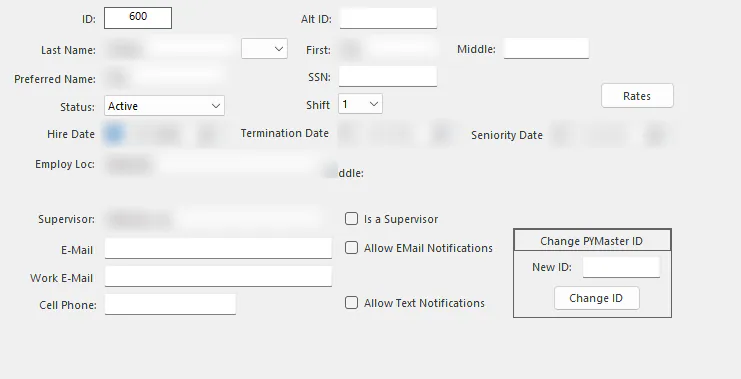
Enter the employee’s information:
- ID: the employee number. If the employee uses the Nexsyis time clock, this is the number they clock in with.
- Last Name and First.
- Middle (optional).
- Preferred Name: the name the employee goes by, if it’s different.
- Status: Active.
- Pay Cycle.
- Hire Date.
- Employ Loc: the location the employee works at.
- Supervisor: if the employee uses the Nexsyis time clock, this person can approve the employee’s time.
- Is a Supervisor: select this if the employee is a supervisor. They then show in the Supervisor list for other employees.
-
Select Save.
Set up the employee’s job and pay rate
Section titled “Set up the employee’s job and pay rate”After you save the employee, open them again and select Rates to set up their job and pay rate. You can also do this from Pay Rates on the Payroll tab. See Set employee pay rates.
Make the employee a resource
Section titled “Make the employee a resource”To make the employee available as a sales and service resource or a technician resource, see Set up labor resources. To add them to a technician team, see Set up technician teams.
Give the employee a login
Section titled “Give the employee a login”If the employee needs to sign in to desktop Nexsyis or the Nexsyis mobile app, set them up as a user. See Add a user (operator).