
Set up status notifications
You can set up a customer notification for a Vehicle Center status, so the customer gets a text and email when their vehicle reaches that status.
Before you begin
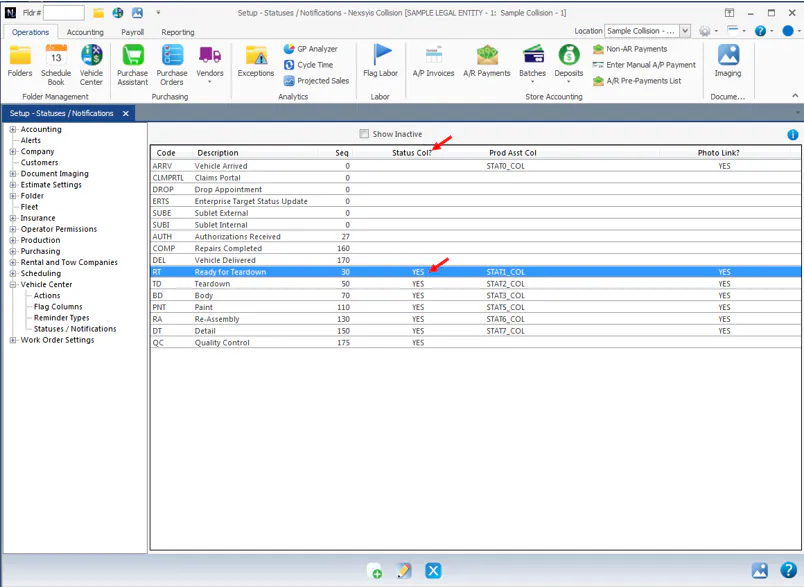
Section titled “Before you begin”You can only set up notifications for statuses with YES in the Status Col? column.
Choose the status
Section titled “Choose the status”-
Go to Setup › Vehicle Center › Statuses / Notifications.
-
Double-click the status you want, or select it and then select Edit at the bottom of the screen. For example, Body.
Turn on notifications
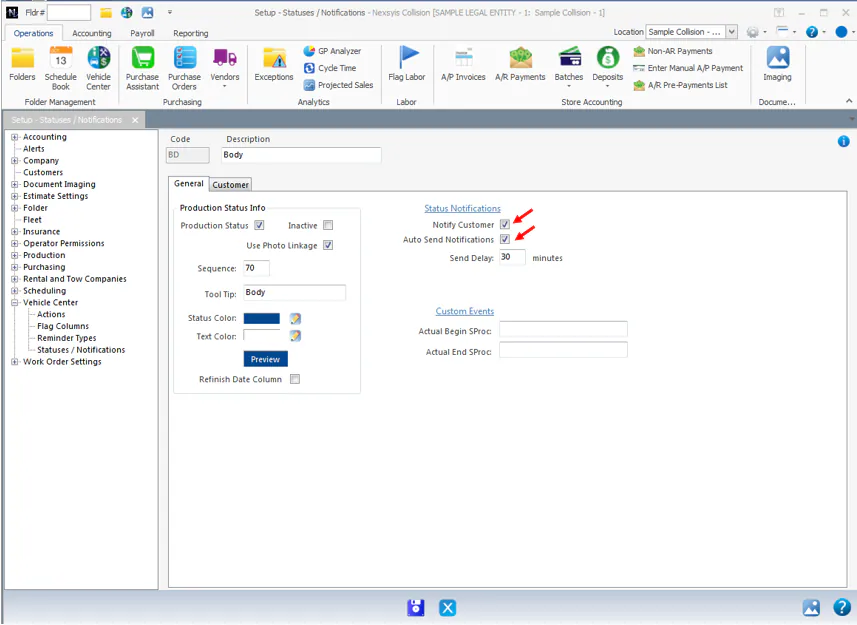
Section titled “Turn on notifications”On the General tab, under Status Notifications:
- Select Notify Customer.
- To send notifications automatically instead of reviewing them first, select Auto Send Notifications.
- If you send automatically, enter a Send Delay in minutes.
Automatic notifications
Section titled “Automatic notifications”- Notifications are sent automatically when the vehicle reaches that repair plan step.
- Use Send Delay to allow time to catch mistakes. If a step is reached by mistake and then undone during the delay, the automatic notification changes to a manual notification, for someone to review.
- If a vehicle reaches a step that comes earlier in the sequence than a step it already reached, its automatic notifications change to manual notifications. When the vehicle reaches a step in the right sequence again, notifications go back to being sent automatically.
Manual notifications
Section titled “Manual notifications”- Notifications wait in the folder under Pending Activity until someone selects OK to Send or deletes the notification.
- You can change a notification before it’s sent.
Write the notification text
Section titled “Write the notification text”-
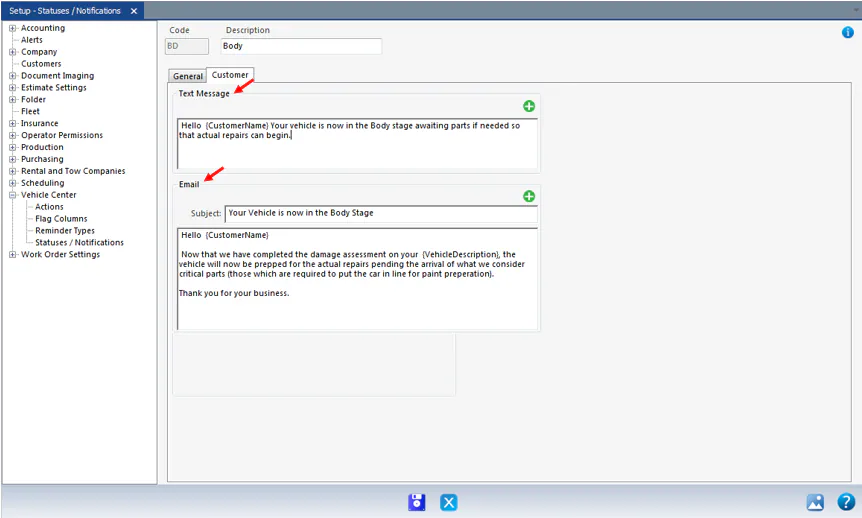
Select the Customer tab.
-
Type the message in the Text Message box.
-
Type the subject and message in the Email section.
-
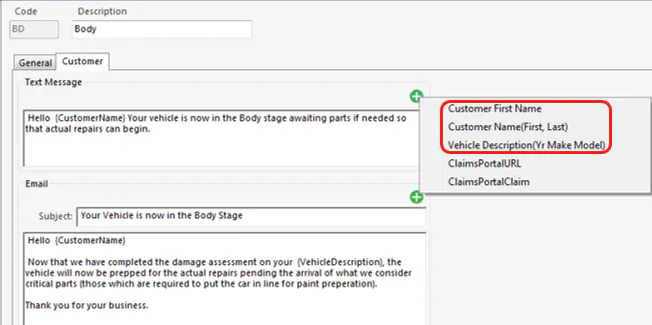
To add customer or vehicle details to the message, select the green plus icon above the box and choose a field. Customer First Name, Customer Name(First, Last) and Vehicle Description(Yr Make Model) are the most common. ClaimsPortalURL and ClaimsPortalClaim don’t apply to most shops.
-
Select Save.