Add photos to a folder
Add photos of the vehicle to the folder, then tag each one with a panel, repair stage and category so it’s easy to find. You can also choose which photos the customer can see.
Add photos
Section titled “Add photos”Add photos to a folder in one of these ways:
-
Drag and drop photos onto the large preview window on the folder’s Photos tab.
-
Select the new button (green +) on the bottom button bar and choose the photos.
-
Use NexsyisNow or the Nexsyis mobile app (see the other tabs and Add photos in the Nexsyis mobile app).
Photos you add on the desktop are tagged to the Additional panel. Each photo is also tagged to the stage the folder was in when the photo was added.
Tag a photo
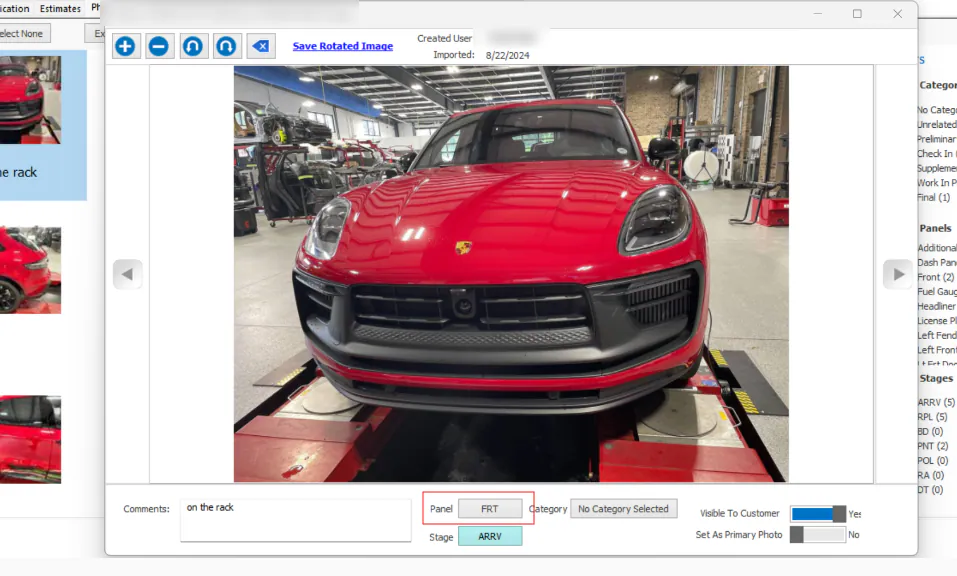
Section titled “Tag a photo”Double-click a photo to open it. The tags are at the bottom of the photo window.
-
Panel: select the Panel button and choose the panel the photo shows.
-
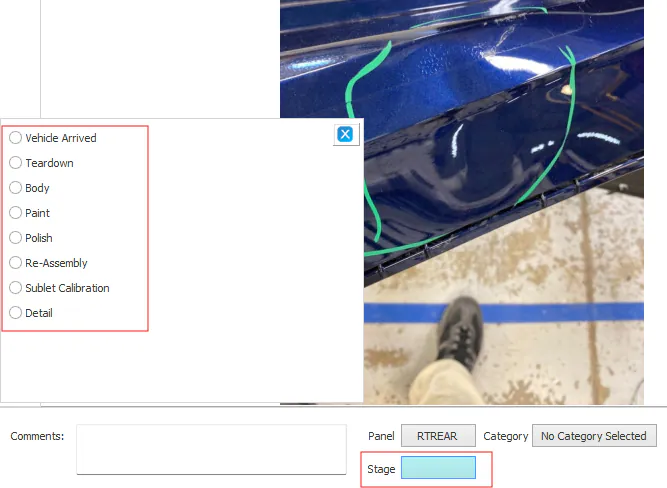
Stage: select the Stage button and choose a repair stage.
-
Category: select the Category button and choose a category. Choose Unrelated Prior Damage for damage that isn’t part of this repair.
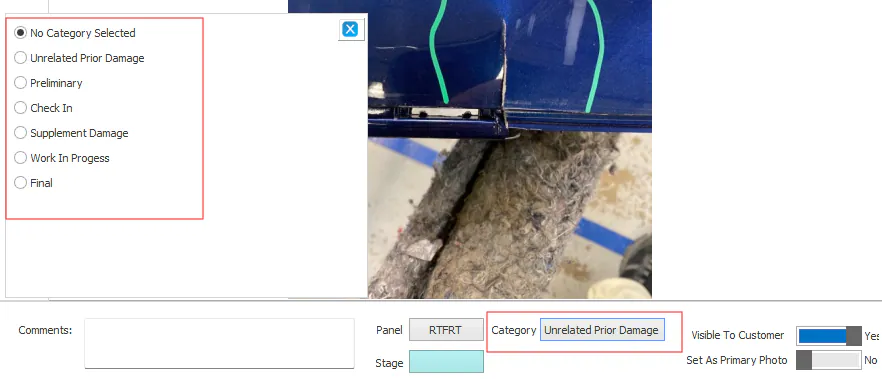
If you use e-authorization, photos marked Unrelated Prior Damage that are also visible to the customer show on a separate Unrelated Prior Damage Photos screen for the customer.
Choose which photos the customer can see
Section titled “Choose which photos the customer can see”If you use e-authorization and the Customer Portal, you can let the customer see photos online.
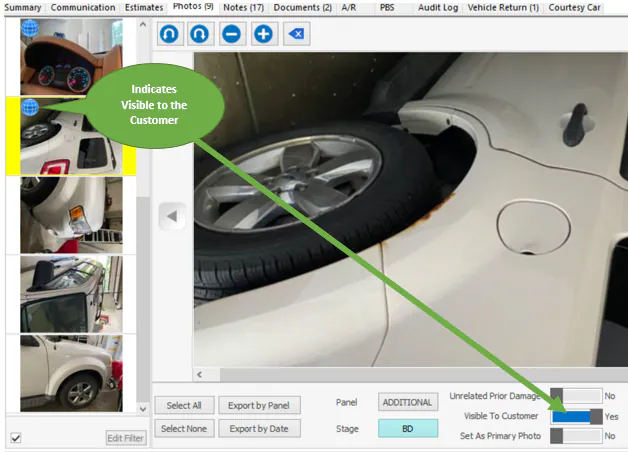
A blue globe on a thumbnail, and Visible To Customer set to Yes, mean the customer can see the photo. To change it, double-click the globe or slide Visible To Customer to No.
Set the primary photo
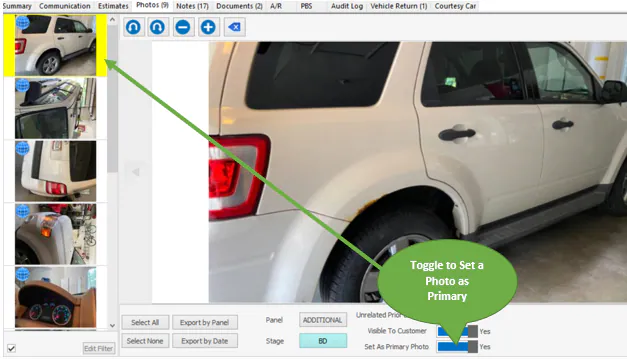
Section titled “Set the primary photo”Slide Set As Primary Photo to Yes. The primary photo moves to the top of the thumbnails and is used as the folder’s preview image in NexsyisNow.
Filter photos
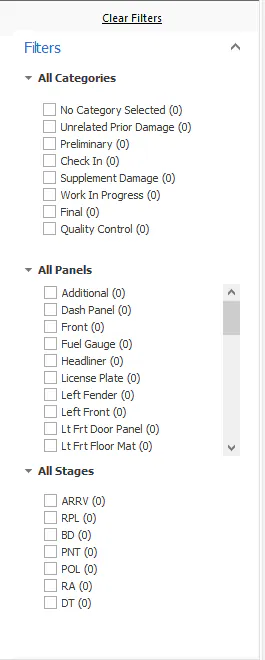
Section titled “Filter photos”Use the filters on the right of the Photos tab to show photos by category, panel or stage. To show all photos again, select Clear Filters.
Export photos
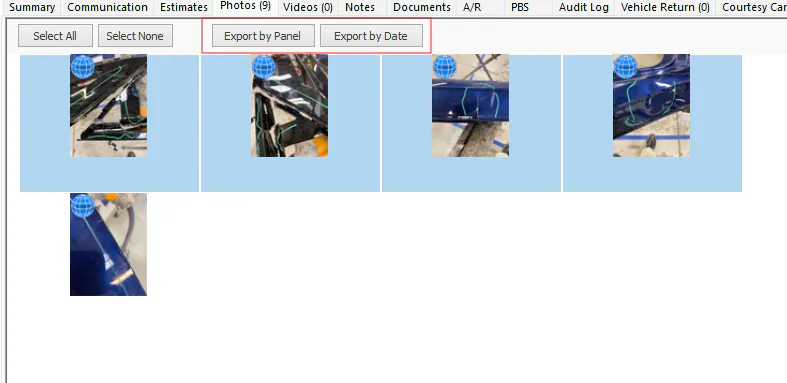
Section titled “Export photos”- Select the photos to export. Use Shift or Ctrl with your mouse, or select Select All. Selected photos have a blue background.
- Select an export option:
- Export by Panel names each photo by its panel, for example FRT. This works best for CCC.
- Export by Date names each photo by folder number and the date and time it was taken. This works best for Mitchell.
Delete photos
Section titled “Delete photos”-
Select the photos to delete.
-
Select the red trash can on the button bar.
-
When you’re asked if you’re sure, select Yes.
Before you begin
Section titled “Before you begin”You need the Photos - Add screen permission.
Add photos
Section titled “Add photos”-
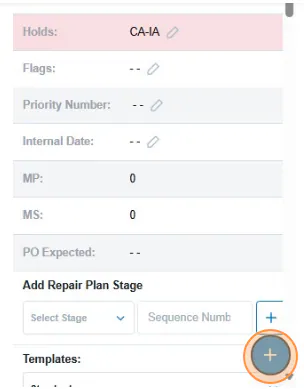
In the folder, select the blue + button.
-
Choose how to add photos:
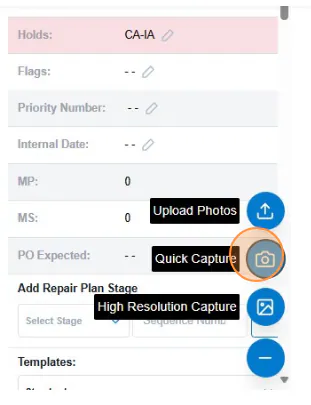
Option What it does Upload Photos Adds several photos you’ve already taken from your phone’s photo library. Quick Capture Takes several photos quickly with the camera inside the browser, without leaving NexsyisNow. Image quality can be lower, because it uses the video camera. High Resolution Capture Opens your phone’s own camera app to take one high-quality photo.
Upload Photos
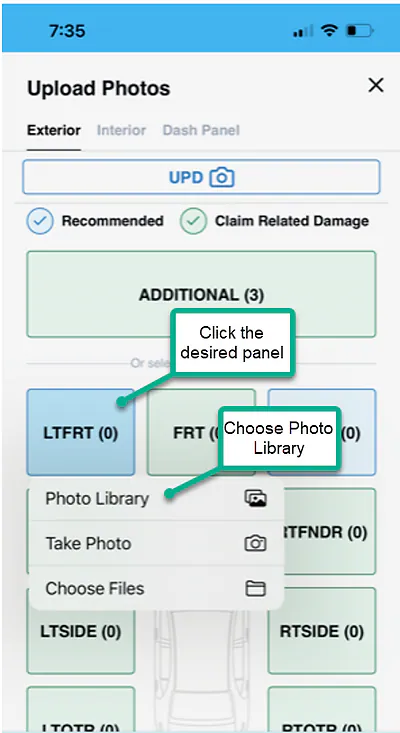
Section titled “Upload Photos”Select Upload Photos, select the panel, then select Photo Library and choose your photos. The button names depend on your phone.
Quick Capture
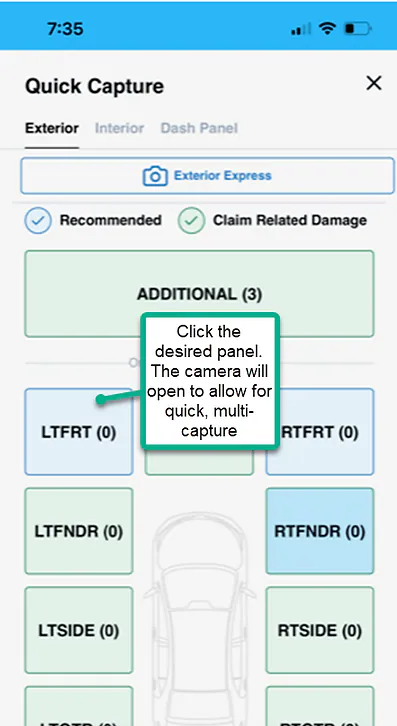
Section titled “Quick Capture”Select Quick Capture, then select the panel. The camera opens in the browser so you can take several photos in a row.
High Resolution Capture
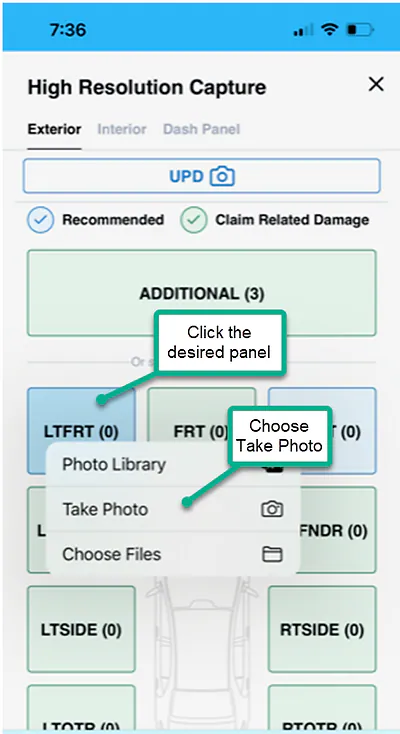
Section titled “High Resolution Capture”Select High Resolution Capture, select the panel, then select Take Photo. Your phone’s camera app opens for one high-quality photo. The button names depend on your phone.
Add photos in the Nexsyis mobile app
Section titled “Add photos in the Nexsyis mobile app”The Nexsyis mobile app uses your phone’s own camera.
-
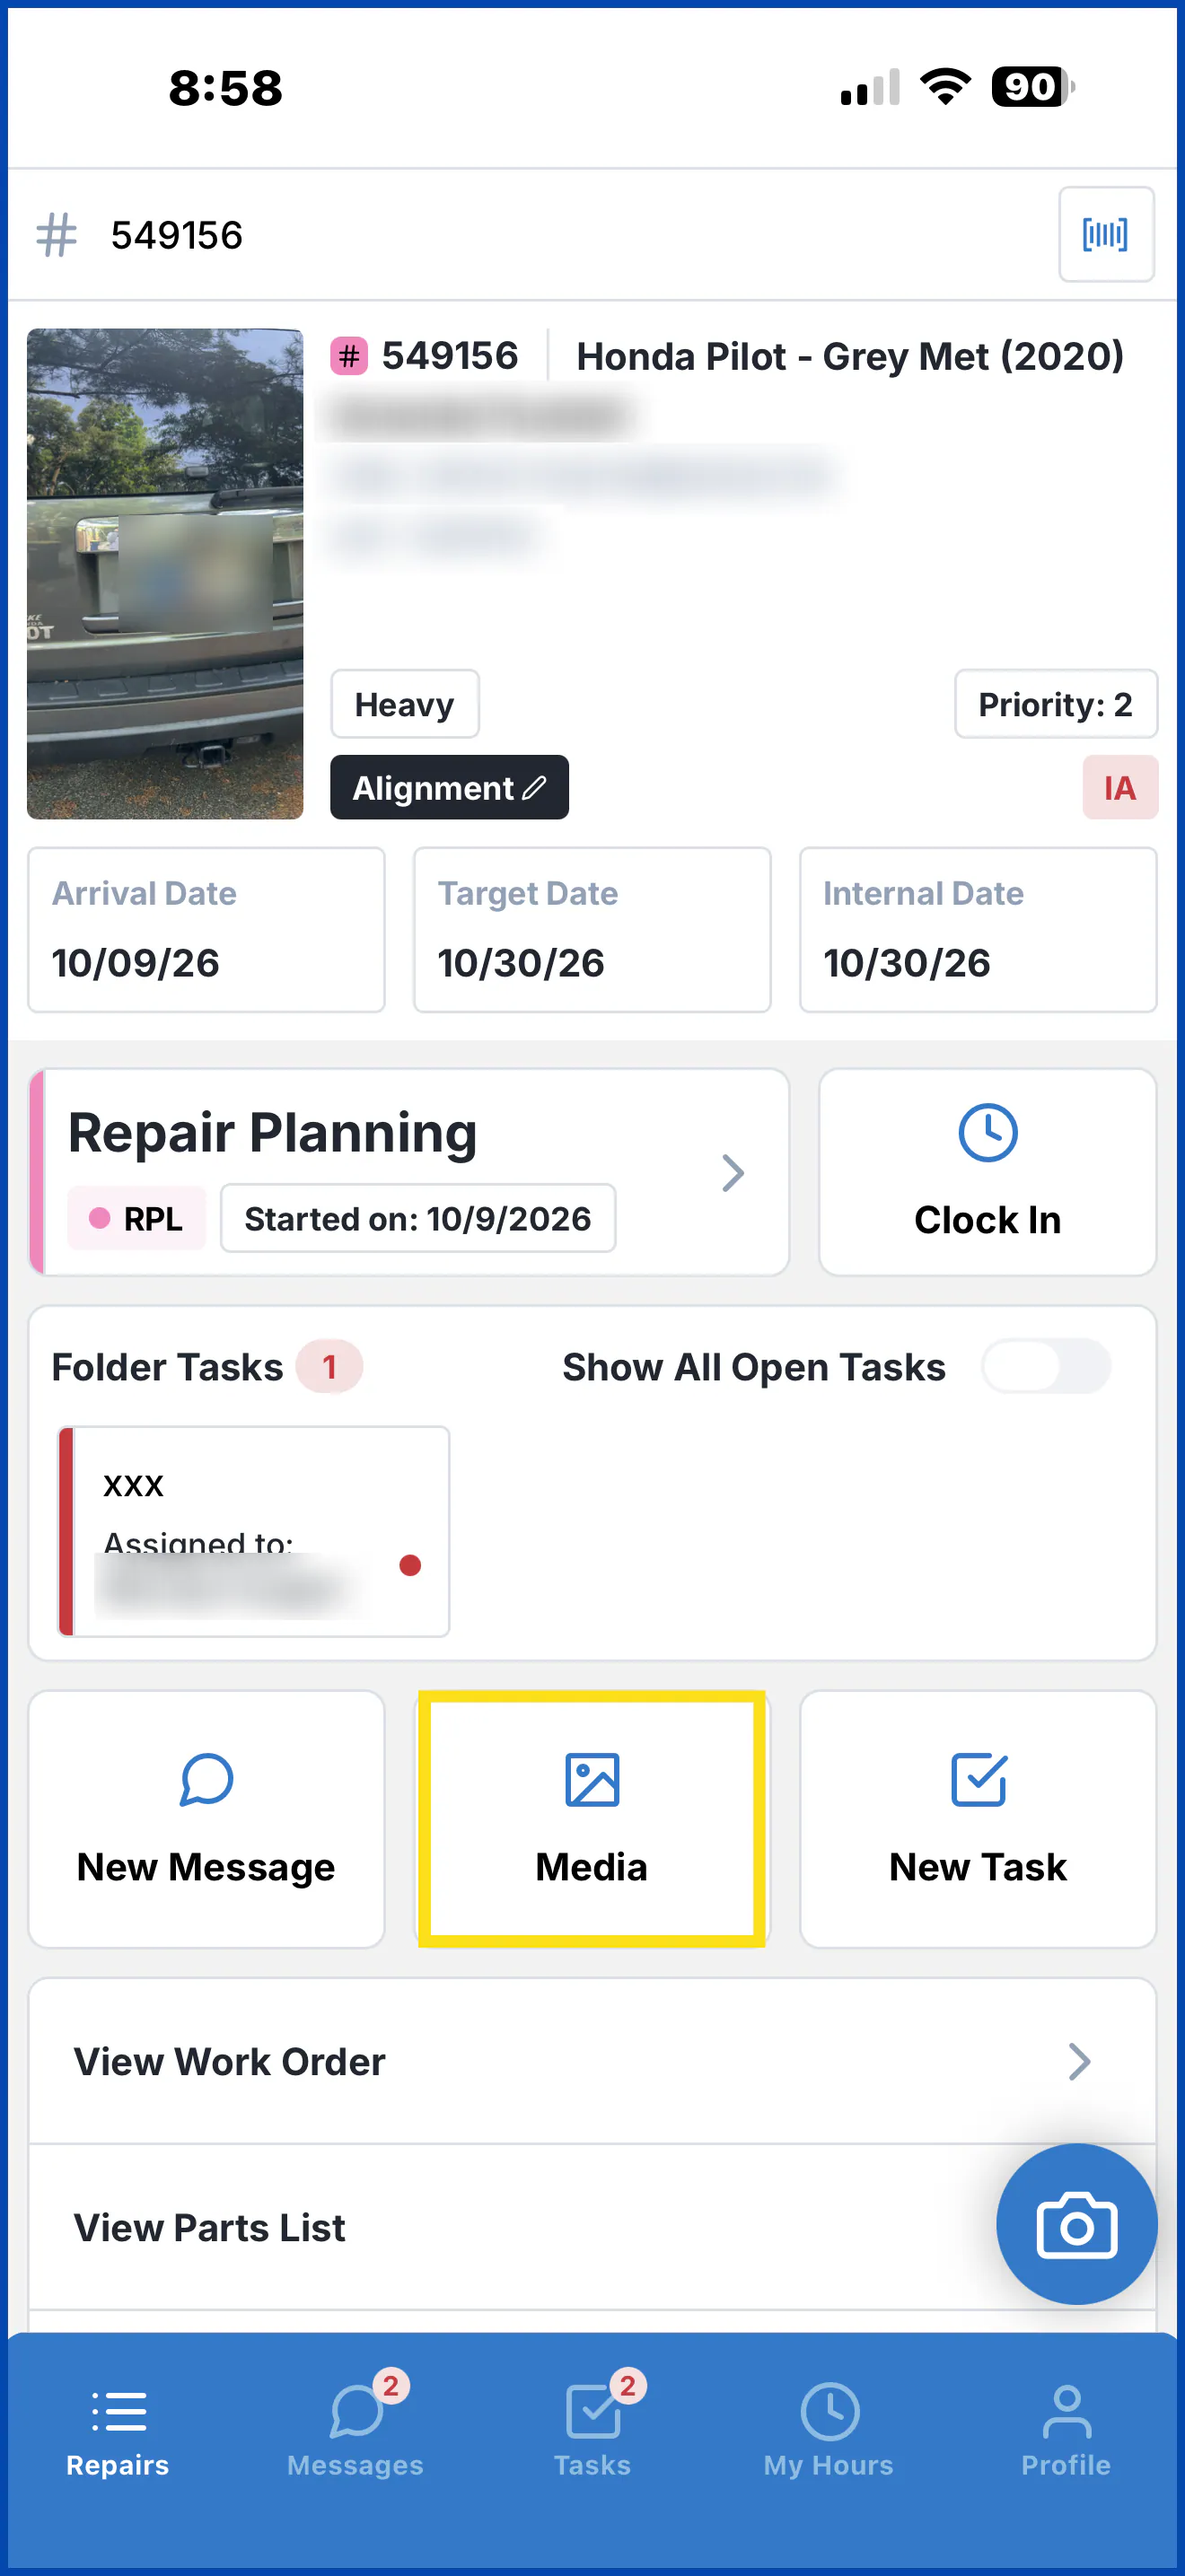
Open the folder and select Media.
-
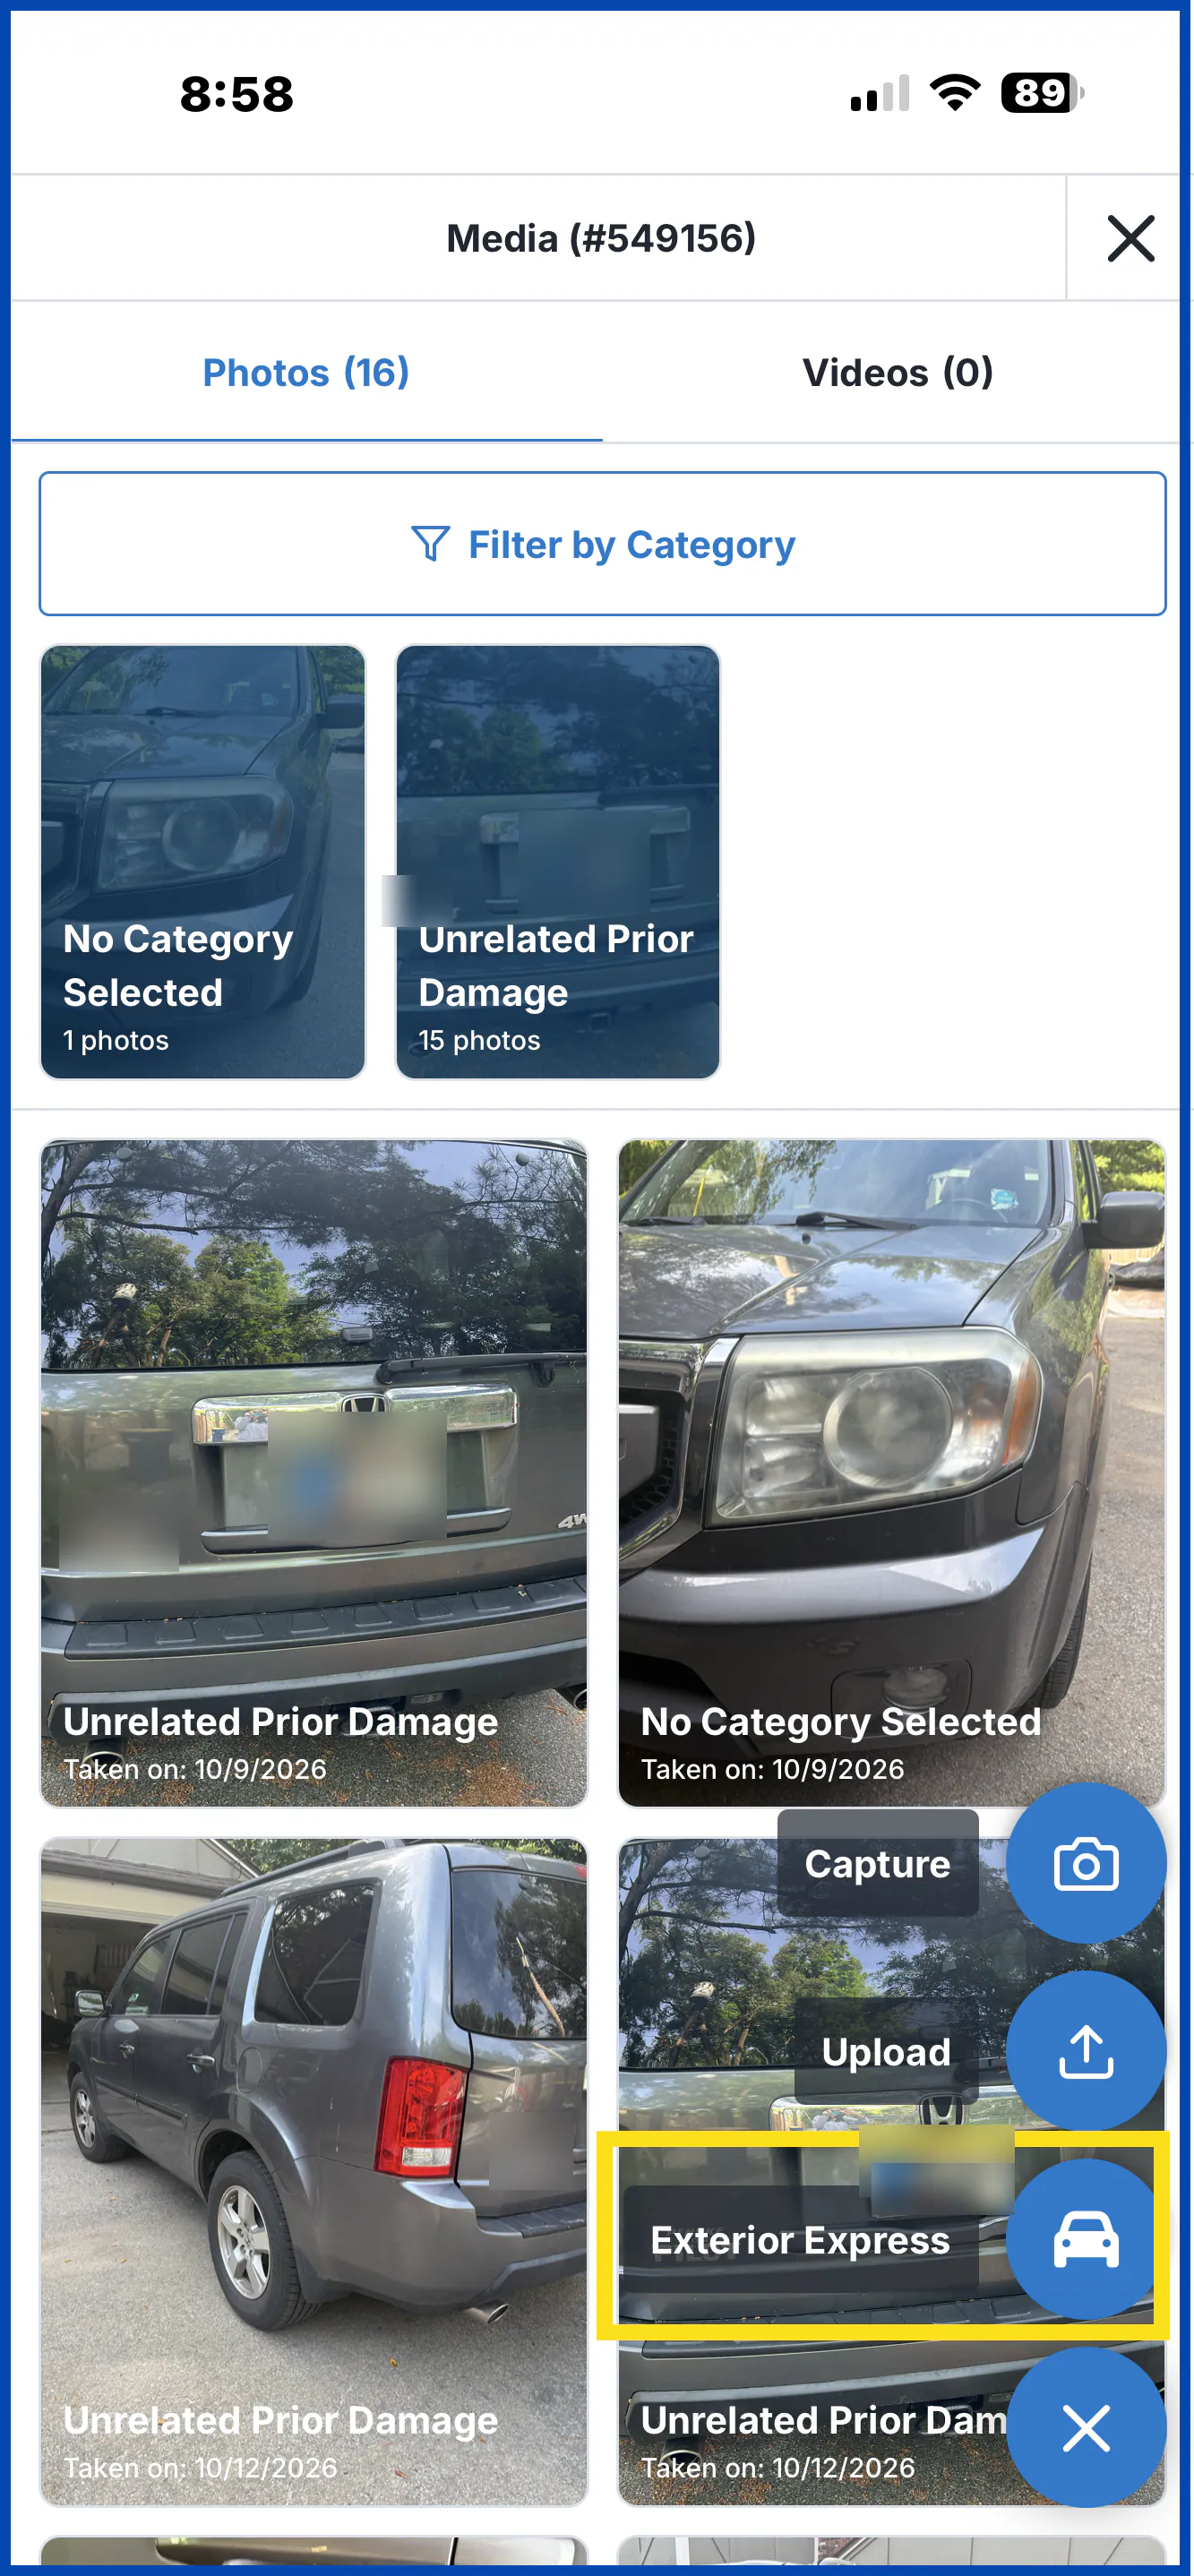
Select Capture to take new photos, or Upload to choose photos already on your phone.
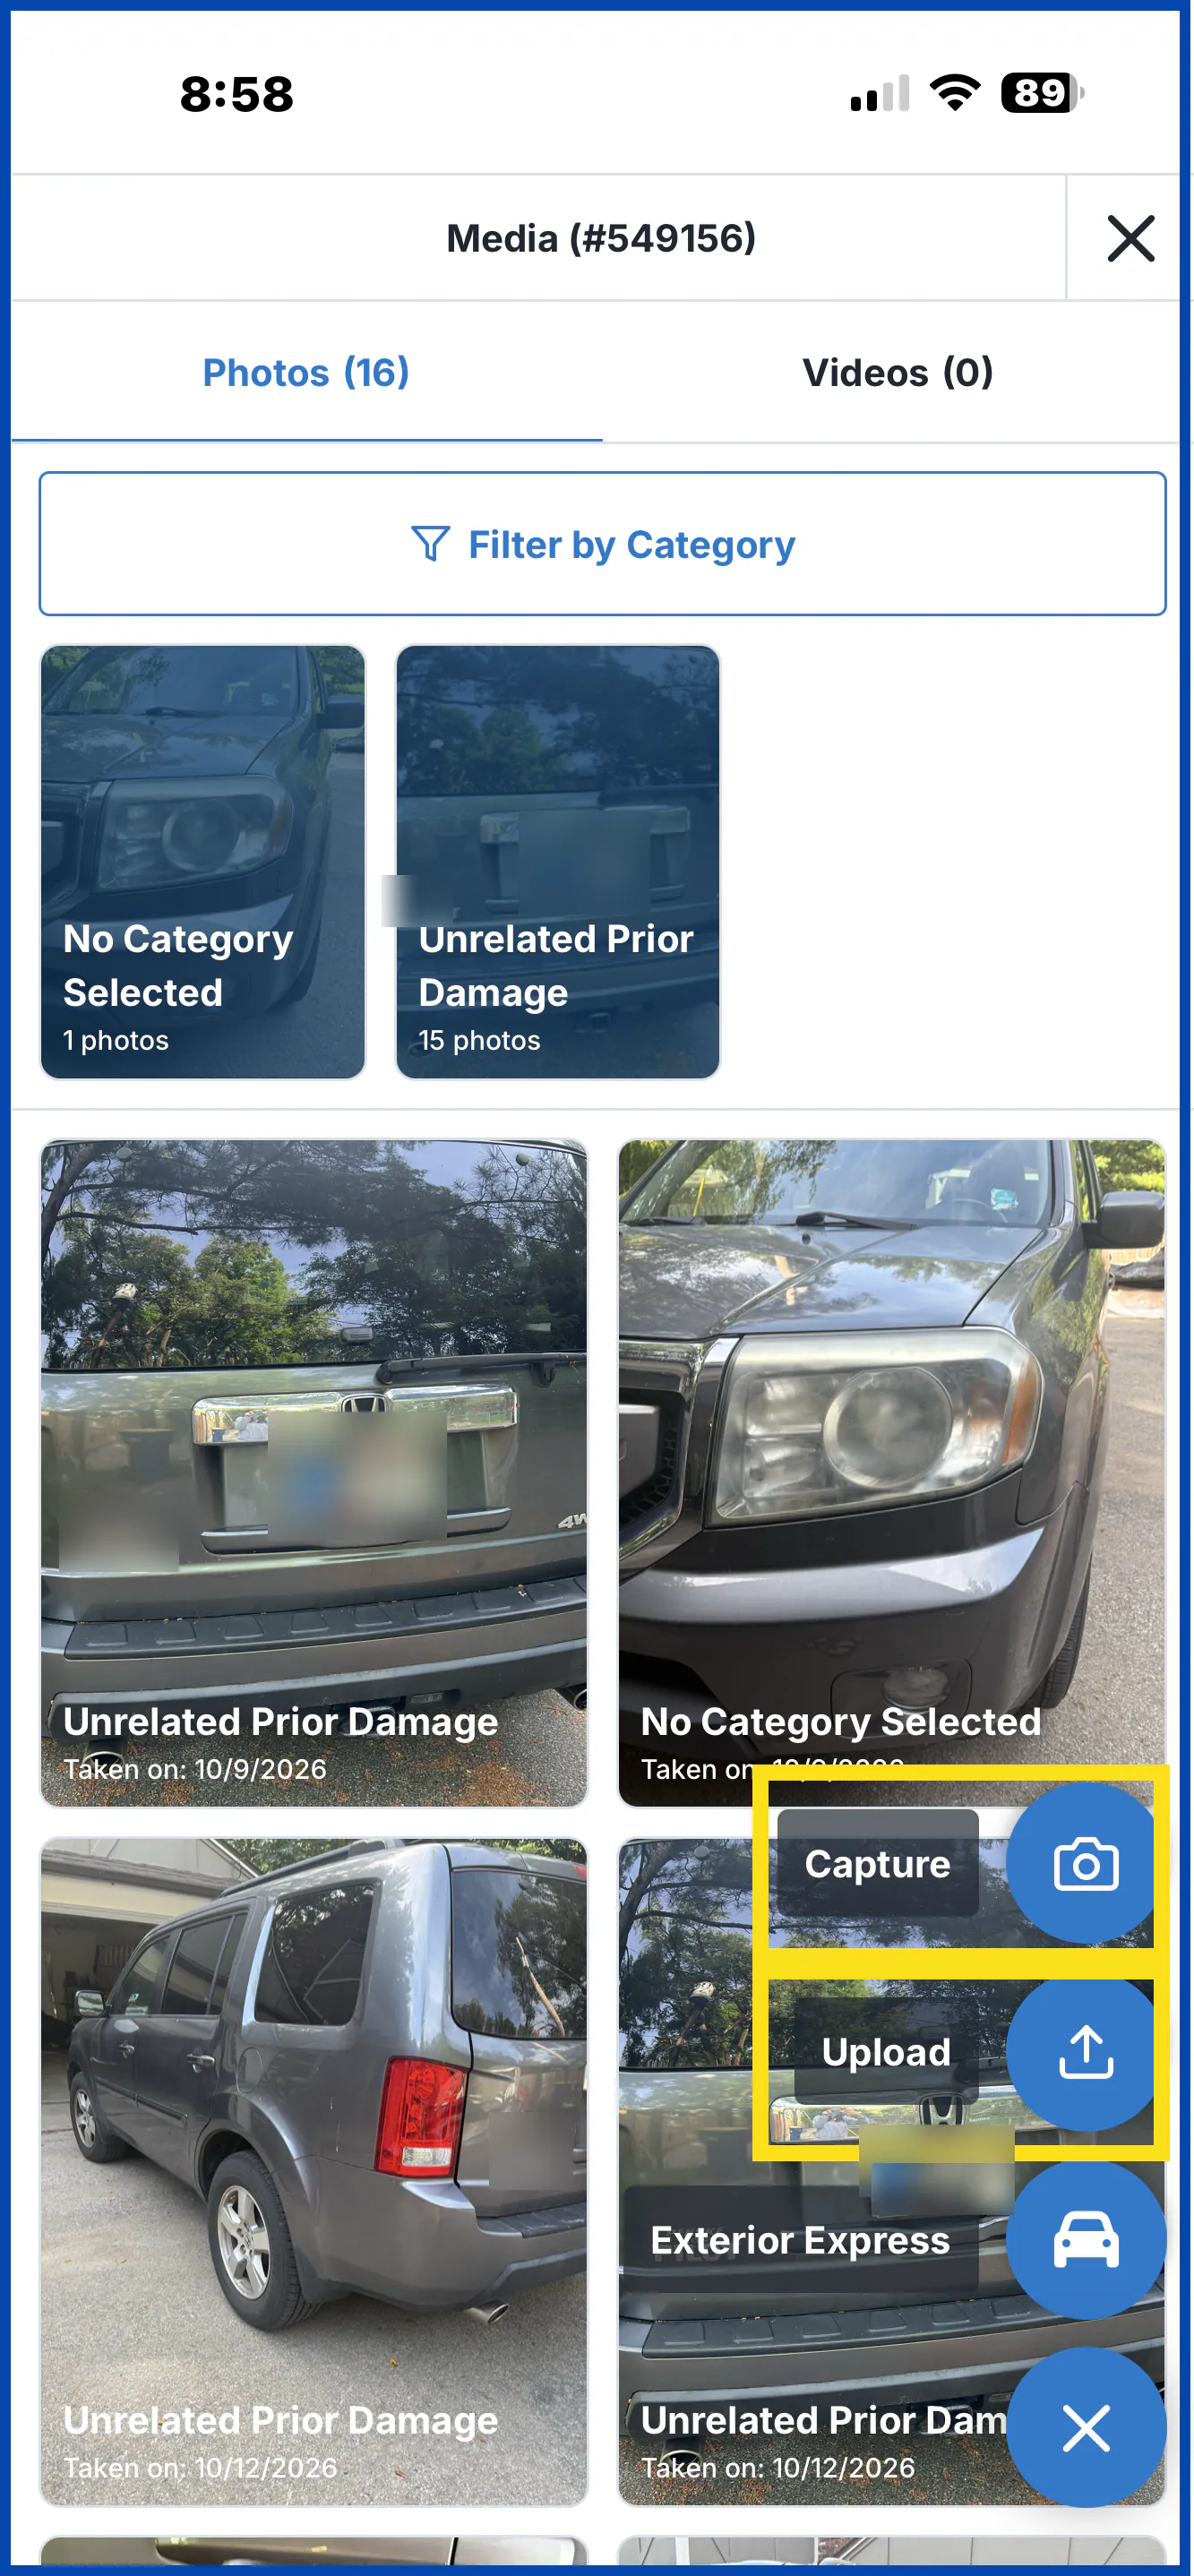
If your shop uses guided photo stages, such as Exterior Express, the app walks you through each section. You can skip a stage that doesn’t apply.
-
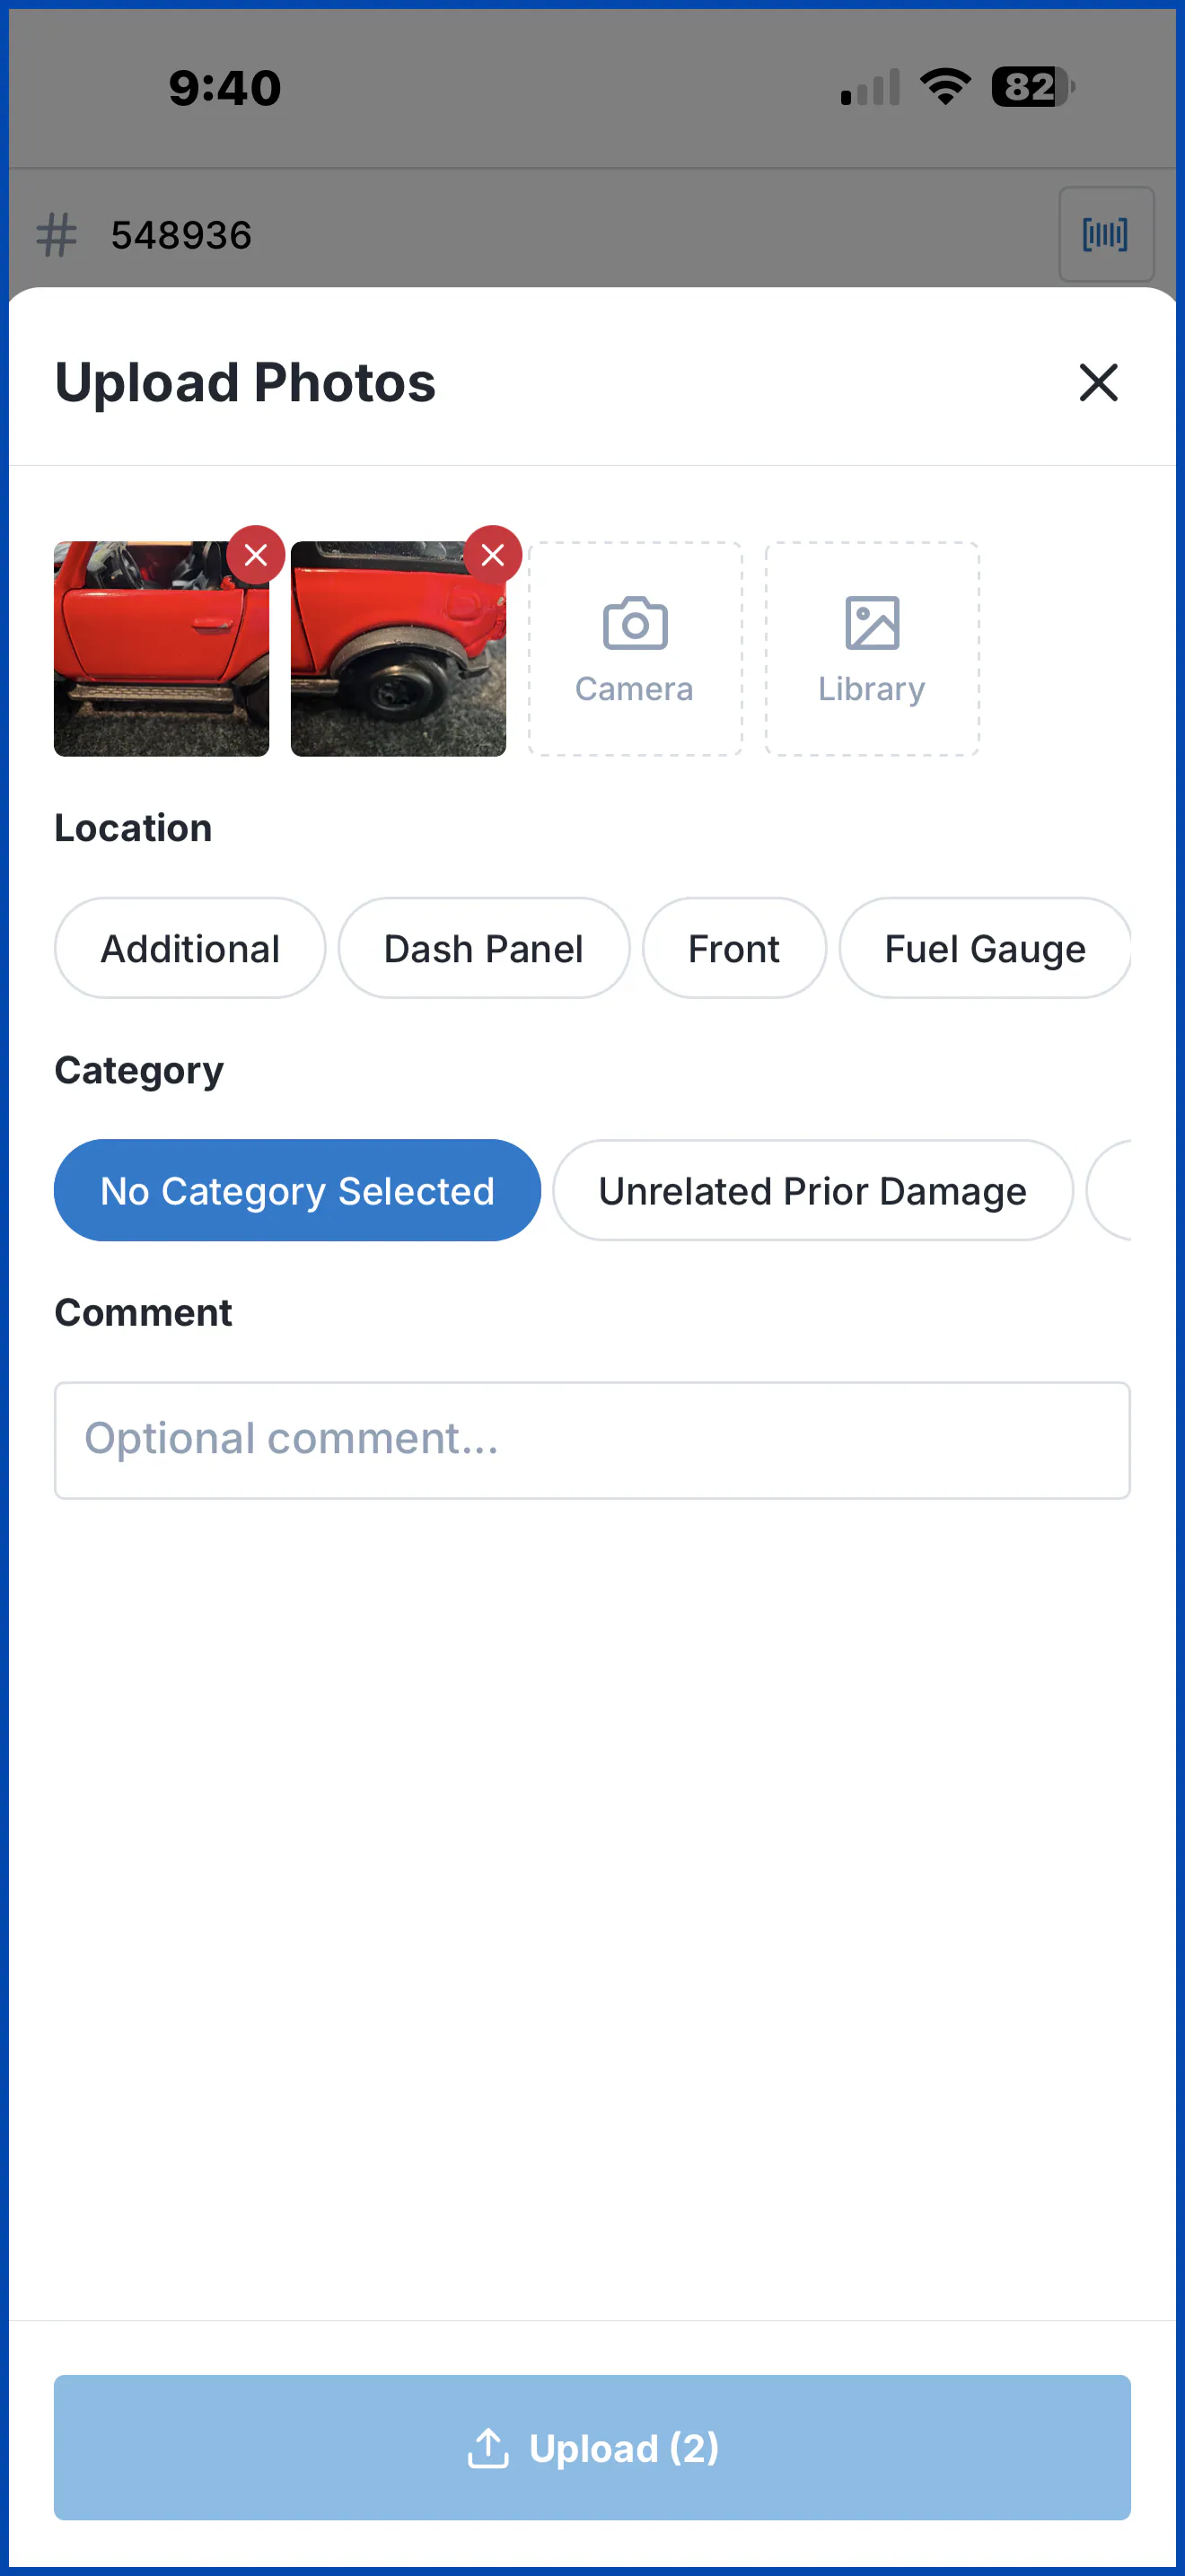
Review your photos. For each photo, you can choose a Location and Category and add a Comment.
-
Select Upload.
Find photos in the mobile app
Section titled “Find photos in the mobile app”The Media screen shows the photos and videos already on the folder. Select Filter by Category, then filter by Stage, Panel or Category.
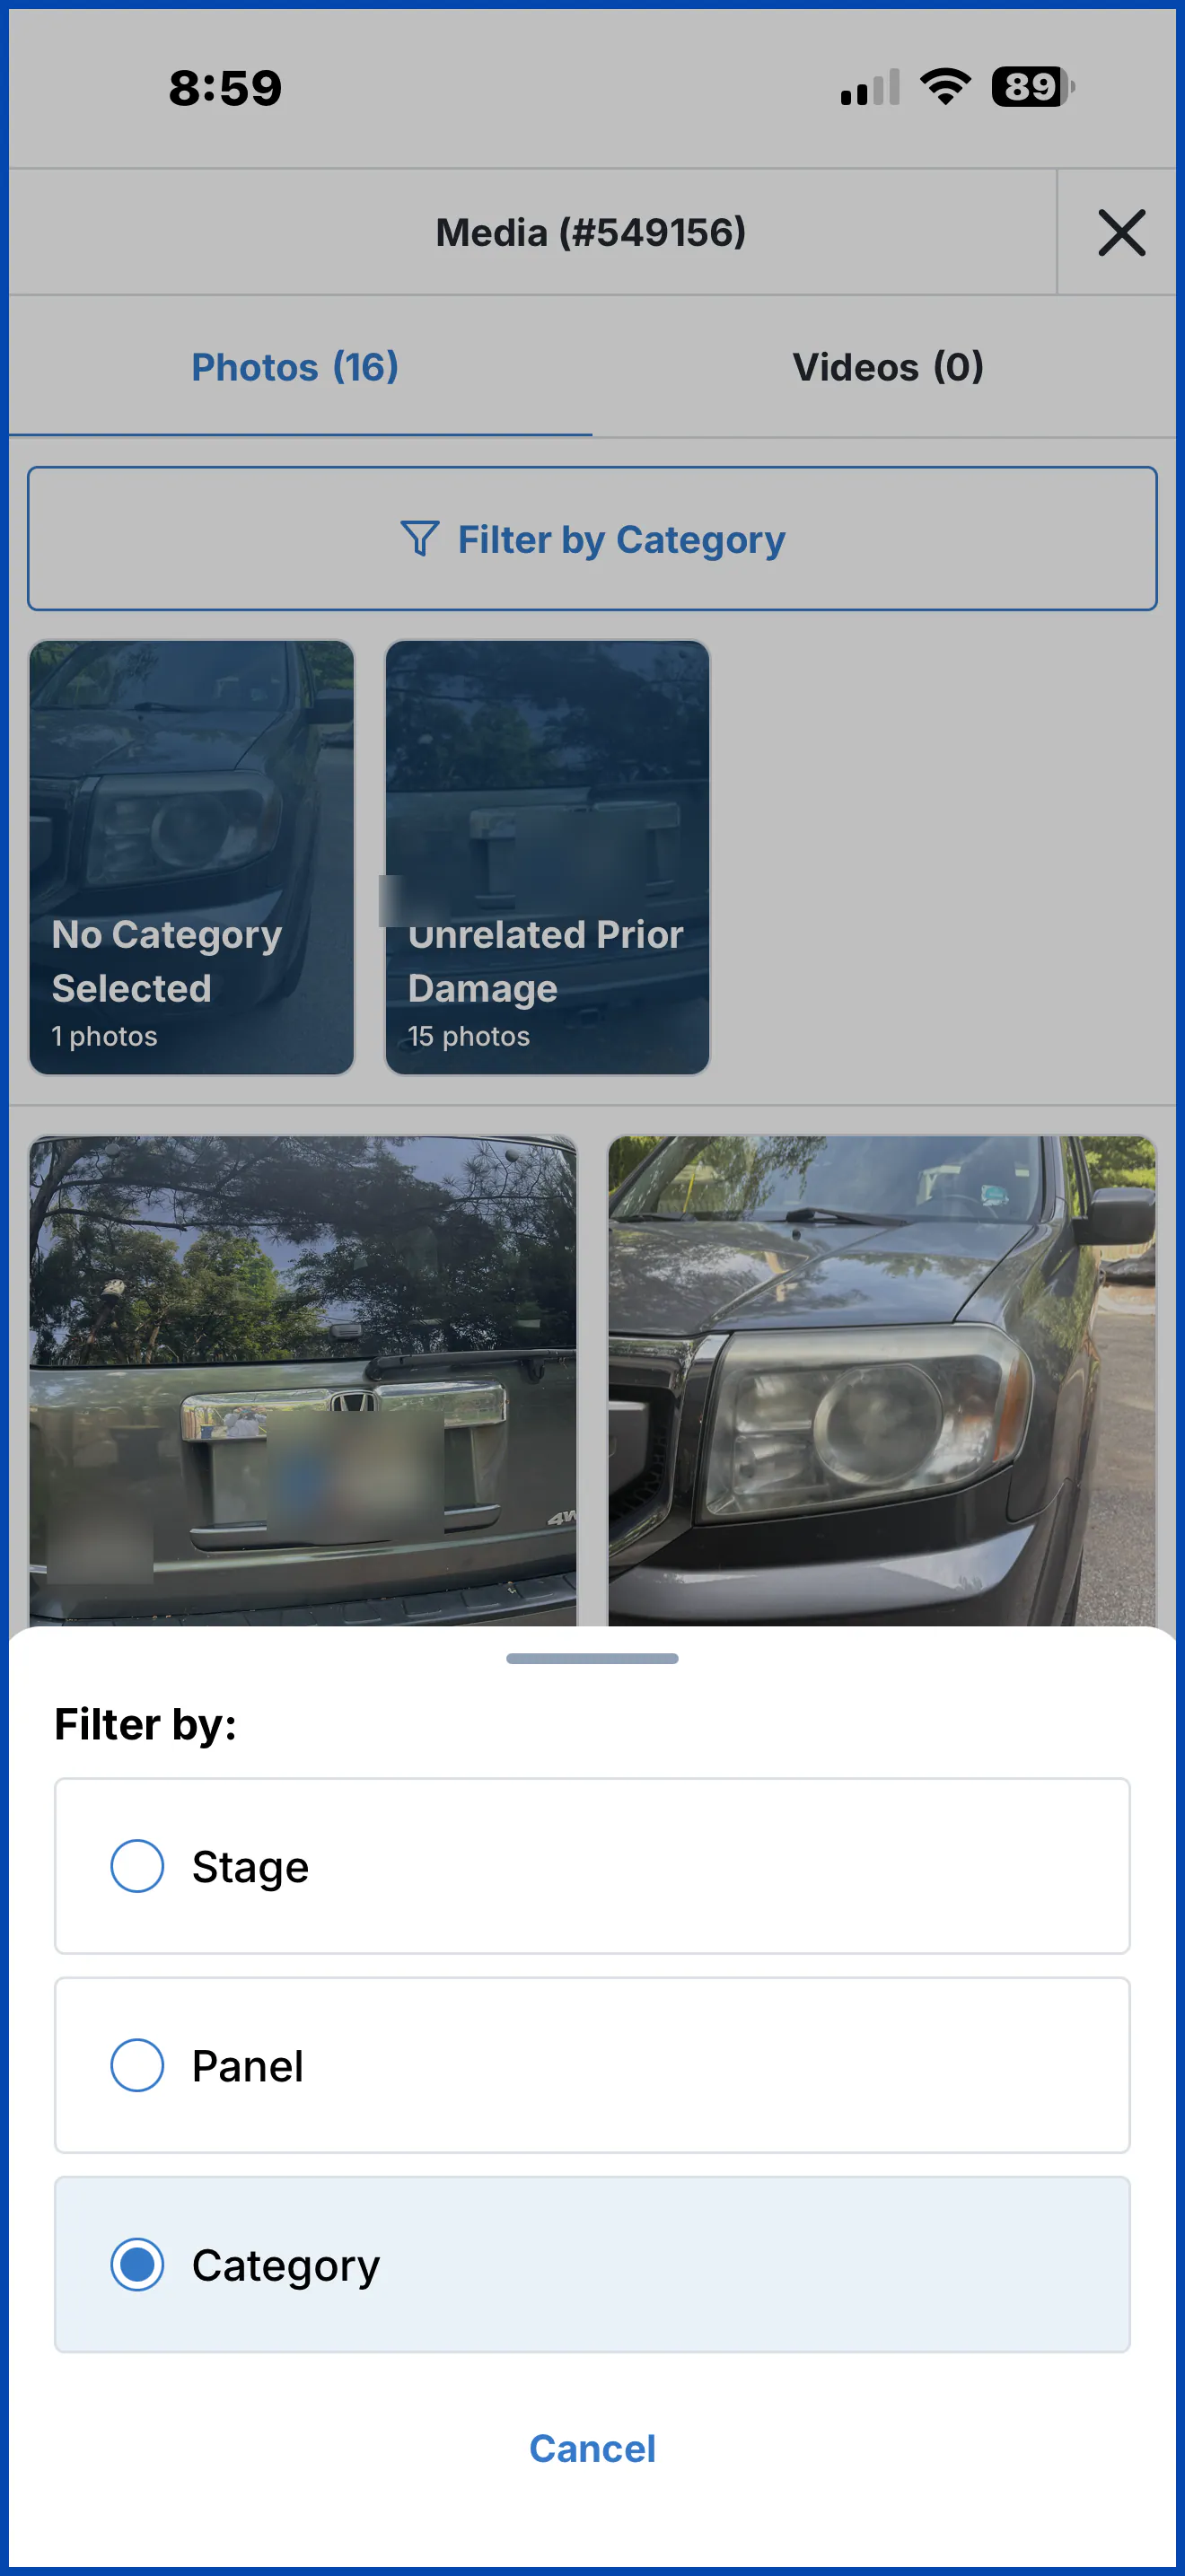
Photo quality and size
Section titled “Photo quality and size”- Photo quality depends on your phone’s camera and how up to date your phone is.
- Photos keep your phone’s shape, so they can look taller than photos taken in NexsyisNow. If your shop would prefer a fixed photo size, contact your Nexsyis representative.
Camera access
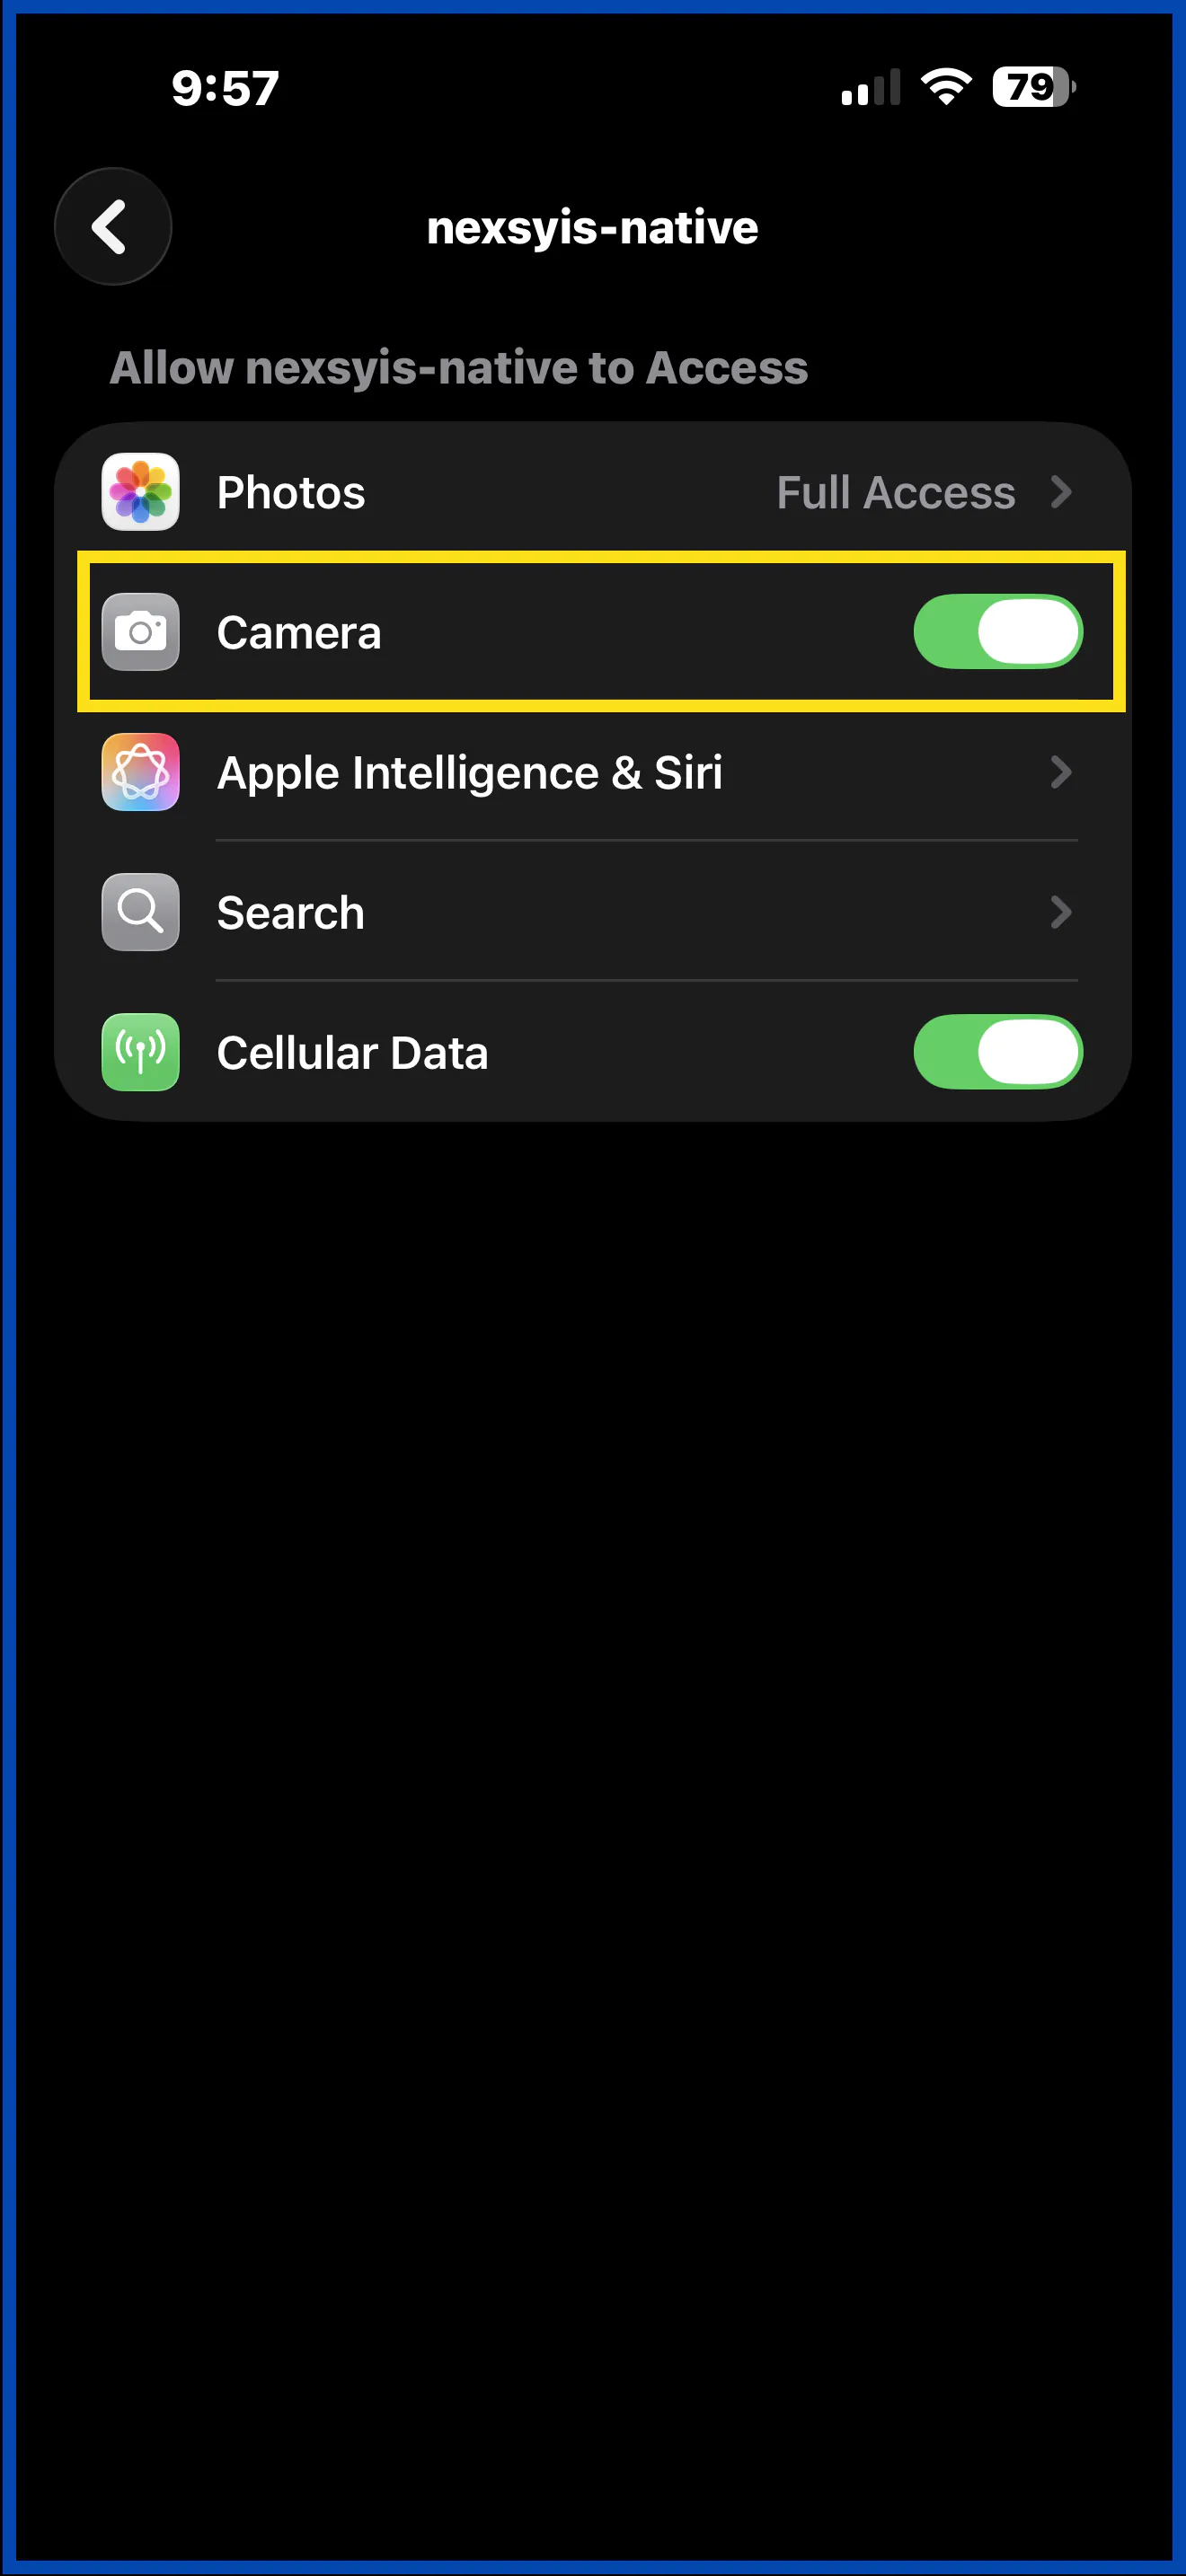
Section titled “Camera access”The first time you take a photo, the app asks to use your camera. If you declined, turn camera access back on for the app in your phone’s settings.